Notification
Notifications allow you to send push notifications directly to users' mobile devices via Firebase Cloud Messaging (FCM). You can target recipients by selecting specific roles (Student, Guardian, Teacher, etc.) or by filtering users with overdue fees. Each notification includes a title, message, and optional image attachment.
- School Admins can send notifications to any user group
- Marketing Managers can send notifications for communication campaigns and reminders
- Notifications are sent as push messages — users receive them instantly on the Stunov+ Student and Staff apps
- The user selection panel lets you hand-pick individual recipients from the filtered list
- Notifications are tracked per Session Year
Notifications are standalone push messages sent to users — they do not require a class section or subject, and they are not displayed within the app's announcement feed. Use Announcements for class-specific academic messages, and Notifications for general school-wide broadcasts.
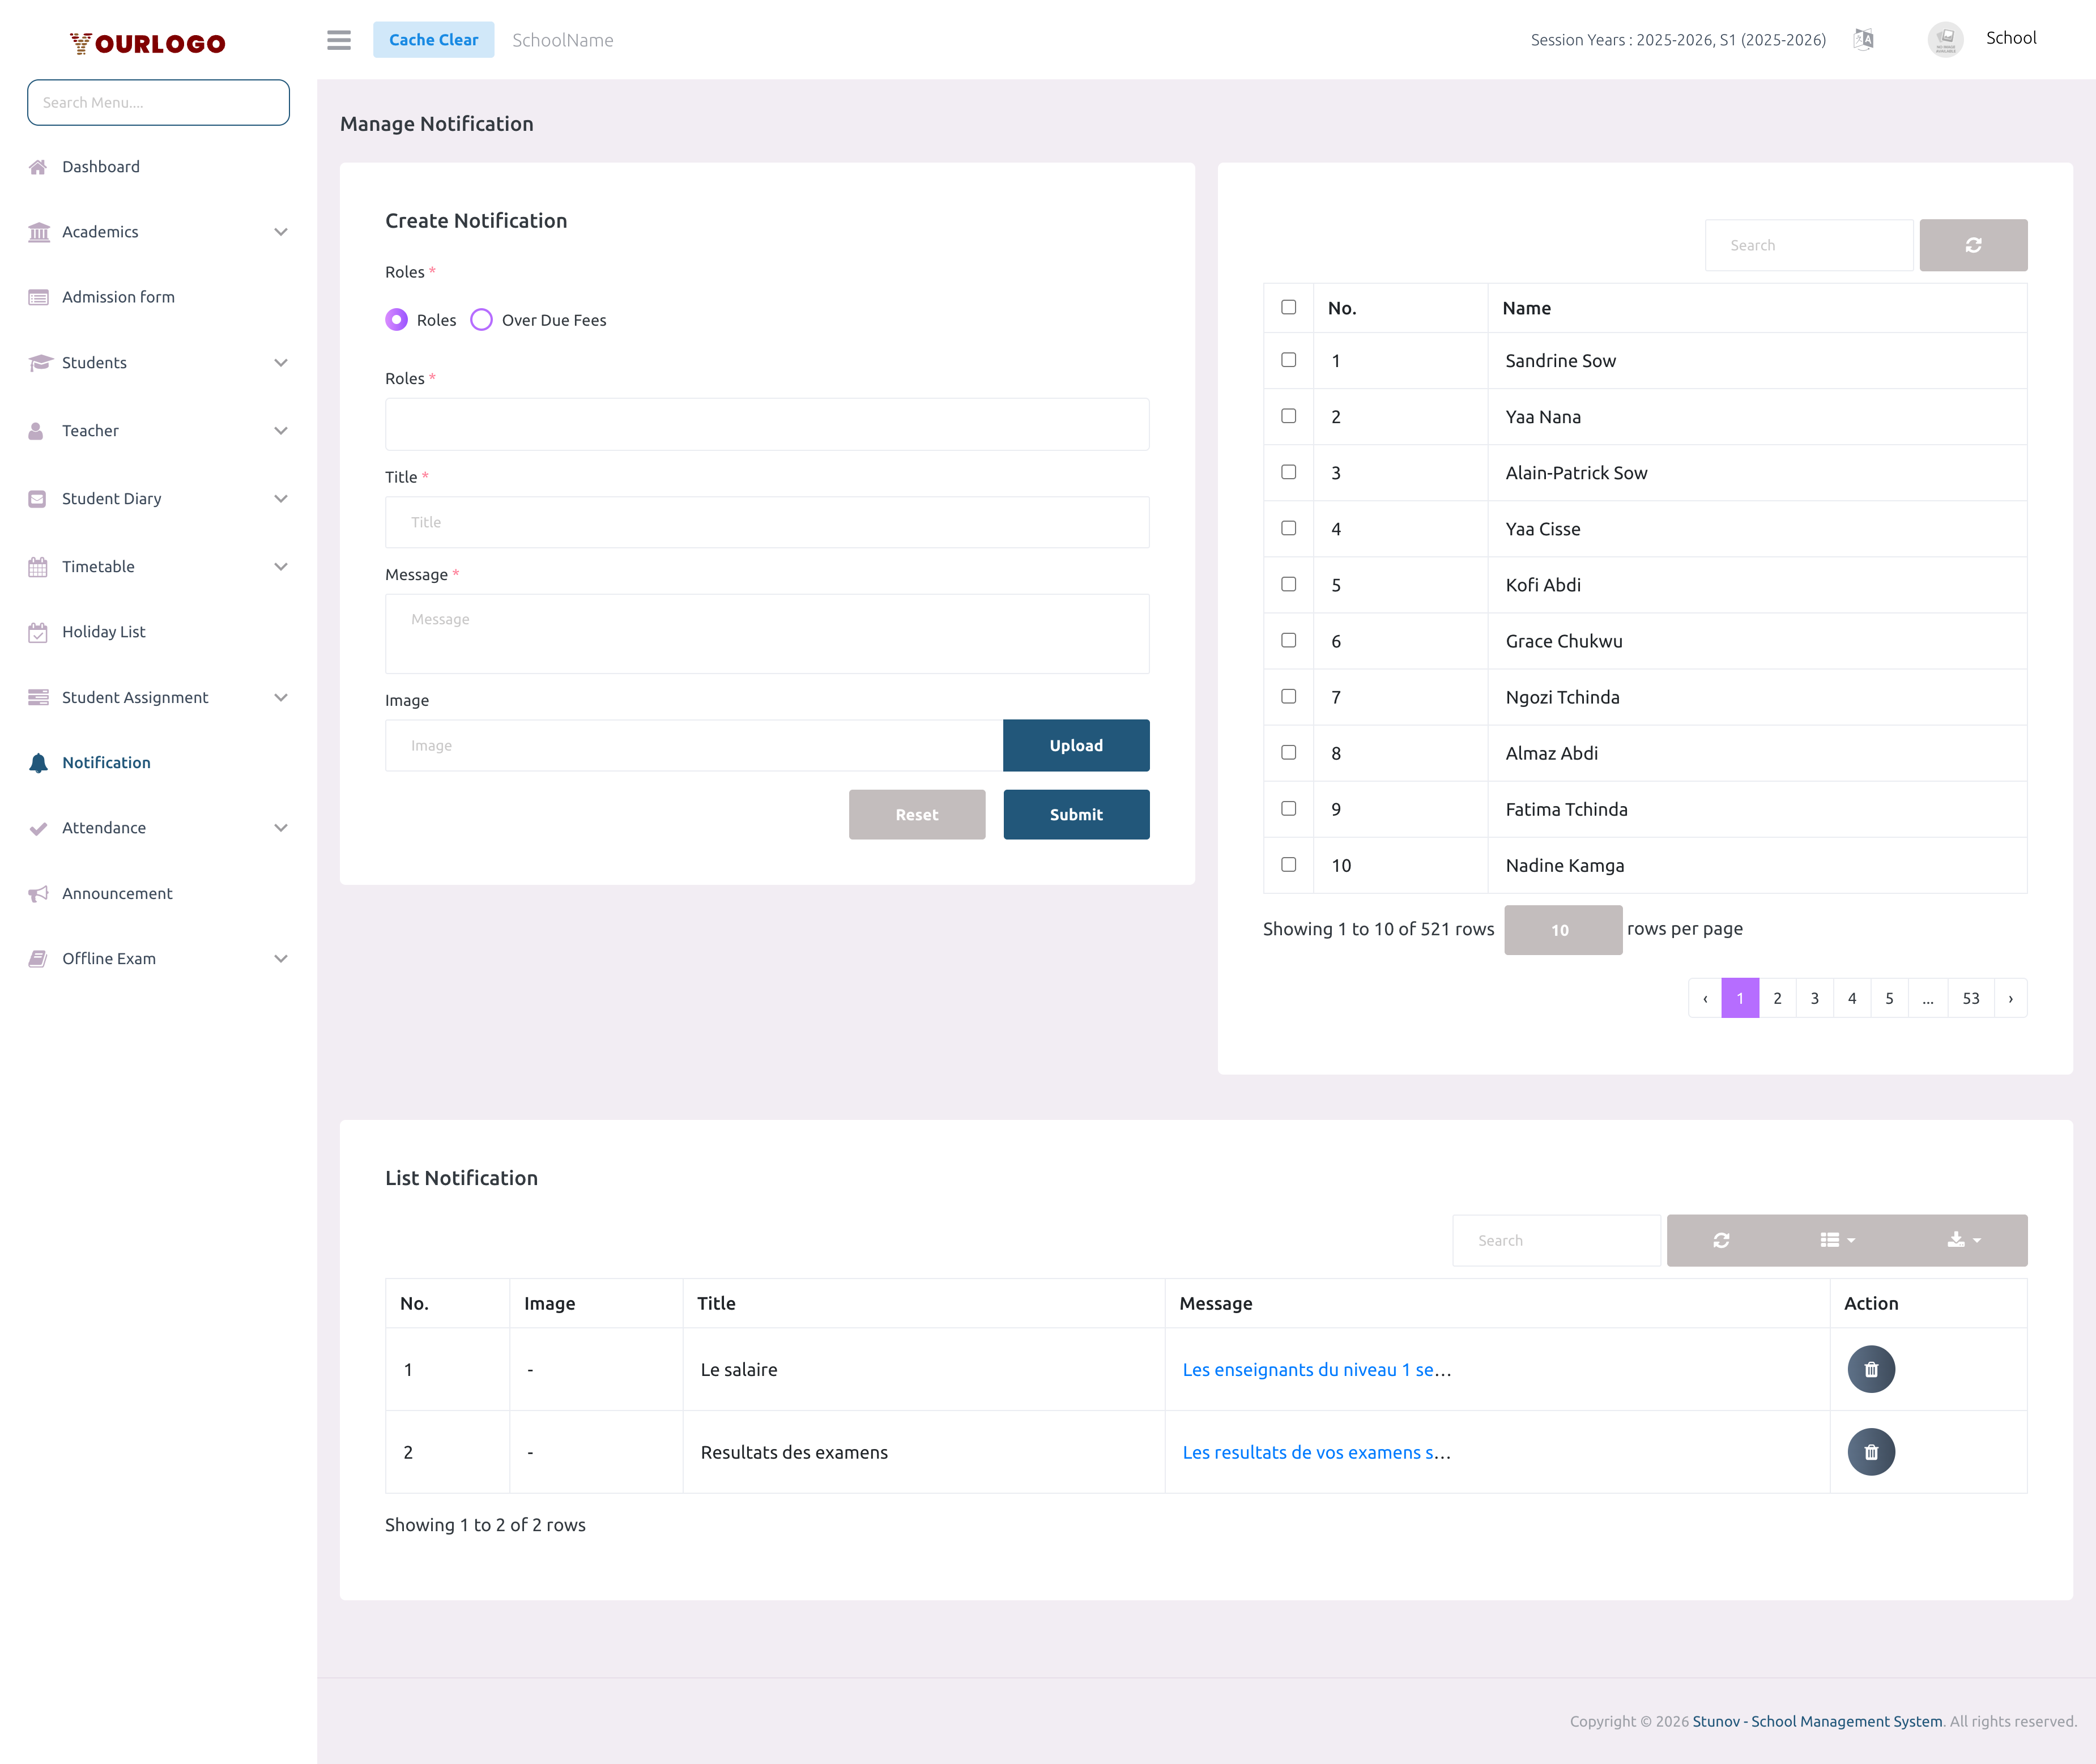
Create a Notification

Form Fields
| Field | Type | Required | Description |
|---|---|---|---|
| Type (Radio) | Radio | Required | Choose the recipient filtering mode. **Roles**: filter users by their system role. **Over Due Fees**: filter students and guardians who have unpaid fees. Default: Roles. |
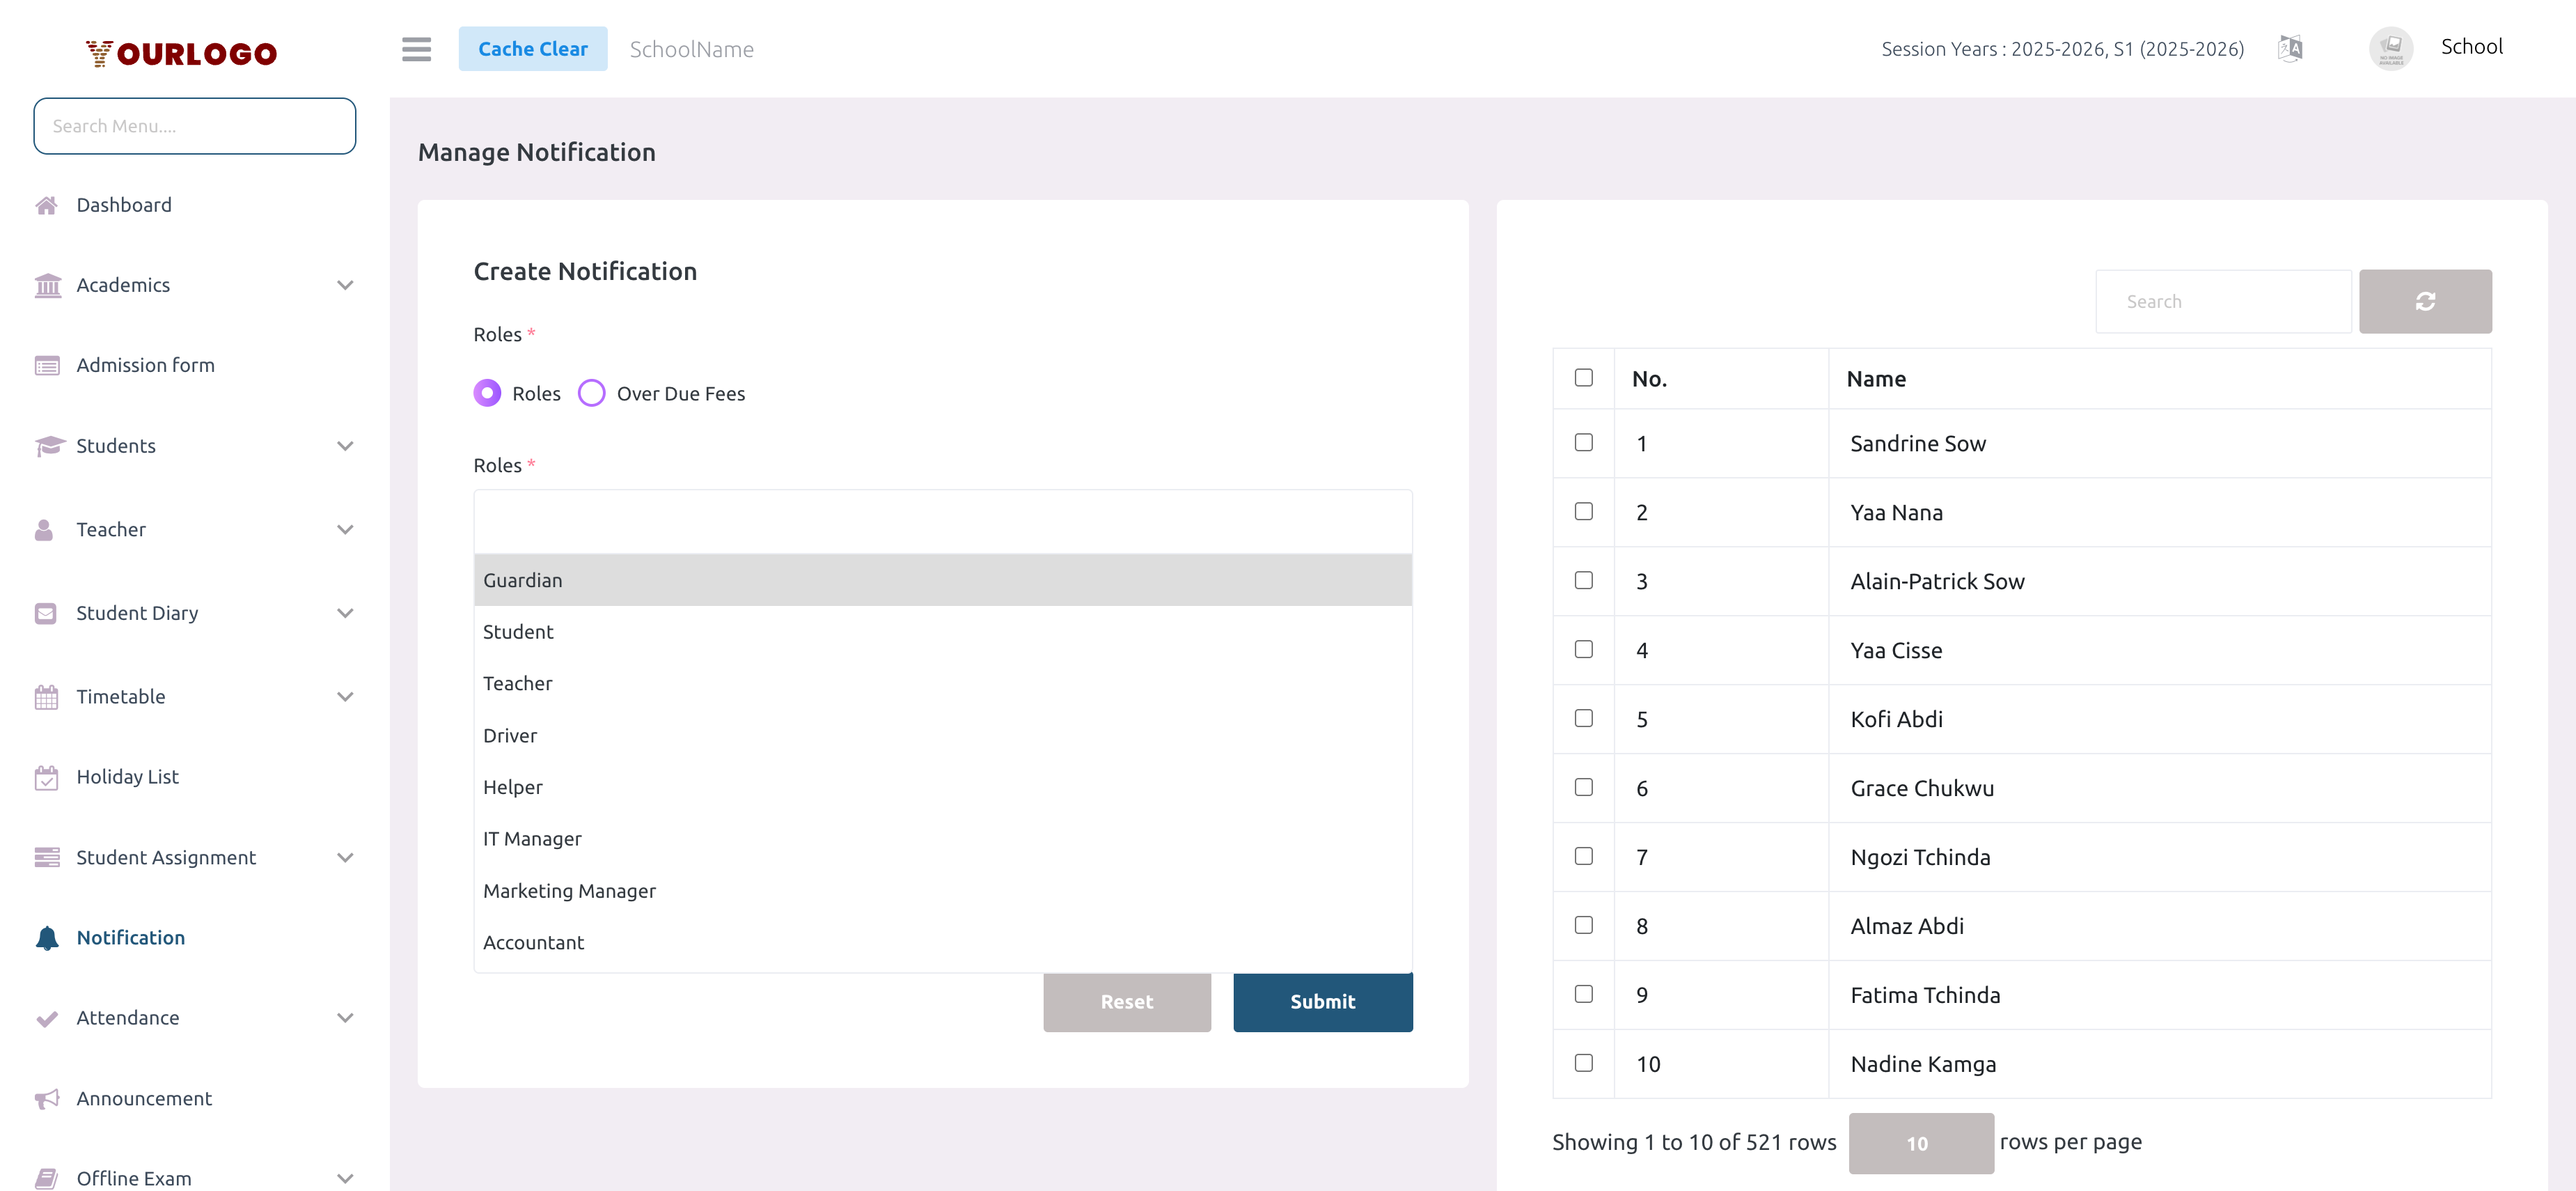
| Roles | Multi-select dropdown | Required | Select one or more roles to filter the user list. In "Roles" mode: all roles (Guardian, Student, Teacher, Driver, Helper, IT Manager, etc.). In "Over Due Fees" mode: only Student and Guardian. |
| Title | Text | Required | The notification title. Appears as the heading in the push notification on users' devices. |
| Message | Textarea | Required | The notification body text. This is the main content users see in the push notification. |
| Image | File upload | Optional | An optional image to attach to the notification. Displayed in the push notification on supported devices. Accepted formats: JPEG, PNG, JPG, GIF, SVG, WebP. |
| User Selection (checkboxes) | Checkbox table | Required | Select specific users from the filtered user list on the right panel. At least one user must be selected. Use the header checkbox to select/deselect all visible users. |
Targeting by Roles vs Over Due Fees
The notification system offers two targeting modes:
Roles Mode (default)
When Roles is selected, the user table shows all users belonging to the selected role(s). This is ideal for:
- Sending general announcements to all teachers
- Notifying all parents about a school event
- Reaching staff members (drivers, helpers) about schedule changes
Over Due Fees Mode
When Over Due Fees is selected, the user table shows only students and guardians who have unpaid fee balances. This is ideal for:
- Sending payment reminders to parents with outstanding fees
- Notifying students about upcoming fee deadlines
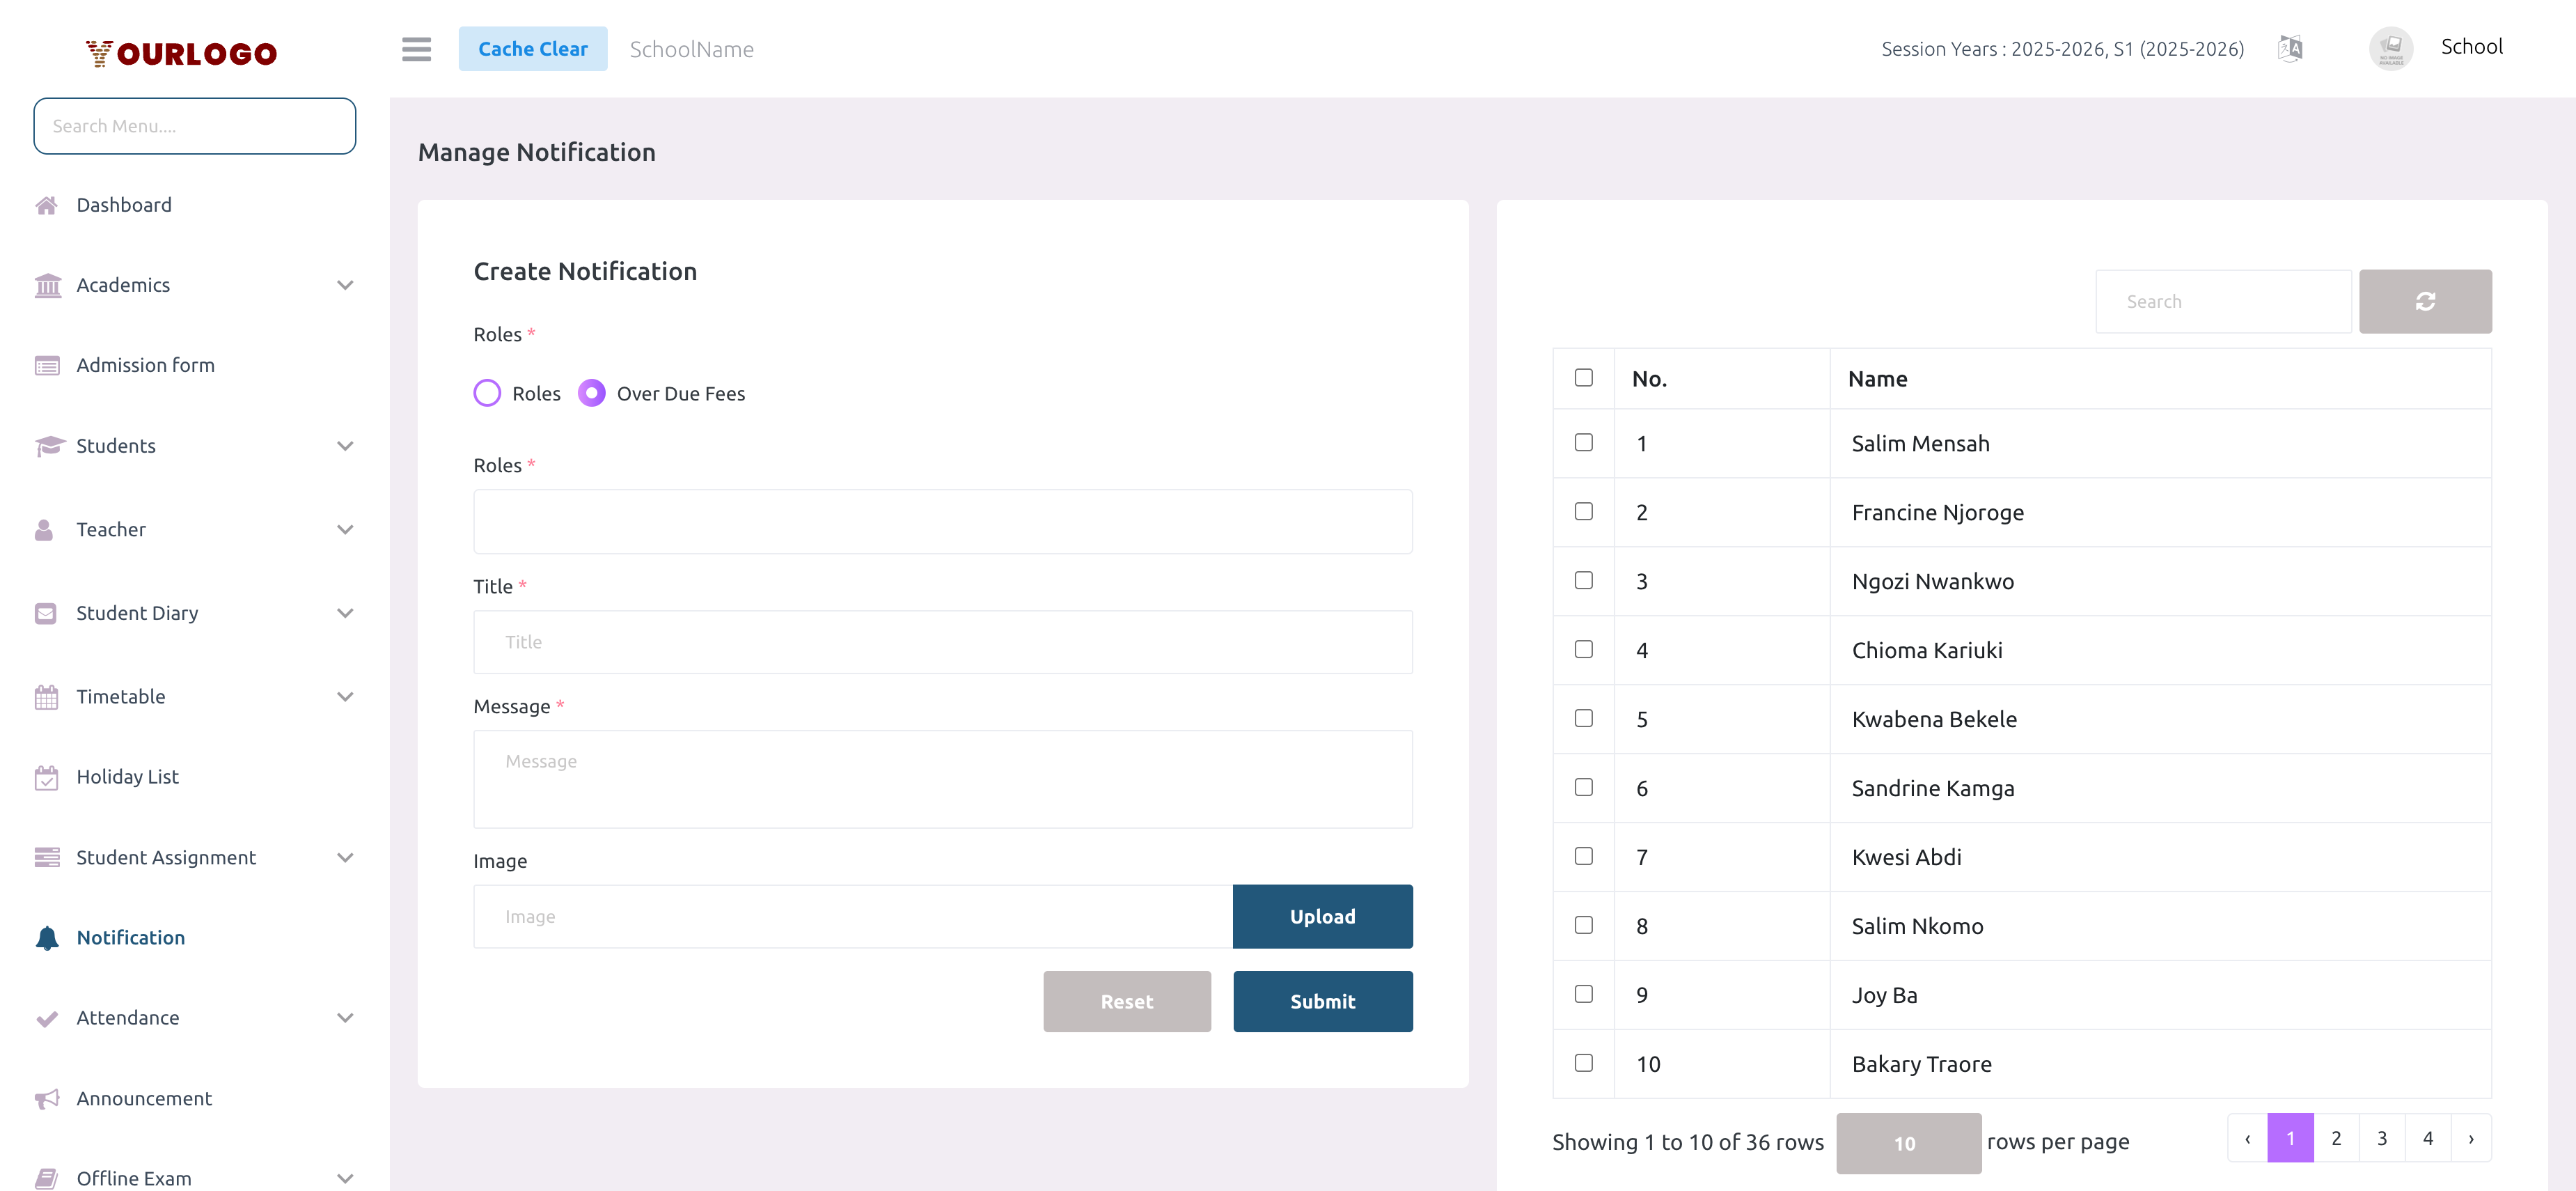
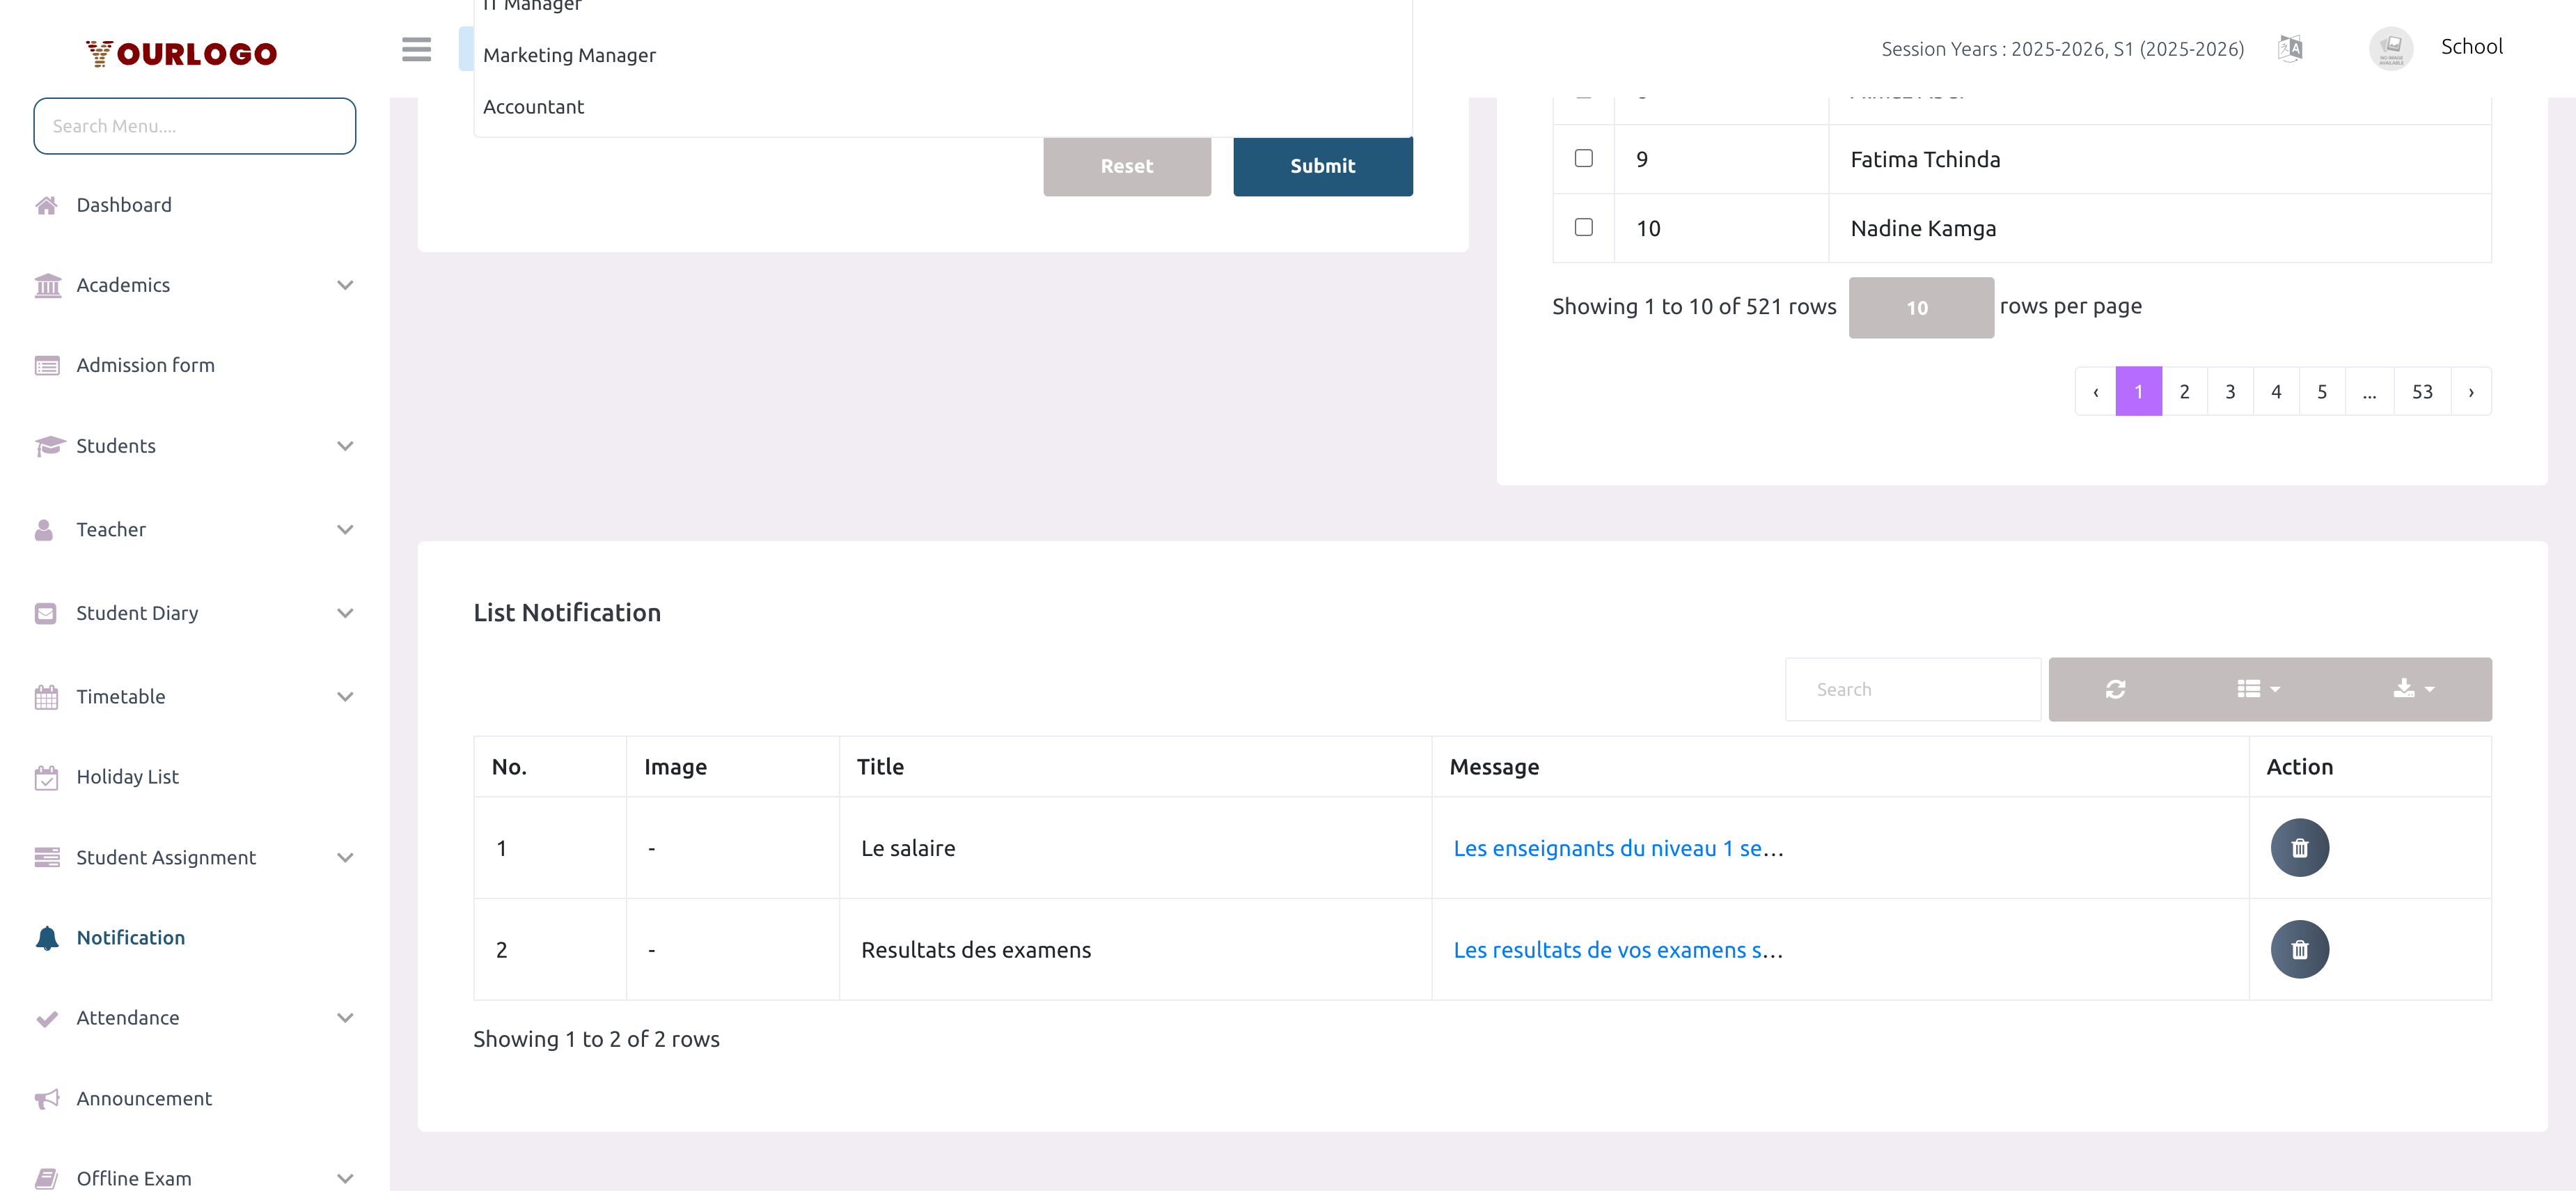
The user selection table is paginated (10 users per page by default). When selecting users across multiple pages, your selections are preserved as you navigate between pages. The total user count is shown at the bottom of the table.
Notification History
Below the creation form, the List Notification table displays all notifications sent during the current session year.
| Column | Description |
|---|---|
| No. | Row number |
| Image | Thumbnail of the attached image (shows "-" if no image) |
| Title | The notification title |
| Message | Notification body — long text is truncated with a clickable "Read more" link |
| Action | Delete button |
Additional Features
- Search: Use the search bar to find notifications by title or message content
- Column Visibility: Click the Columns button to show or hide specific columns (including the hidden "Type" column which shows the
send_tovalue) - Export: Click the Export button to download the notification list as CSV
- Refresh: Click the Refresh button to reload the table data
Delete a Notification
Deleting a notification removes it from the history list only. Users who already received the push notification will still see it on their devices. Push notifications cannot be recalled once sent.
Firebase Cloud Messaging (FCM) Setup
Notifications are delivered via Firebase Cloud Messaging (FCM), which is configured for your school at the platform level. From your side, the only requirement is on the recipients:
- Users must have the Stunov+ Student or Staff app installed with push notifications enabled — the app registers a device token (
fcm_id) on login.
Users who have never logged into the mobile app (or have disabled notifications) will not have a registered FCM token. Notifications sent to these users will silently fail. The system does not report individual delivery failures.
Permissions Summary
| Action | Permission | Roles |
|---|---|---|
| View notification page | notification-list | School Admin, Marketing Manager |
| Send notification | notification-create | School Admin, Marketing Manager |
| Delete notification | notification-delete | School Admin, Marketing Manager |
The Notification feature is available only when the Announcement Management add-on is enabled in your school's subscription. If this feature is not visible in the sidebar, contact your Super Admin to enable it.
Related Pages
- Announcement — Send class-specific academic announcements with file attachments
- Dashboard — Overview of school metrics and recent activity
- Fees — Manage fee types and student payments (related to overdue fees targeting)
- Staff Management — Manage roles and staff members who receive notifications