Certificate Template
Certificate templates define the appearance and content of all certificates generated for students and staff. Each template includes a background image, page dimensions, and a drag-and-drop layout editor where you position fields like school name, student/staff photo, signature, and description text.
You must have at least one certificate template before you can generate certificates under Student Certificate or Staff Certificate. Templates are either Student type or Staff type — each type has its own set of available placeholders.
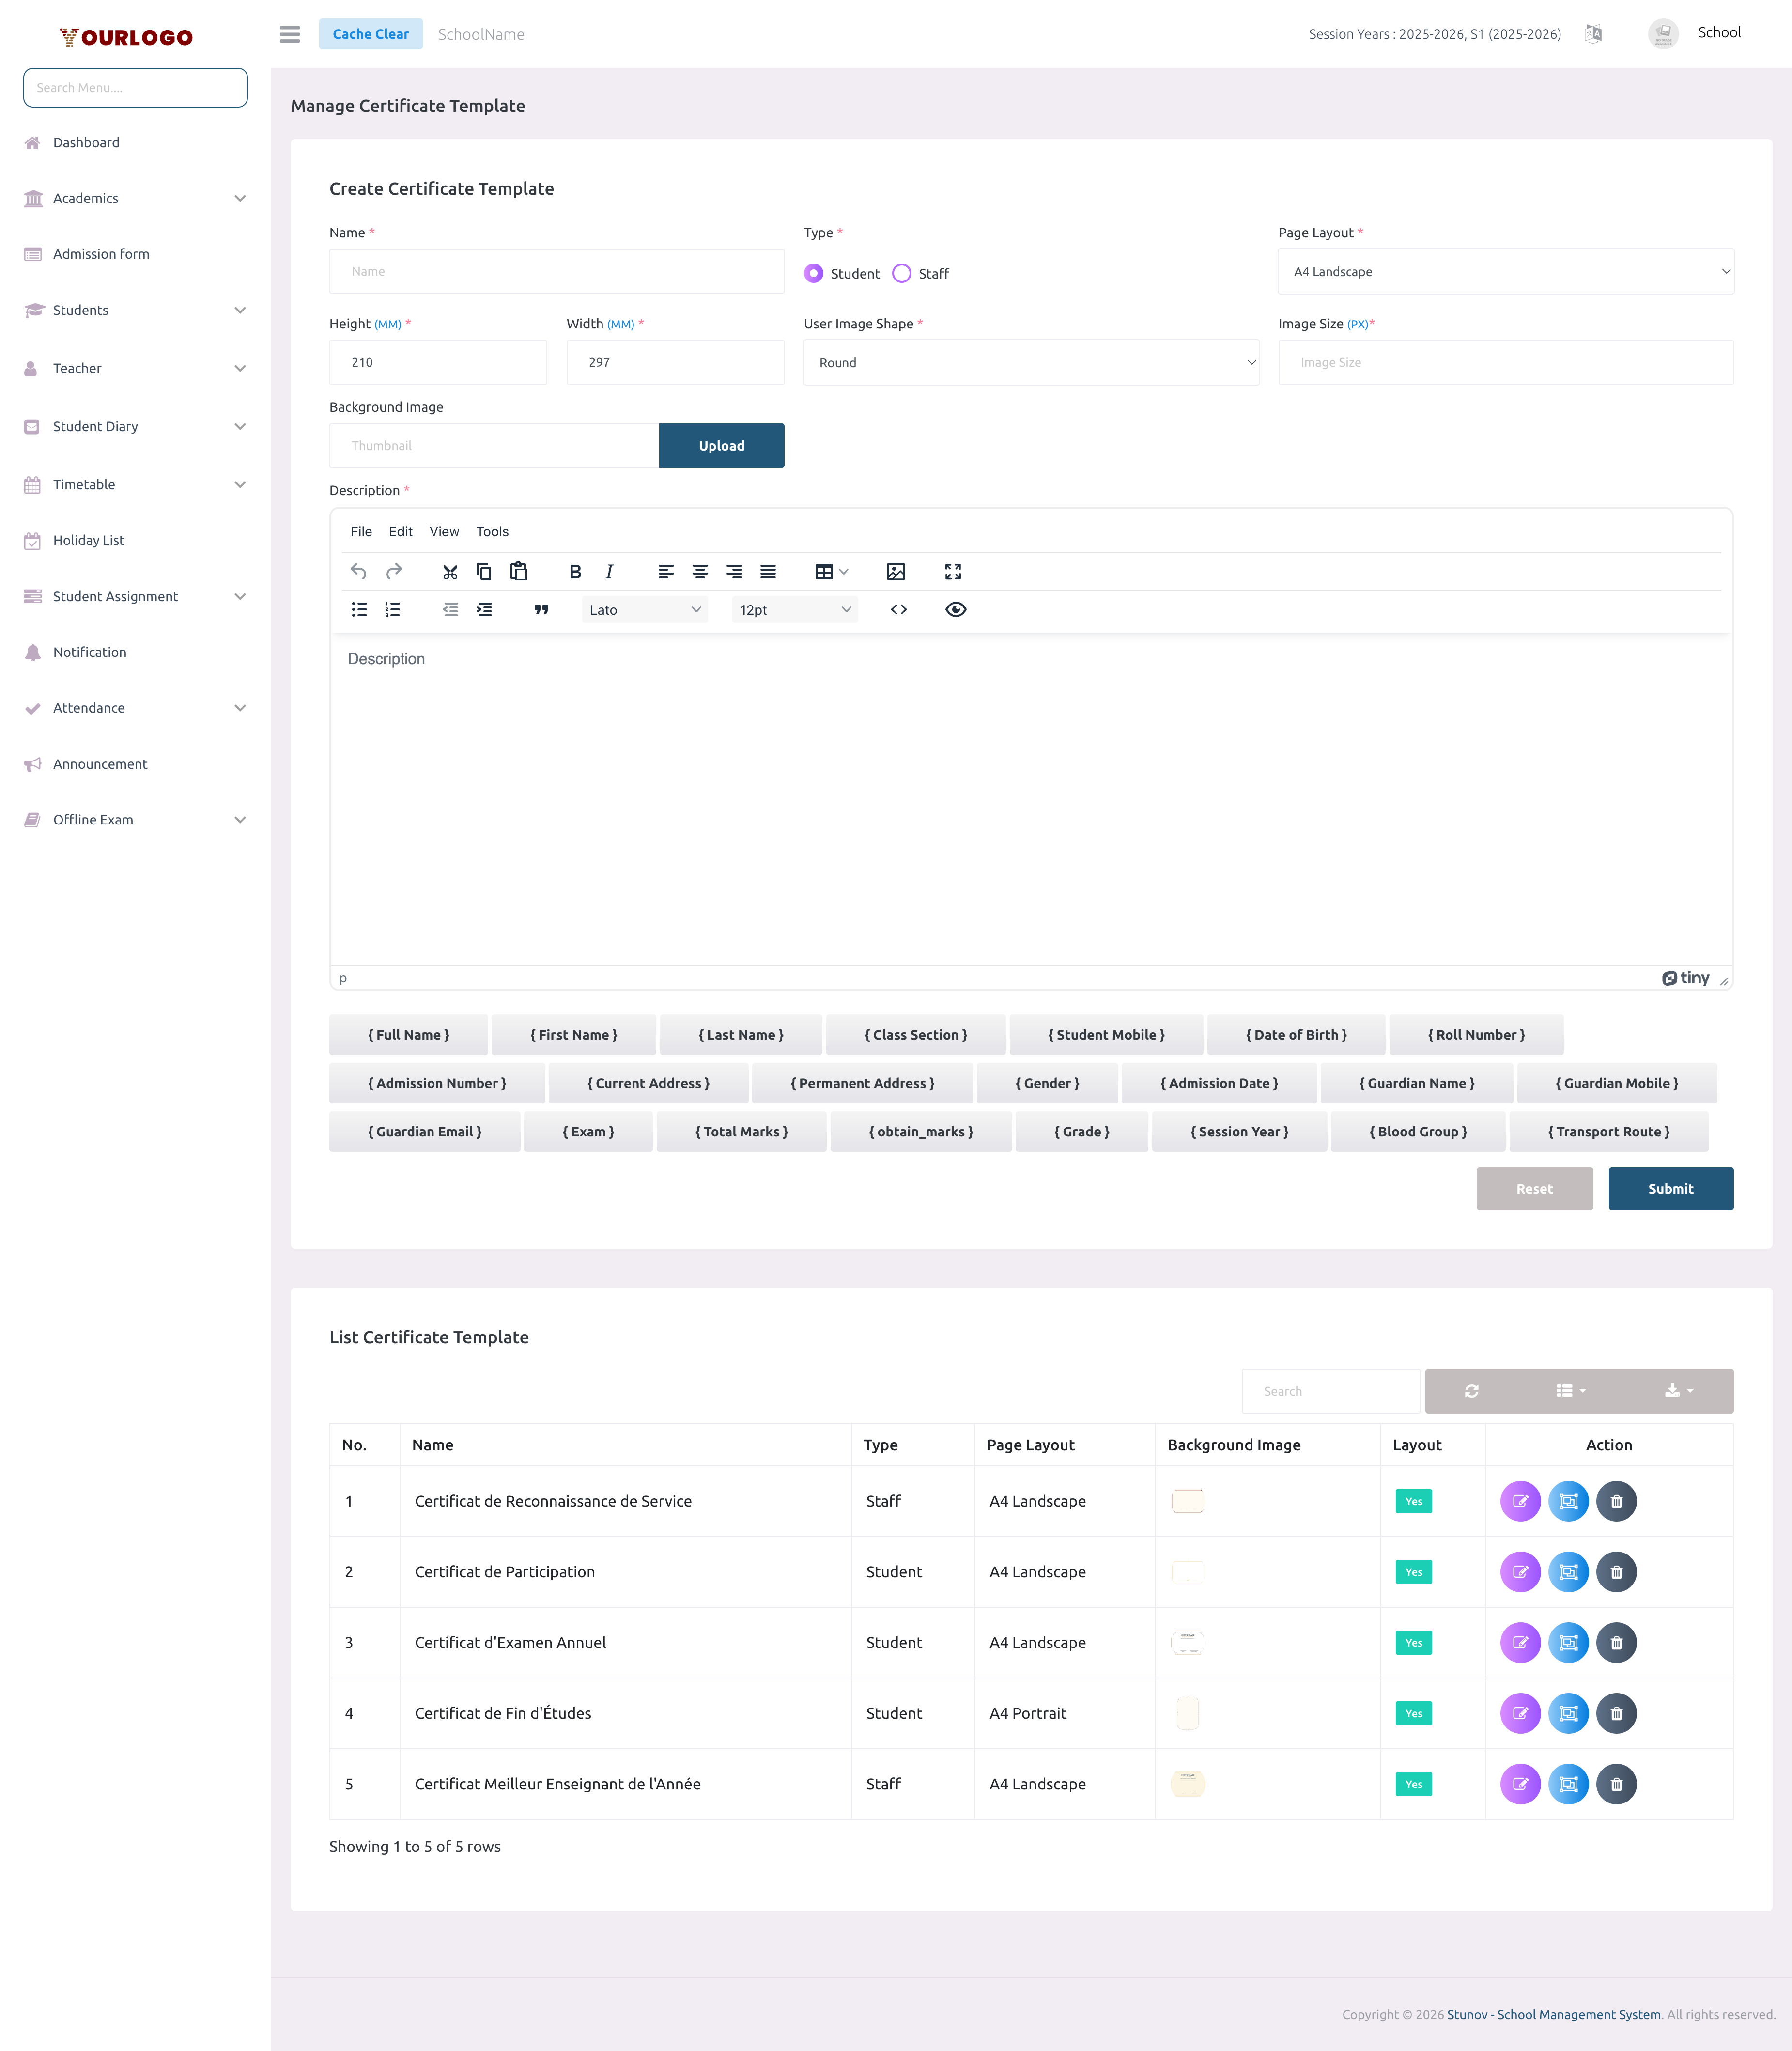
Create a Template
Available Placeholders
When writing the description, click on any placeholder tag shown below the editor to insert it. The system replaces these with actual data at generation time.
Student templates:
| Placeholder | {full_name} | {first_name} | {last_name} | {class_section} | {roll_no} | {dob} | {admission_no} | {guardian_name} | {guardian_mobile} | {guardian_email} | {gender} | {admission_date} | {current_address} | {permanent_address} | {student_mobile} | {exam} | {total_marks} | {obtain_marks} | {grade} | {session_year} | {blood_group} | {transport_route} |
|---|---|---|---|---|---|---|---|---|---|---|---|---|---|---|---|---|---|---|---|---|---|---|
| Value | Student's full name | Student's first name | Student's last name | Class and section name | Roll number | Date of birth | Admission/GR number | Guardian's name | Guardian's mobile number | Guardian's email | Student's gender | Date of admission | Current address | Permanent address | Student's mobile number | Exam name | Total marks | Obtained marks | Grade obtained | Current session year | Blood group | Transport route |
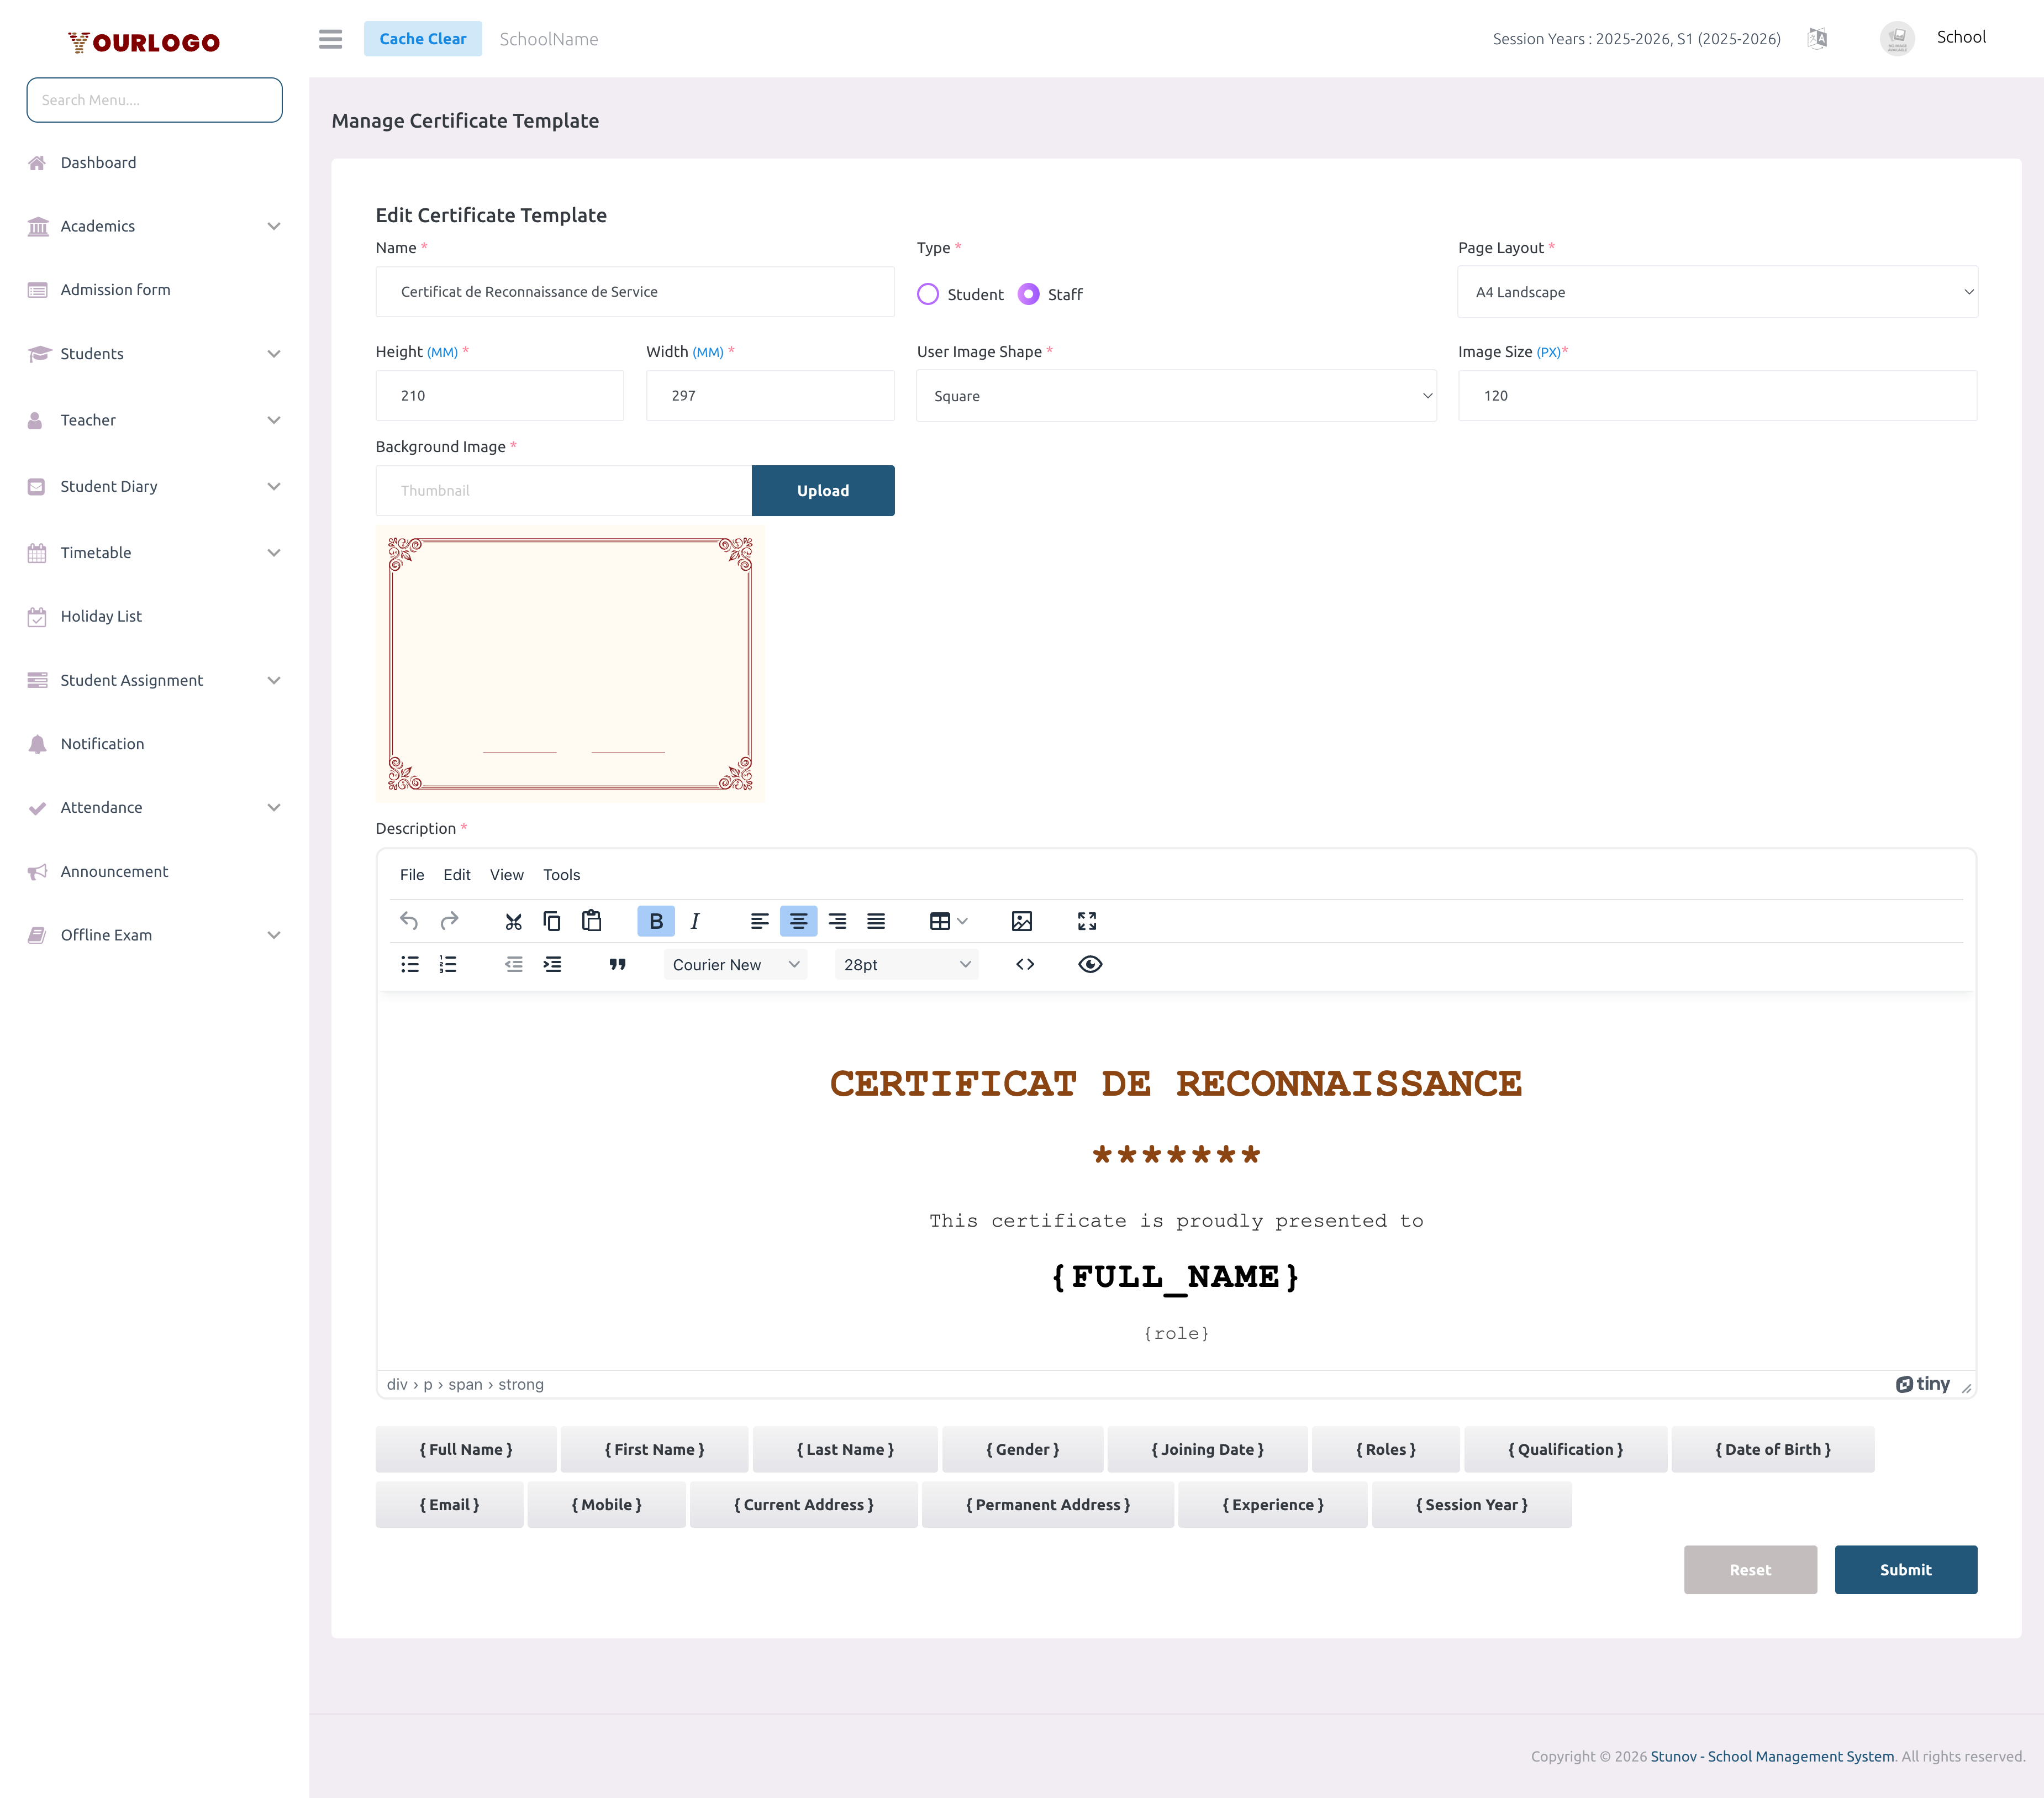
Staff templates:
| Placeholder | {full_name} | {mobile} | {dob} | {email} | {joining_date} | {role} | {qualification} | {experience} | {session_year} |
|---|---|---|---|---|---|---|---|---|---|
| Value | Staff member's full name | Mobile number | Date of birth | Email address | Date of joining | Staff role | Qualification | Work experience | Current session year |
When generating a certificate, you can also add custom extra fields on the fly (e.g., event name, special remarks). These fields are entered at the time of generation, not in the template.
Design the Layout
After creating a template, you can visually position the fixed elements (school name, logo, signature, etc.) on the certificate using the drag-and-drop layout editor.
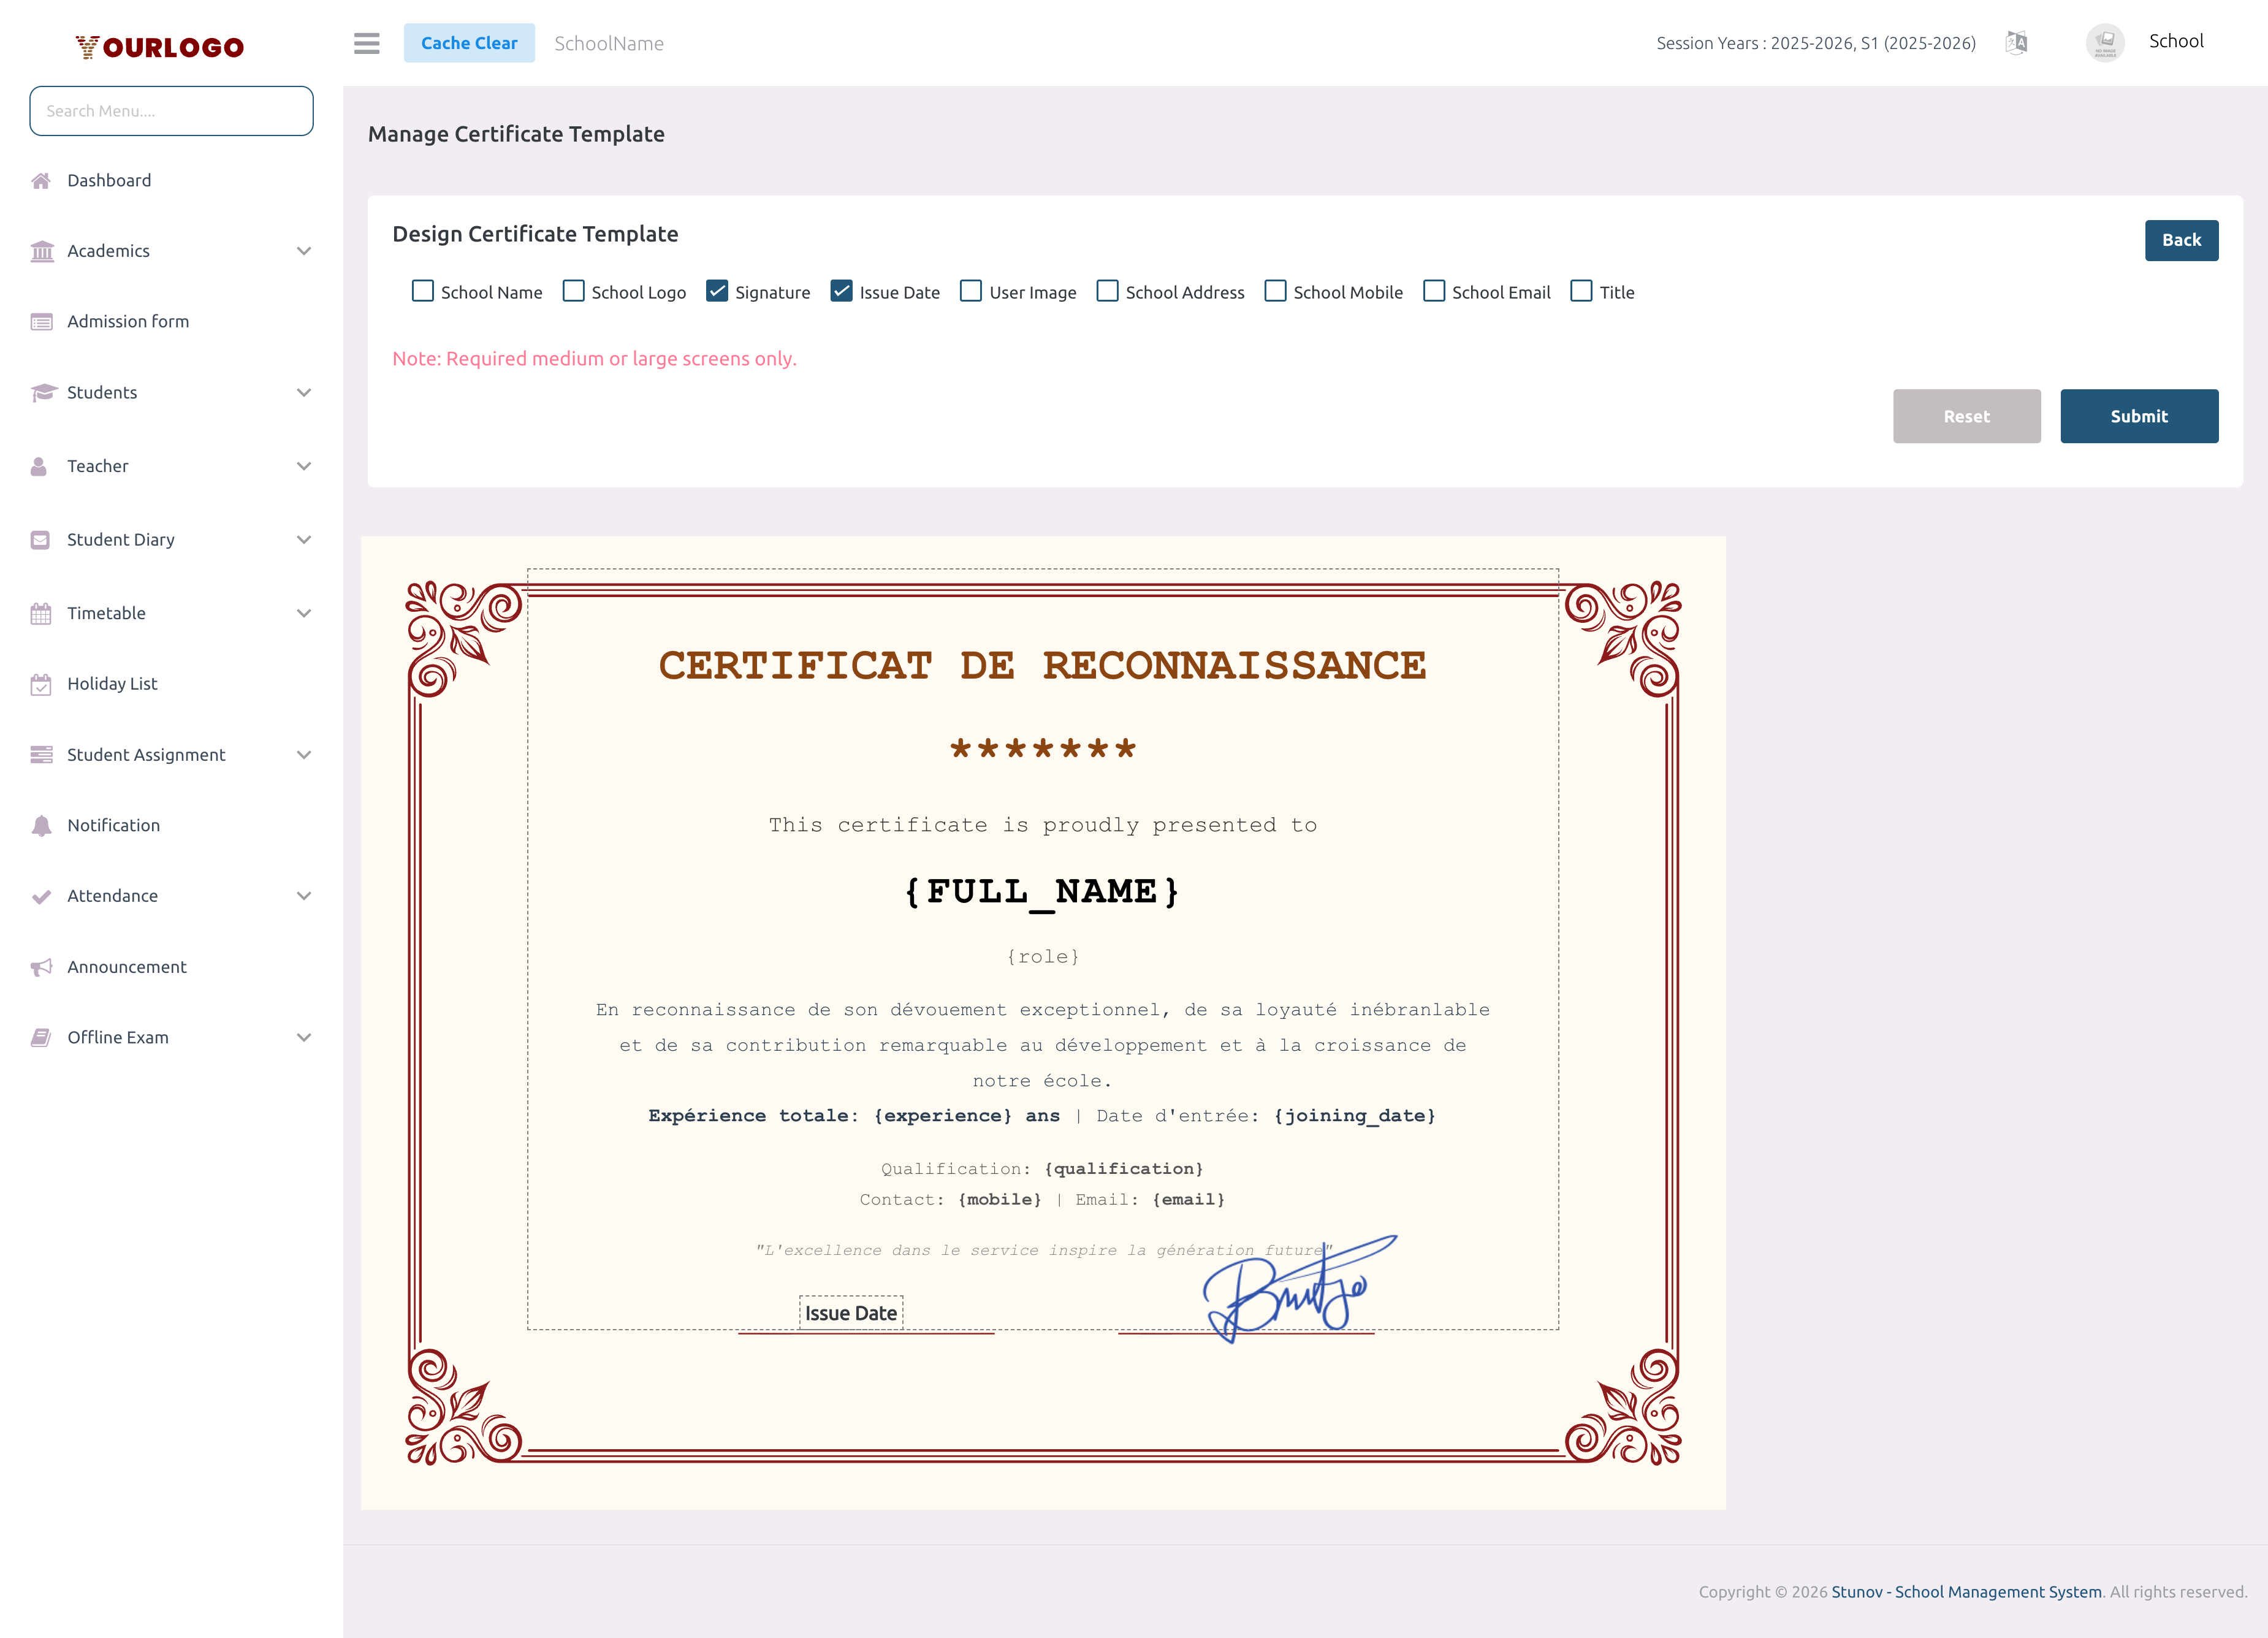
The layout designer requires a background image to display the certificate preview area. If your template has no background image, upload one first by editing the template.
View Templates
The template list displays all certificate templates in a searchable table.
| Column | No. | Name | Type | Page Layout | Background Image | Layout | Action |
|---|---|---|---|---|---|---|---|
| Description | Row number | Template name | Student or Staff | A4 Landscape, A4 Portrait, or Custom | Thumbnail preview of the background | Whether a layout has been designed (Yes/No) | Edit, Layout, and Delete buttons |
- Use the search bar to filter templates by name or type
- Click Export to download the template list
Edit a Template
Delete a Template
Deleting a template is irreversible. The background image is also deleted from storage. Previously generated certificates are not affected.
Related Pages
- Student Certificate — Generate certificates for students using these templates
- Staff Certificate — Generate certificates for staff using these templates
- ID Card Settings — The signature uploaded in ID Card Settings is shared with certificates