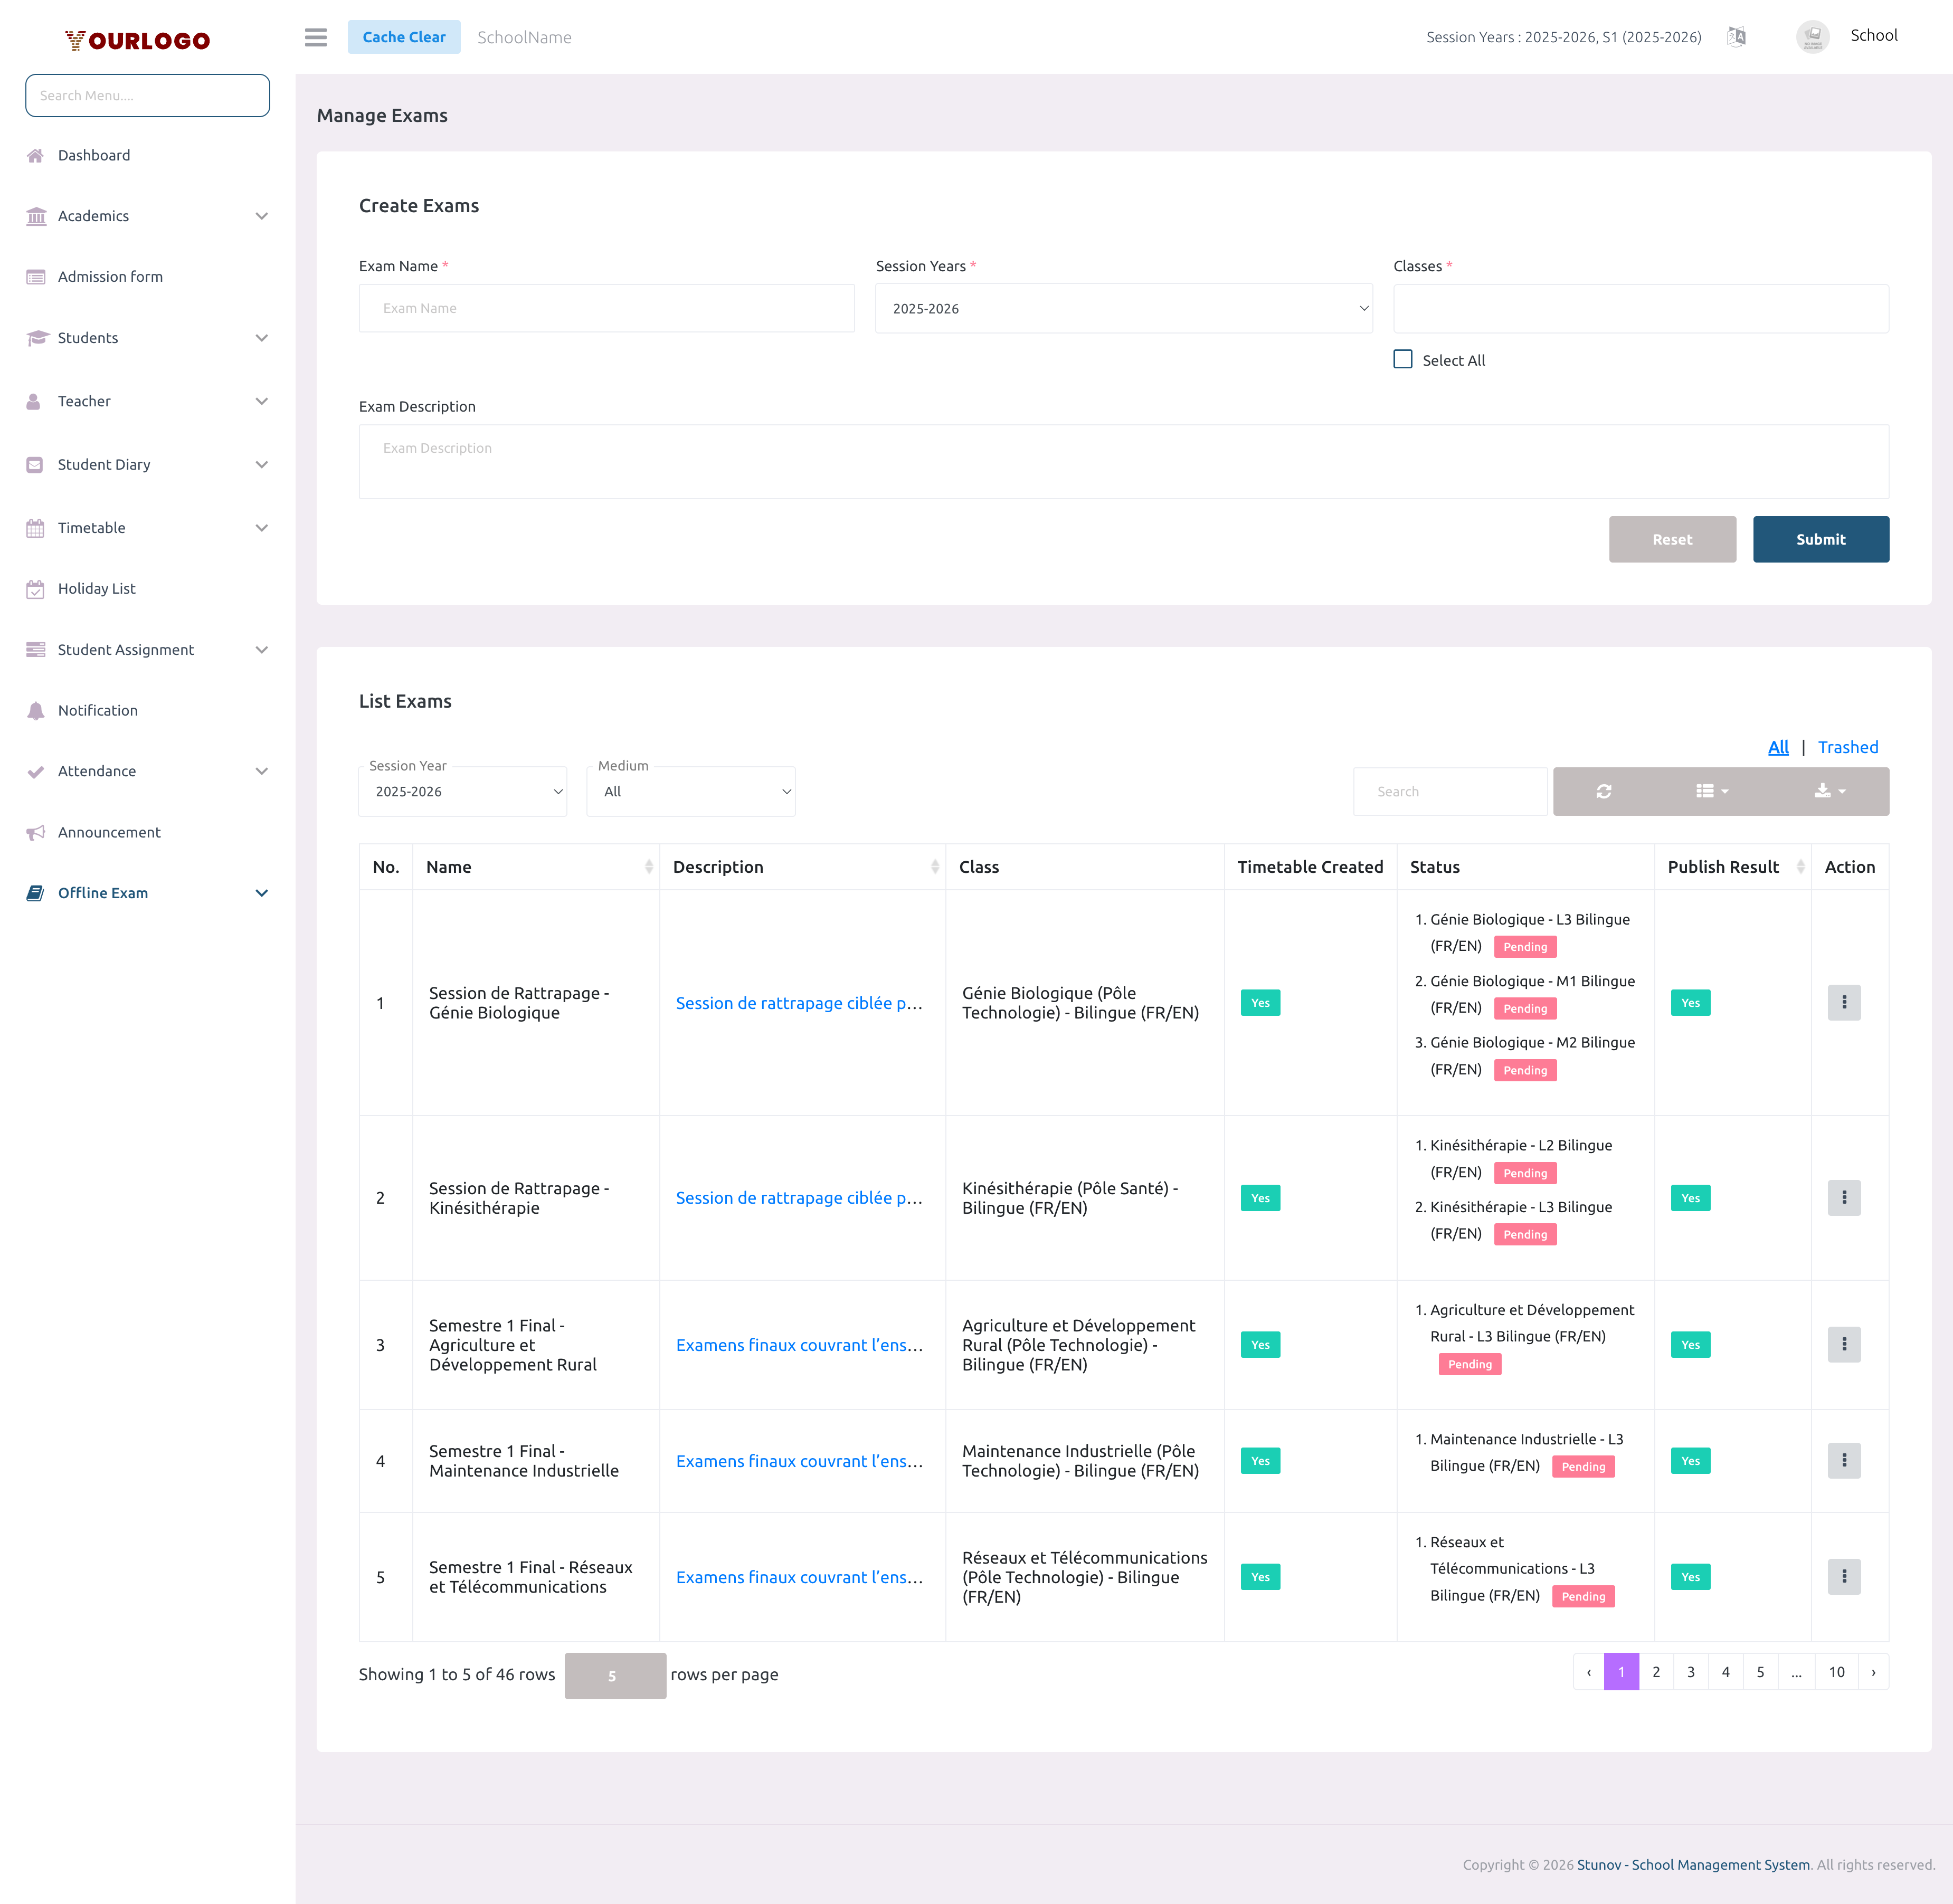
Manage Exam
The Manage Exam page is the starting point for the offline exam lifecycle. Here you create exams, assign them to one or more classes, monitor marks submission status, publish results, and manage the exam lifecycle (edit, delete, restore).
The complete offline exam lifecycle follows this order: Create Exam → Set Timetable → Upload Marks → Track Marks → Publish Result → View Results. Make sure Exam Grades are configured before publishing.
Create an Exam
Form Fields
| Field | Type | Required | Description |
|---|---|---|---|
| Exam Name | Text | Required | The name of the exam (e.g., "Semester 1 Final"). Must be descriptive and recognizable. |
| Session Years | Select | Required | The session year the exam belongs to. Only the active session year is shown. |
| Classes | Multi-select | Required | One or more classes to assign the exam to. Includes a "Select All" option. Each selected class creates a separate exam record. |
| Exam Description | Textarea | Optional | Optional description of the exam scope or purpose. Shown as tooltip in the list. |
View Exams
The exam list displays all exams for the selected session year with marks submission tracking per class section.
| Column | Description |
|---|---|
| No. | Row number |
| Name | Exam name |
| Description | Exam description (hover tooltip) |
| Class | Class and section assigned to this exam |
| Timetable Created | Whether the exam timetable has been set up (Yes/No) |
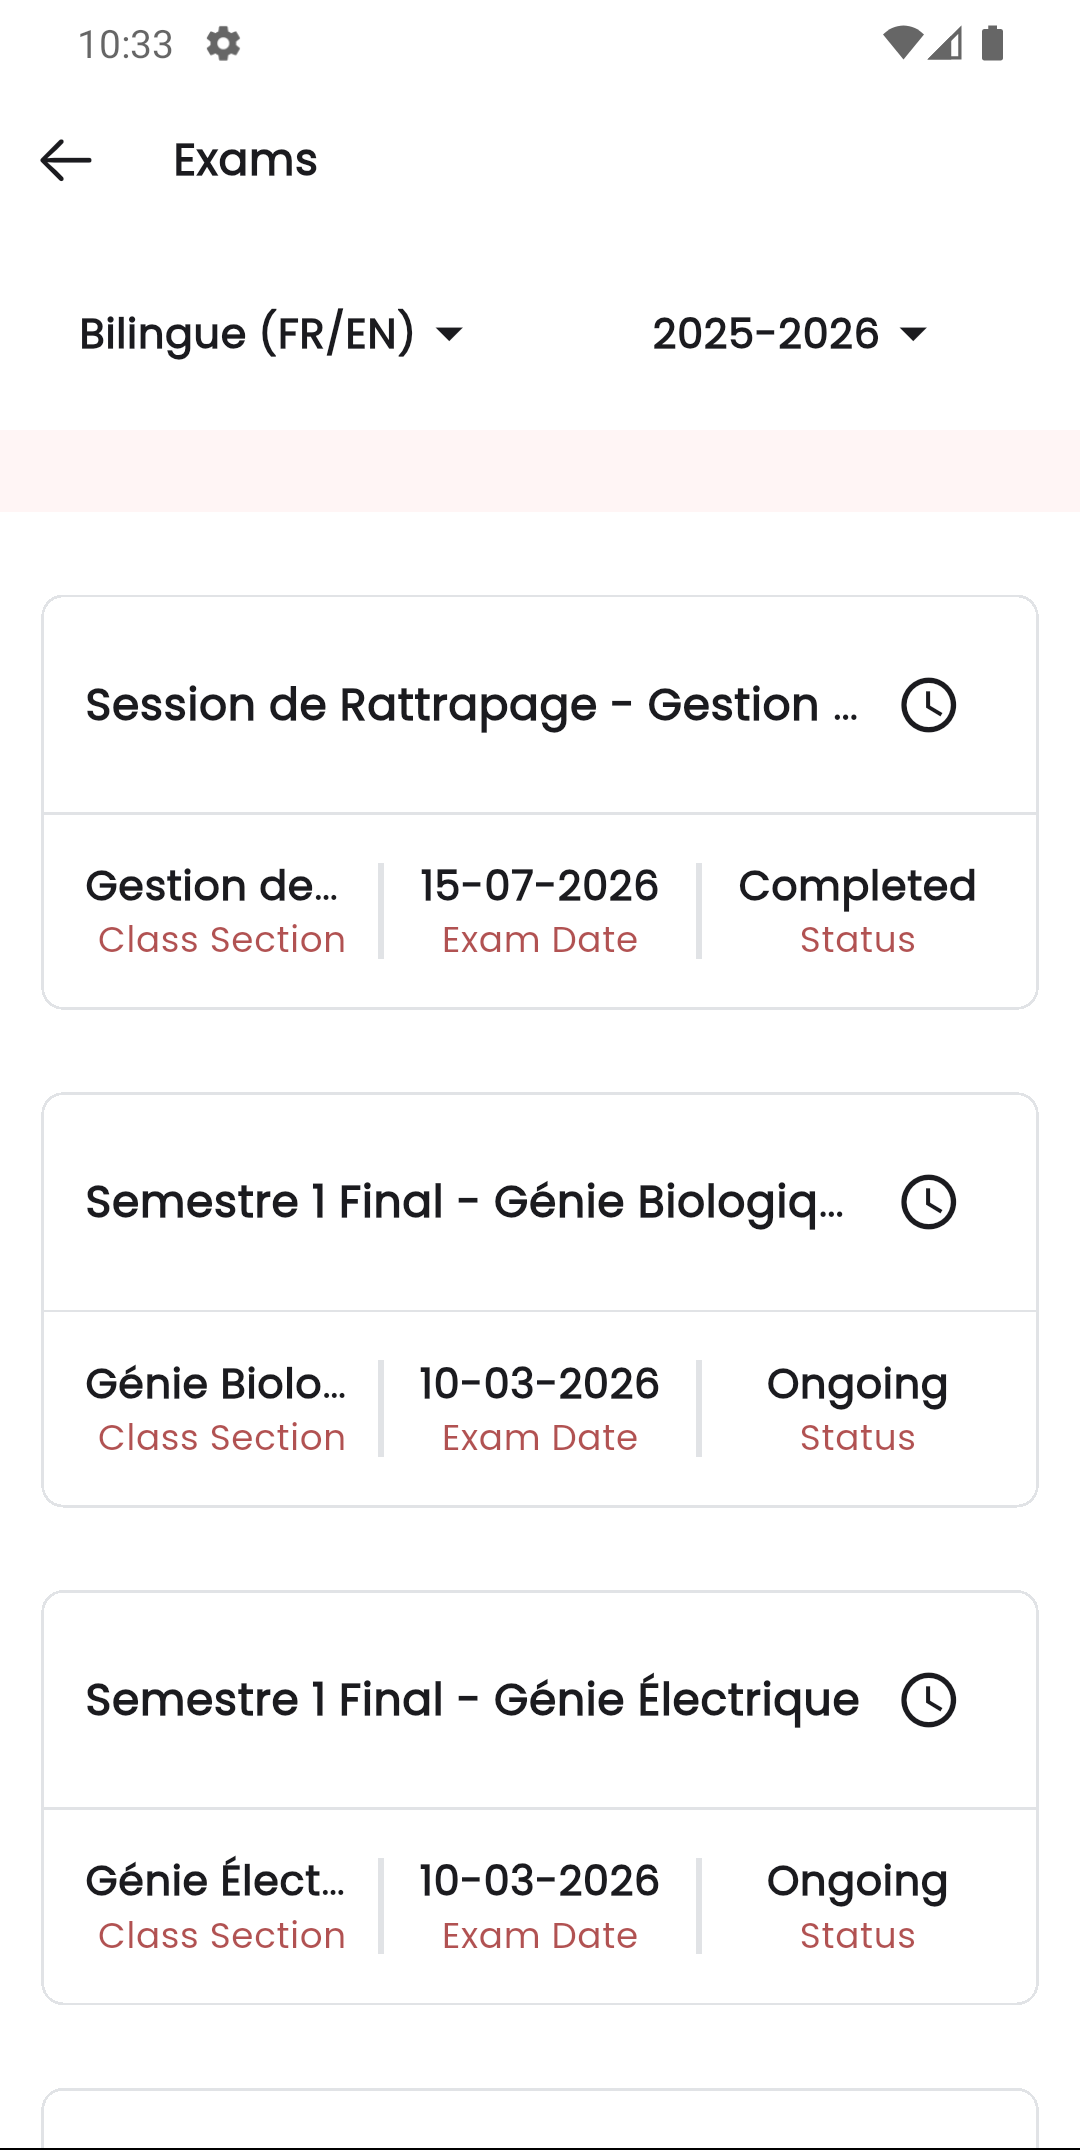
| Status | Per-section marks submission status: Pending or Submitted |
| Publish Result | Whether the result has been published (Yes/No) |
| Action | Dropdown with Timetable, Publish, Edit, and Delete options |
Filters:
- Session Year — filter exams by session year
- Medium — filter exams by medium of instruction (e.g., English, French, Bilingual)
Use the search bar to filter by exam name, and the Export button to download the list.
Edit an Exam
You can only edit exams that are in Upcoming status. Once the exam timetable dates have passed and the exam is Ongoing or Completed, the name cannot be changed.
Set Up Exam Timetable
From the Action dropdown, click Timetable to navigate to the timetable editor for that exam. See Timetable for the full timetable creation workflow.
Publish Exam Results
Publishing is a toggle — you can unpublish results by clicking Publish again. Unpublishing hides results from students and parents but does not delete any data.
Delete an Exam
If the exam result is published, you must unpublish it before deleting the exam.
Restore a Deleted Exam
Deleted exams are soft-deleted and can be restored:
- In the exam list, click the Trashed tab
- Click Restore in the Action column of the deleted exam
- The exam returns to the active list
To permanently remove an exam, use Force Delete from the Trashed view.
Exam Status Flow
Exam status is automatically determined based on the timetable dates:
| Status | Condition |
|---|---|
| Upcoming | All timetable dates are in the future |
| Ongoing | At least one timetable date is today or has passed, but the exam end date has not been reached |
| Completed | All timetable dates have passed |
Staff App View
In the Stunov+ Staff app, exams appear in the exam list where teachers and admins can view exam details, timetables, and results.
Related Pages
- Timetable — Set exam dates, times, and marks per subject
- Track Exam Marks — Monitor marks submission progress
- Upload Exam Marks — Enter student marks per subject
- Exam Result — View and manage published results
- Exam Grade — Configure grade ranges