School Onboarding
The School Onboarding wizard is the guided checklist a School Admin sees the first time they sign in to a brand-new school. It walks you through the essentials — confirm your settings, set your academic year, build your class/subject structure, then optionally add staff, students and fees — so your dashboard is ready to use. It is resumable across logins and devices, and it tracks your progress automatically from the real data you create.
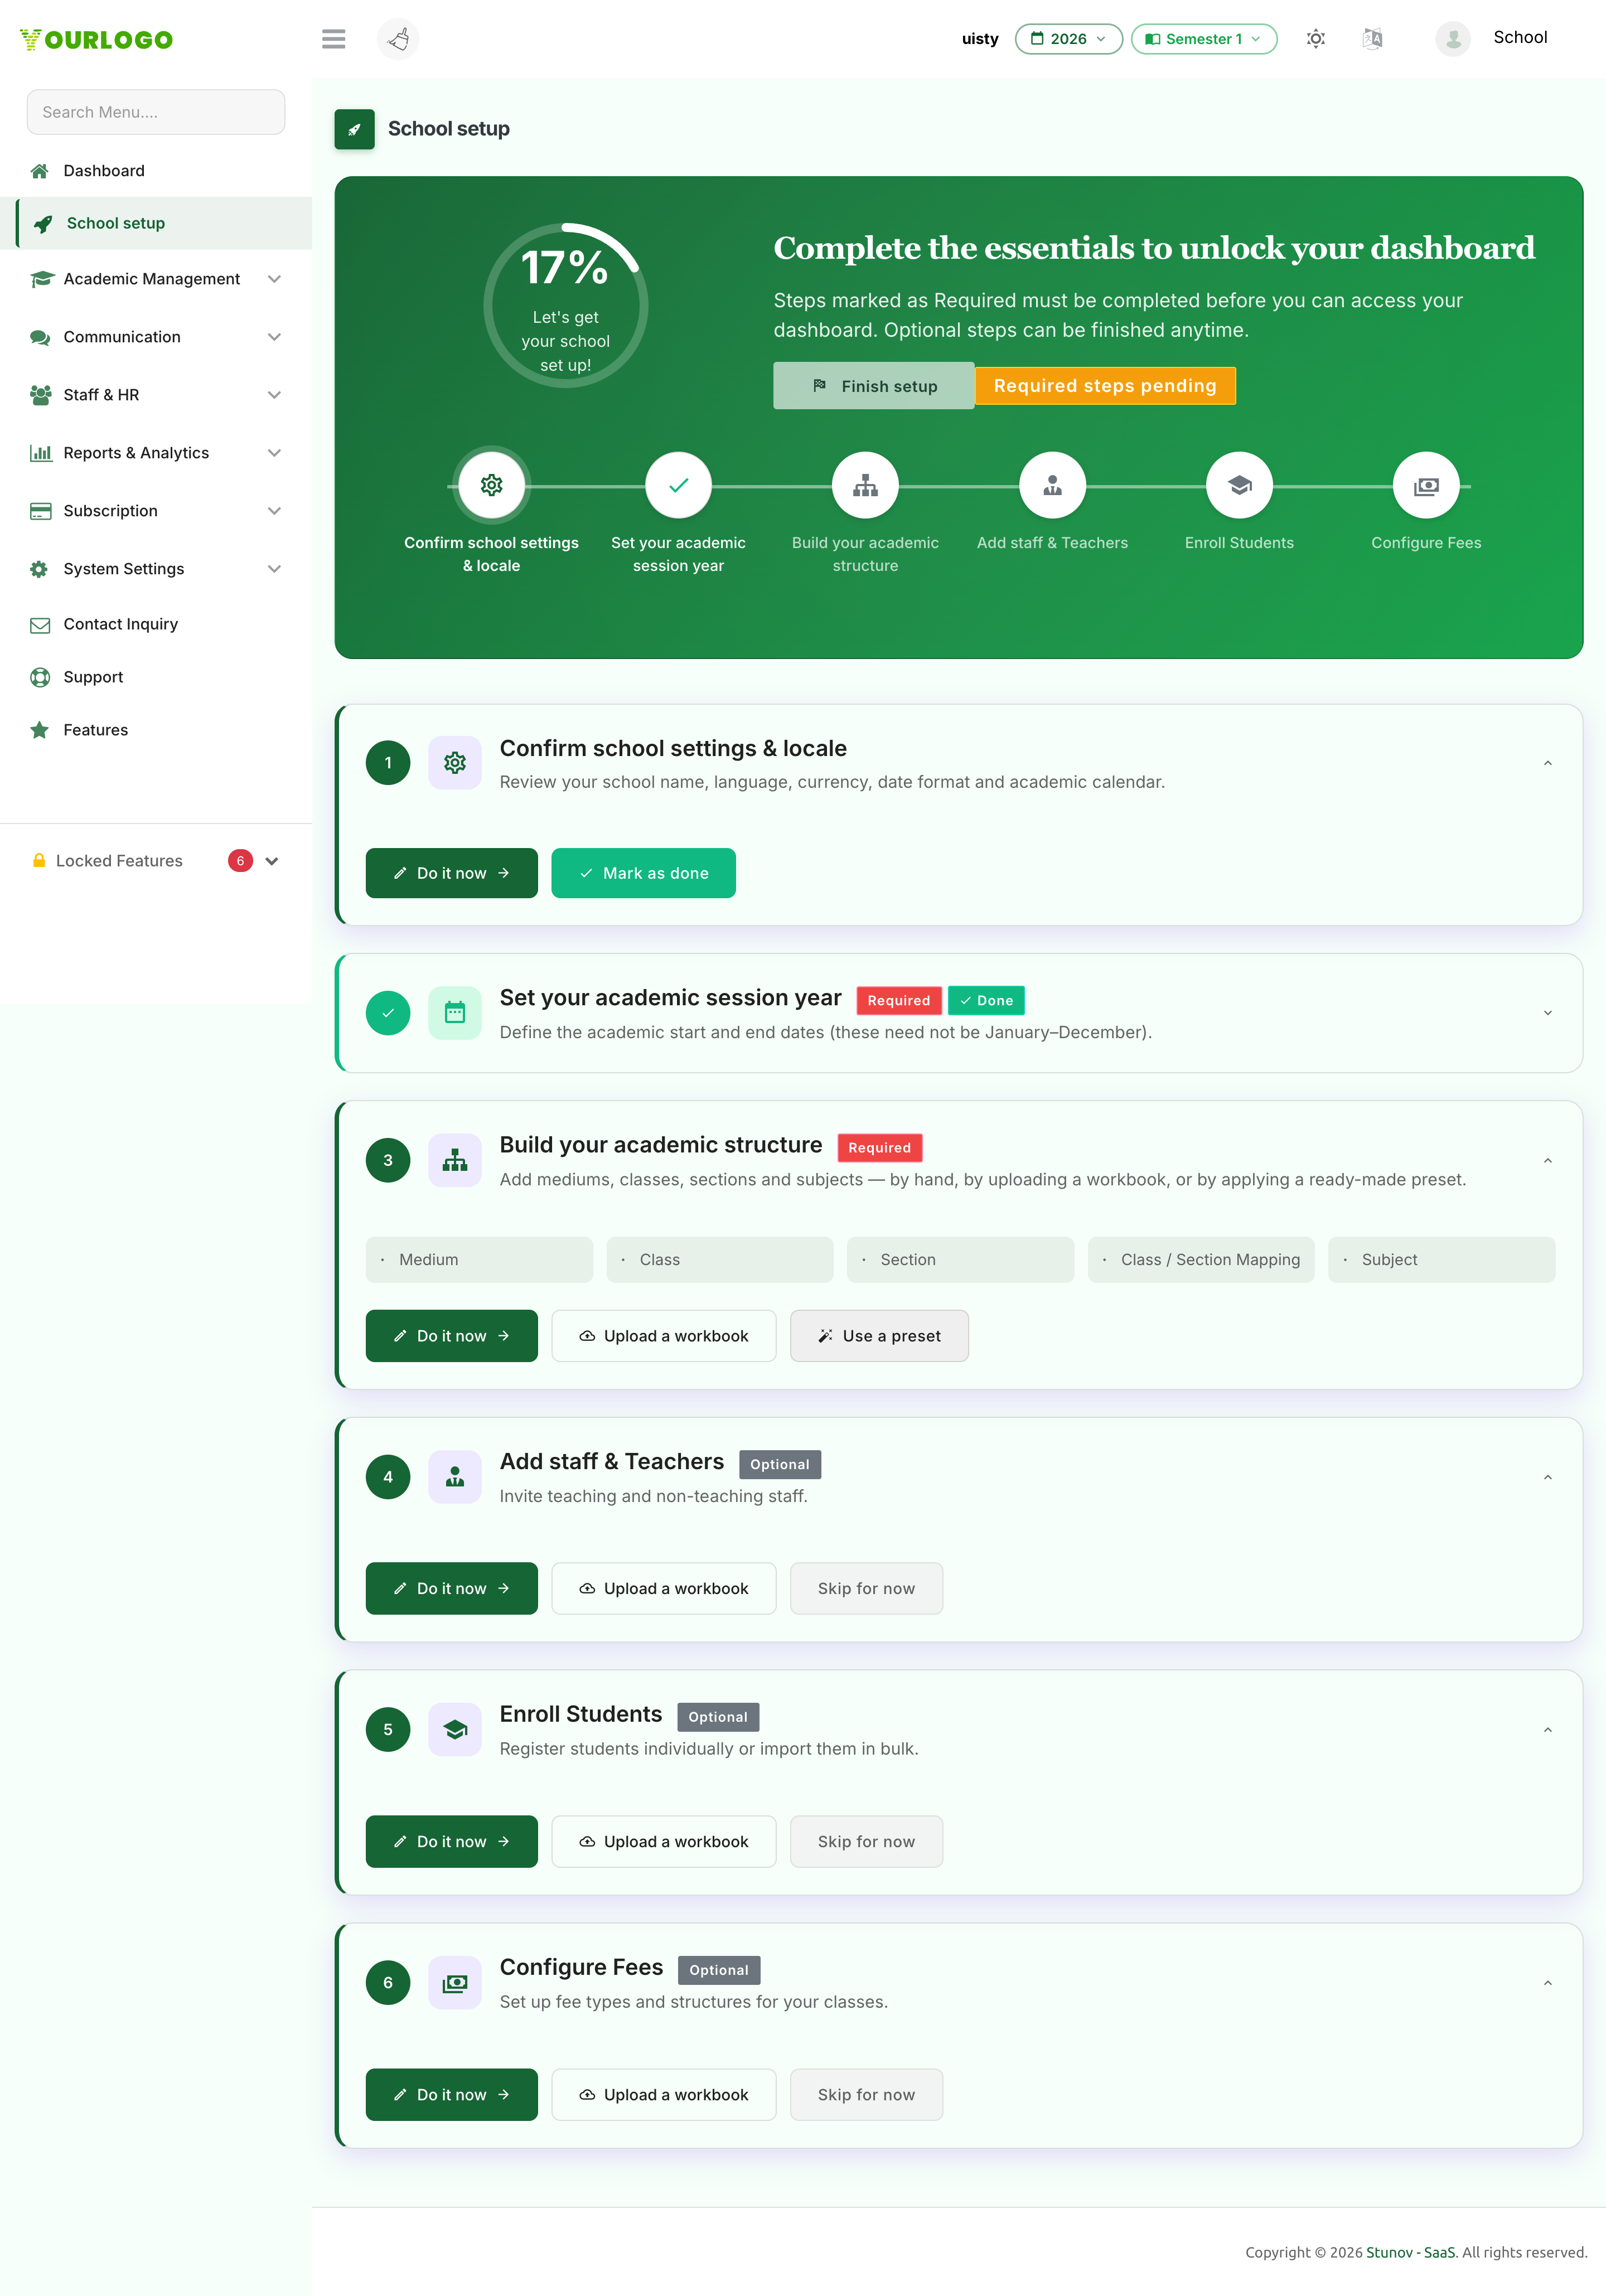
The wizard opens automatically the first time you sign in to a new school and stays as your landing page until the required essentials are in place. Once your school is set up the wizard steps aside and the dashboard becomes your home page. You can always reopen it from System Settings → General Settings → School Settings → Restart onboarding.
How the wizard works
Onboarding is a checklist of six steps. Two of them are required (you cannot finish until they are done); the rest are optional and can be skipped and returned to later.
Each step offers up to three ways to complete it:
- Do it now — jump straight to the relevant management page.
- Upload a workbook — bulk-import via a spreadsheet.
- Use a preset — for the academic structure step, apply a ready-made template (see below).
Progress is derived from your real data: as soon as a session year, class, subject, staff member, student or fee exists, the matching step lights up as done. You never have to mark things manually (though you can mark the settings step as confirmed).
Step status at a glance
| Field | Type | Required | Description |
|---|---|---|---|
| Settings | Required | Required | Confirm name, locale, currency, date format and calendar |
| Session Year | Required | Required | At least one academic year with start and end dates |
| Academic Structure | Required | Required | At least one of each: medium, class, section, class-section mapping, and subject |
| Staff & Teachers | Optional | Optional | Add or skip — can be completed any time |
| Students | Optional | Optional | Add or skip — can be completed any time |
| Fees | Optional | Optional | Add or skip — can be completed any time |
The academic structure step
This is the heart of onboarding. It expands into a small checklist with one tick per building block, and it must be complete before you can finish:
| Field | Type | Required | Description |
|---|---|---|---|
| Mediums | Required | Required | Languages of instruction (e.g. English) |
| Classes | Required | Required | Classes / grades (university: programs) |
| Sections | Required | Required | Divisions within a class (e.g. A, B) |
| Class / Section mapping | Required | Required | Which sections belong to which classes |
| Subjects | Required | Required | Subjects / courses taught |
Use a preset
If you would rather not build everything by hand, click Use a preset and apply a ready-made structure. Presets are curated templates (for example a standard school, or a university with faculties) that seed mediums, classes, sections, subjects and fees for you. For university presets you can even choose a subset of faculties to apply now and add more later.
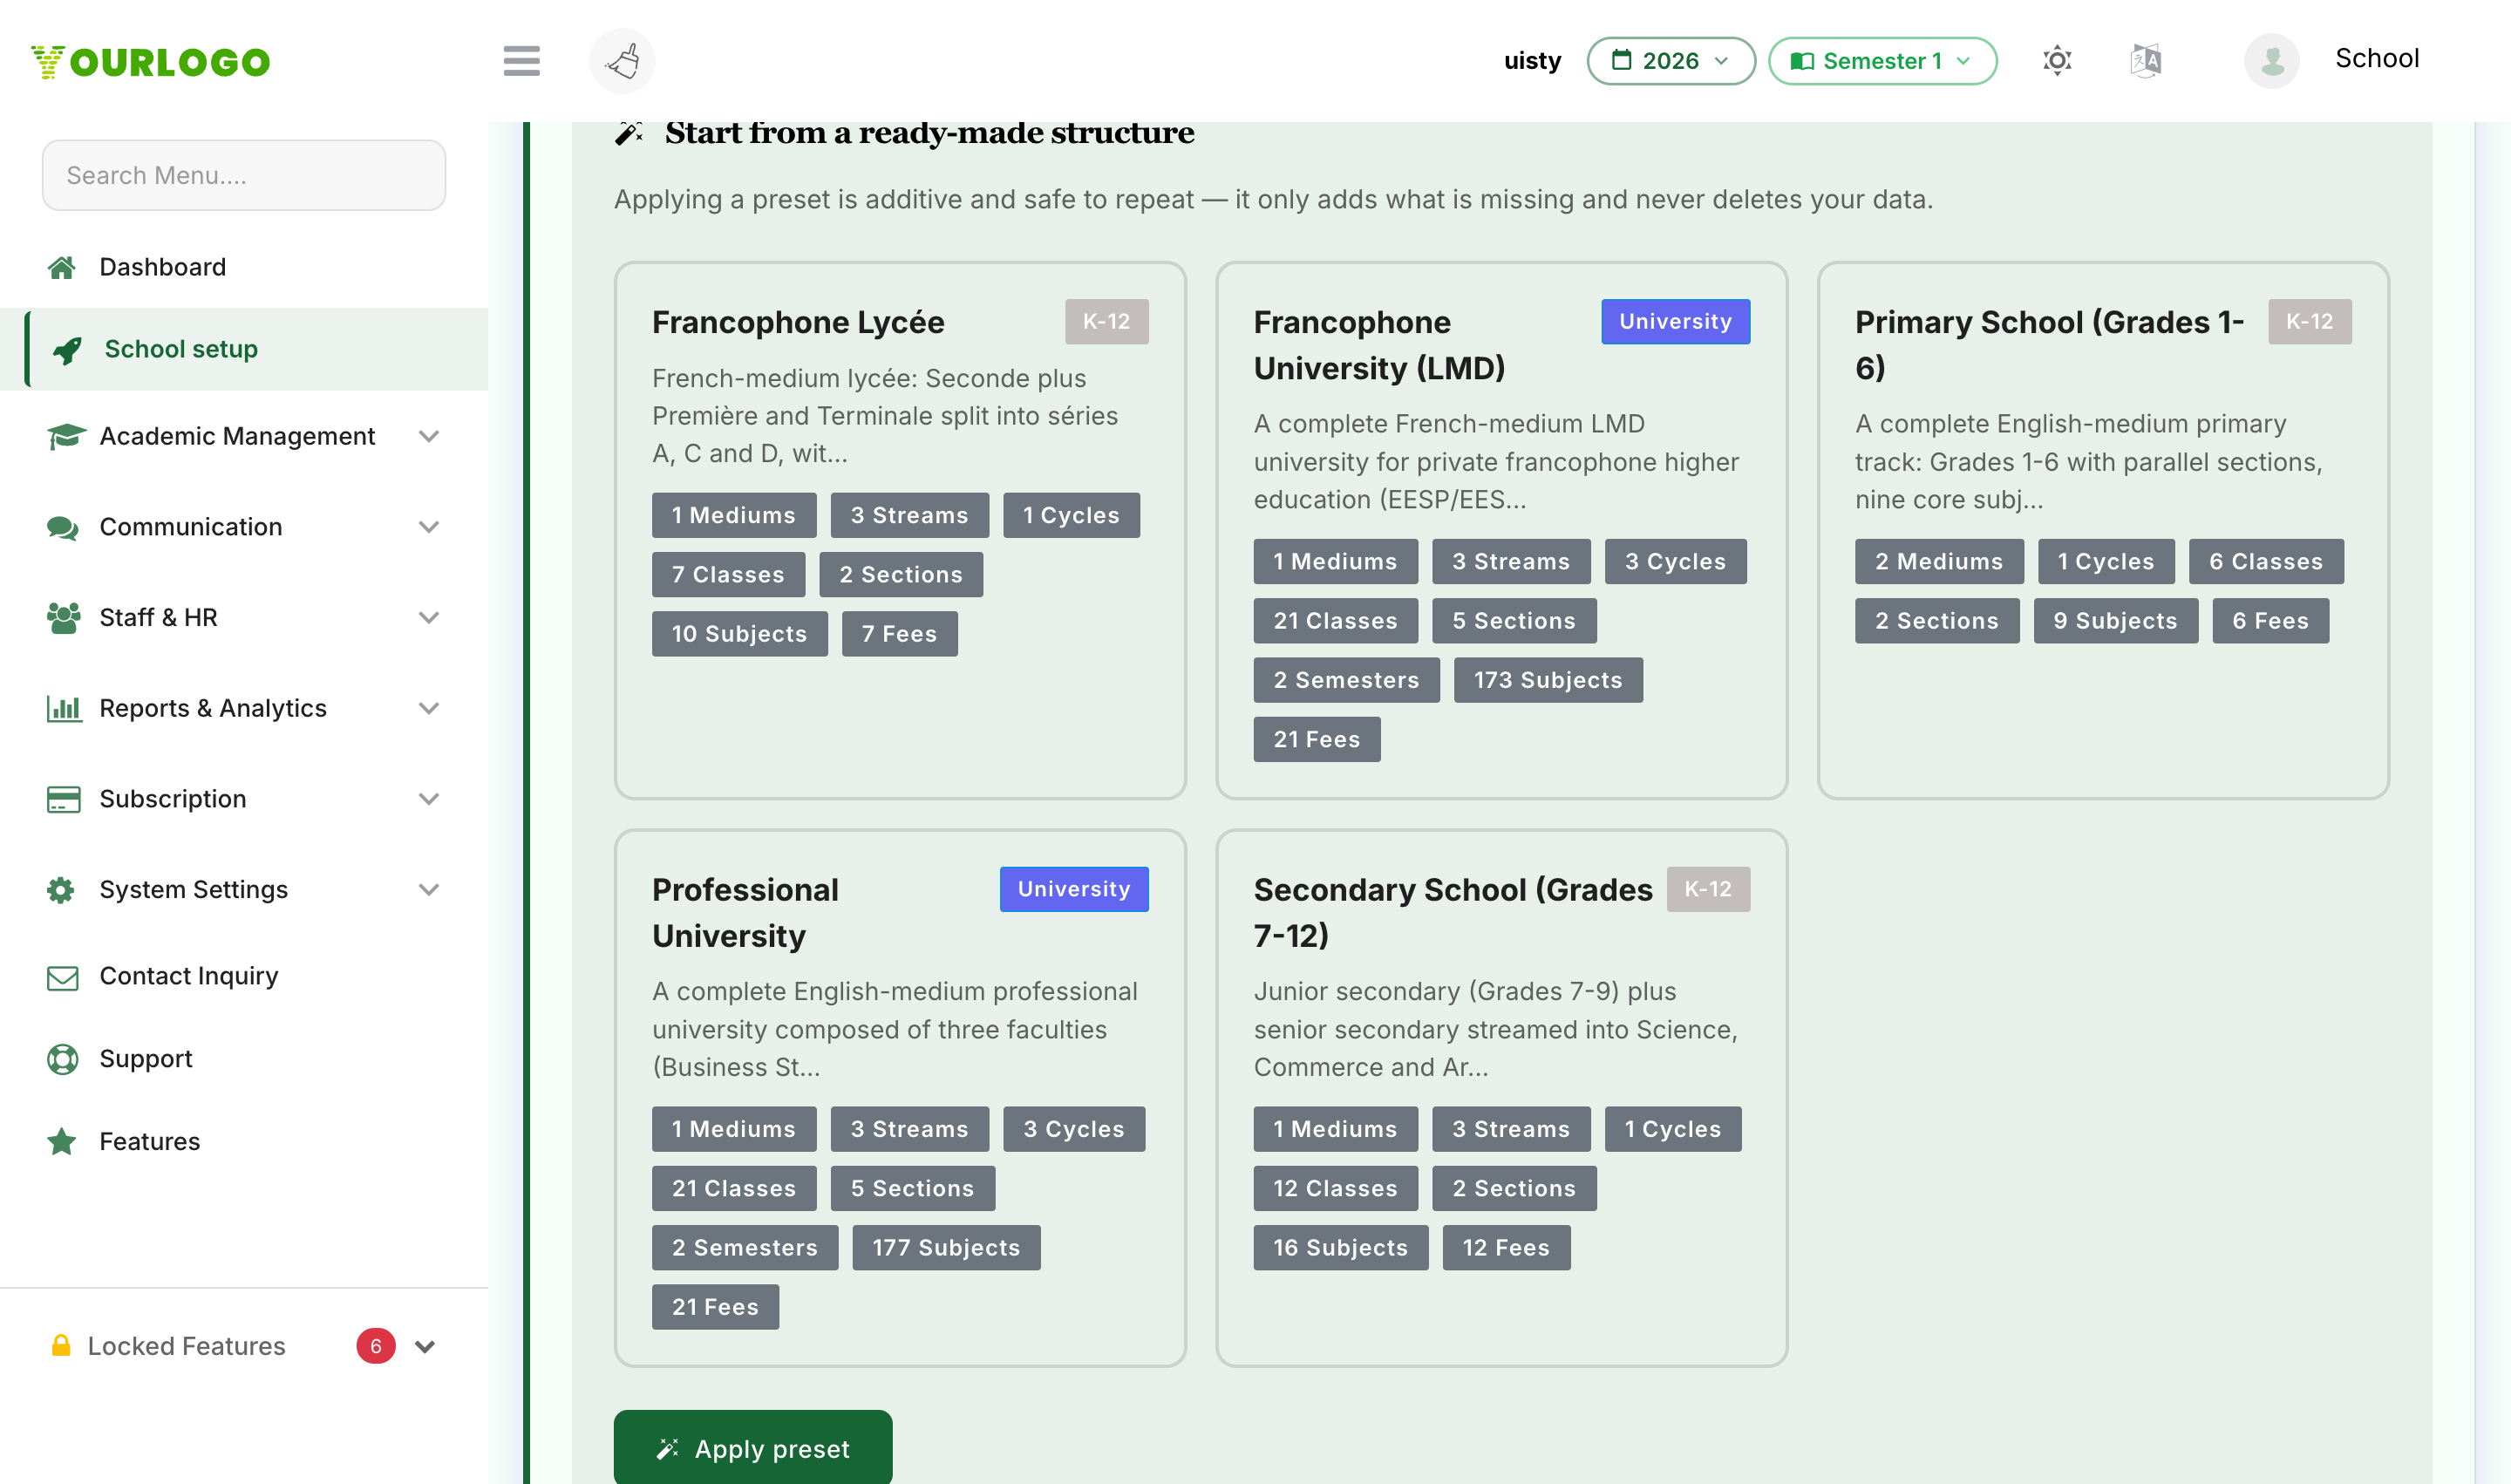
Applying a preset only adds what is missing — it never deletes or overwrites your existing data, and re-applying the same preset is a harmless no-op. Apply one to bootstrap, then tweak the result to match your school.
Finishing setup
A Finish setup button sits at the top of the wizard. It stays disabled, with a "Required steps pending" note, until the two required steps (session year + complete academic structure) are satisfied. Once they are, the heading changes to "Your school is ready to use!" and clicking Finish setup hides the wizard and the dashboard reminder card.
While onboarding is unfinished, a compact checklist card on your dashboard shows your progress (X / Y steps complete) and a Continue setup button pointing at the next step. You can dismiss the card without affecting your underlying progress.
What happens after onboarding
Completing onboarding does not trigger any heavy process. Onboarding simply makes sure the minimum viable configuration (calendar, structure) exists so every other feature has the data it needs. From here you can deepen each area:
- Bulk-import people and historical data using the bulk-upload tools on each management page.
- Preview the finished school to stakeholders — see Preview Mode & Demo.
Related Pages
- Preview Mode & Demo — show off the configured school safely
- Student Admission — add students individually
- Manage Teacher — add teachers individually