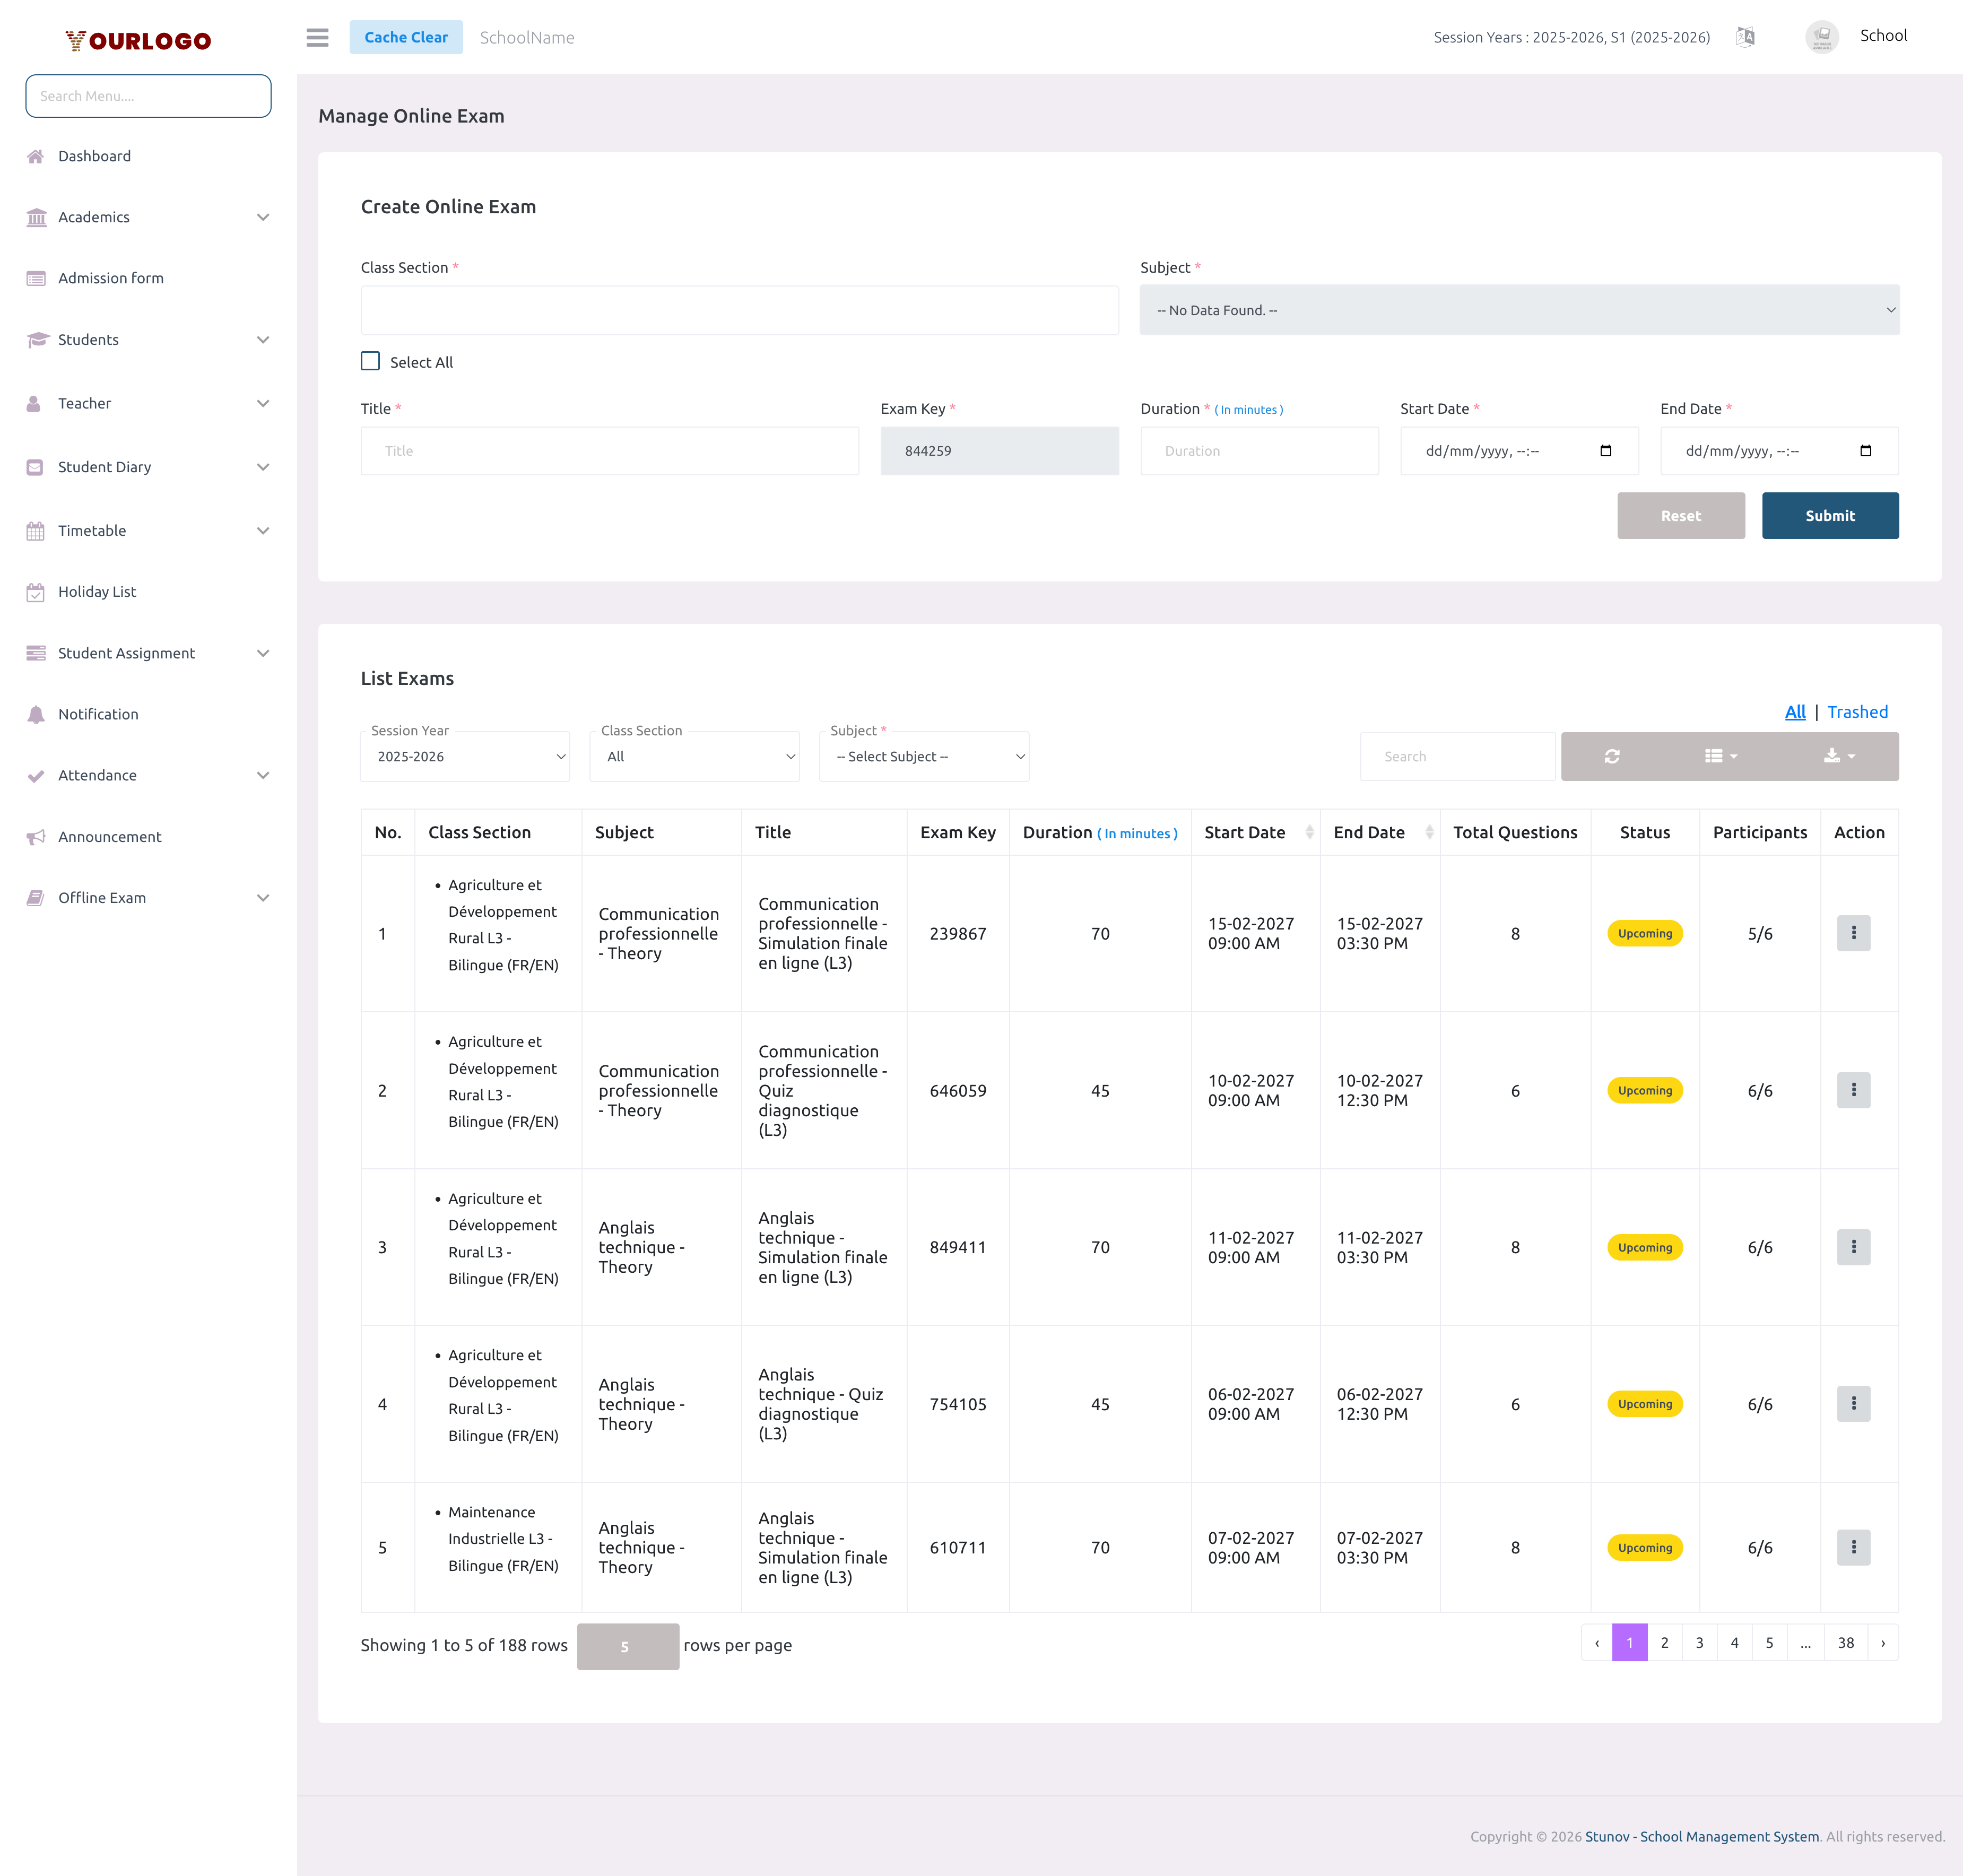
Manage Online Exam
Online Exams let you create timed, digital assessments that students take through the Stunov+ Student app. Each exam is linked to a class section and subject, has a unique exam key, and runs within a defined start/end window. After the exam window closes, you can view results per student.
Teachers can create and manage online exams only for the class sections and subjects assigned to them. School Admins and IT Managers see all class sections.
Create an Online Exam
Create Form Fields
| Field | Type | Required | Description |
|---|---|---|---|
| Class Section | Multi-select | Required | One or more class sections this exam targets. Teachers see only their assigned sections. |
| Subject | Dropdown | Required | The subject for this exam. Options depend on selected class sections. |
| Title | Text | Required | A descriptive name for the exam (max 128 characters). |
| Exam Key | Number (read-only) | Required | Auto-generated unique 6-digit key. Cannot be edited. Used by students to access the exam. |
| Duration | Number | Required | Exam duration in minutes. Minimum 1 minute. |
| Start Date | Date-Time | Required | The date and time when the exam becomes available to students. |
| End Date | Date-Time | Required | The date and time when the exam closes. Must be after Start Date. |
View Online Exams
The exam list displays all online exams in a server-side paginated, filterable table.
Filter Bar
| Filter | Description |
|---|---|
| Session Year | Filter by academic session year |
| Class Section | Filter by a specific class section |
| Subject | Filter by subject (populates after selecting a class section) |
List Columns
| Column | Description |
|---|---|
| No. | Row number |
| Class Section | The class and section with medium (e.g., "Banque et Finance L1 — Bilingue (FR/EN)") |
| Subject | Subject name |
| Title | Exam title |
| Exam Key | Unique 6-digit exam identifier |
| Duration | Duration in minutes |
| Start Date | When the exam opens |
| End Date | When the exam closes |
| Total Questions | Number of questions assigned to this exam |
| Status | Upcoming, Ongoing, or Completed |
| Participants | Shows "attempted / total" student count |
| Action | Result, Add Questions, Edit, Delete |
- Toggle between All and Trashed views using the tabs above the list
- Use the search bar to find exams by title or other fields
- Export the list using the export button
Edit an Online Exam
Once an exam is created, its Class Section and Subject are fixed and cannot be edited. To change these, delete the exam and create a new one.
Assign Questions to an Exam
After creating an exam, you must assign questions to it. Click the Add Questions action button on any exam row.
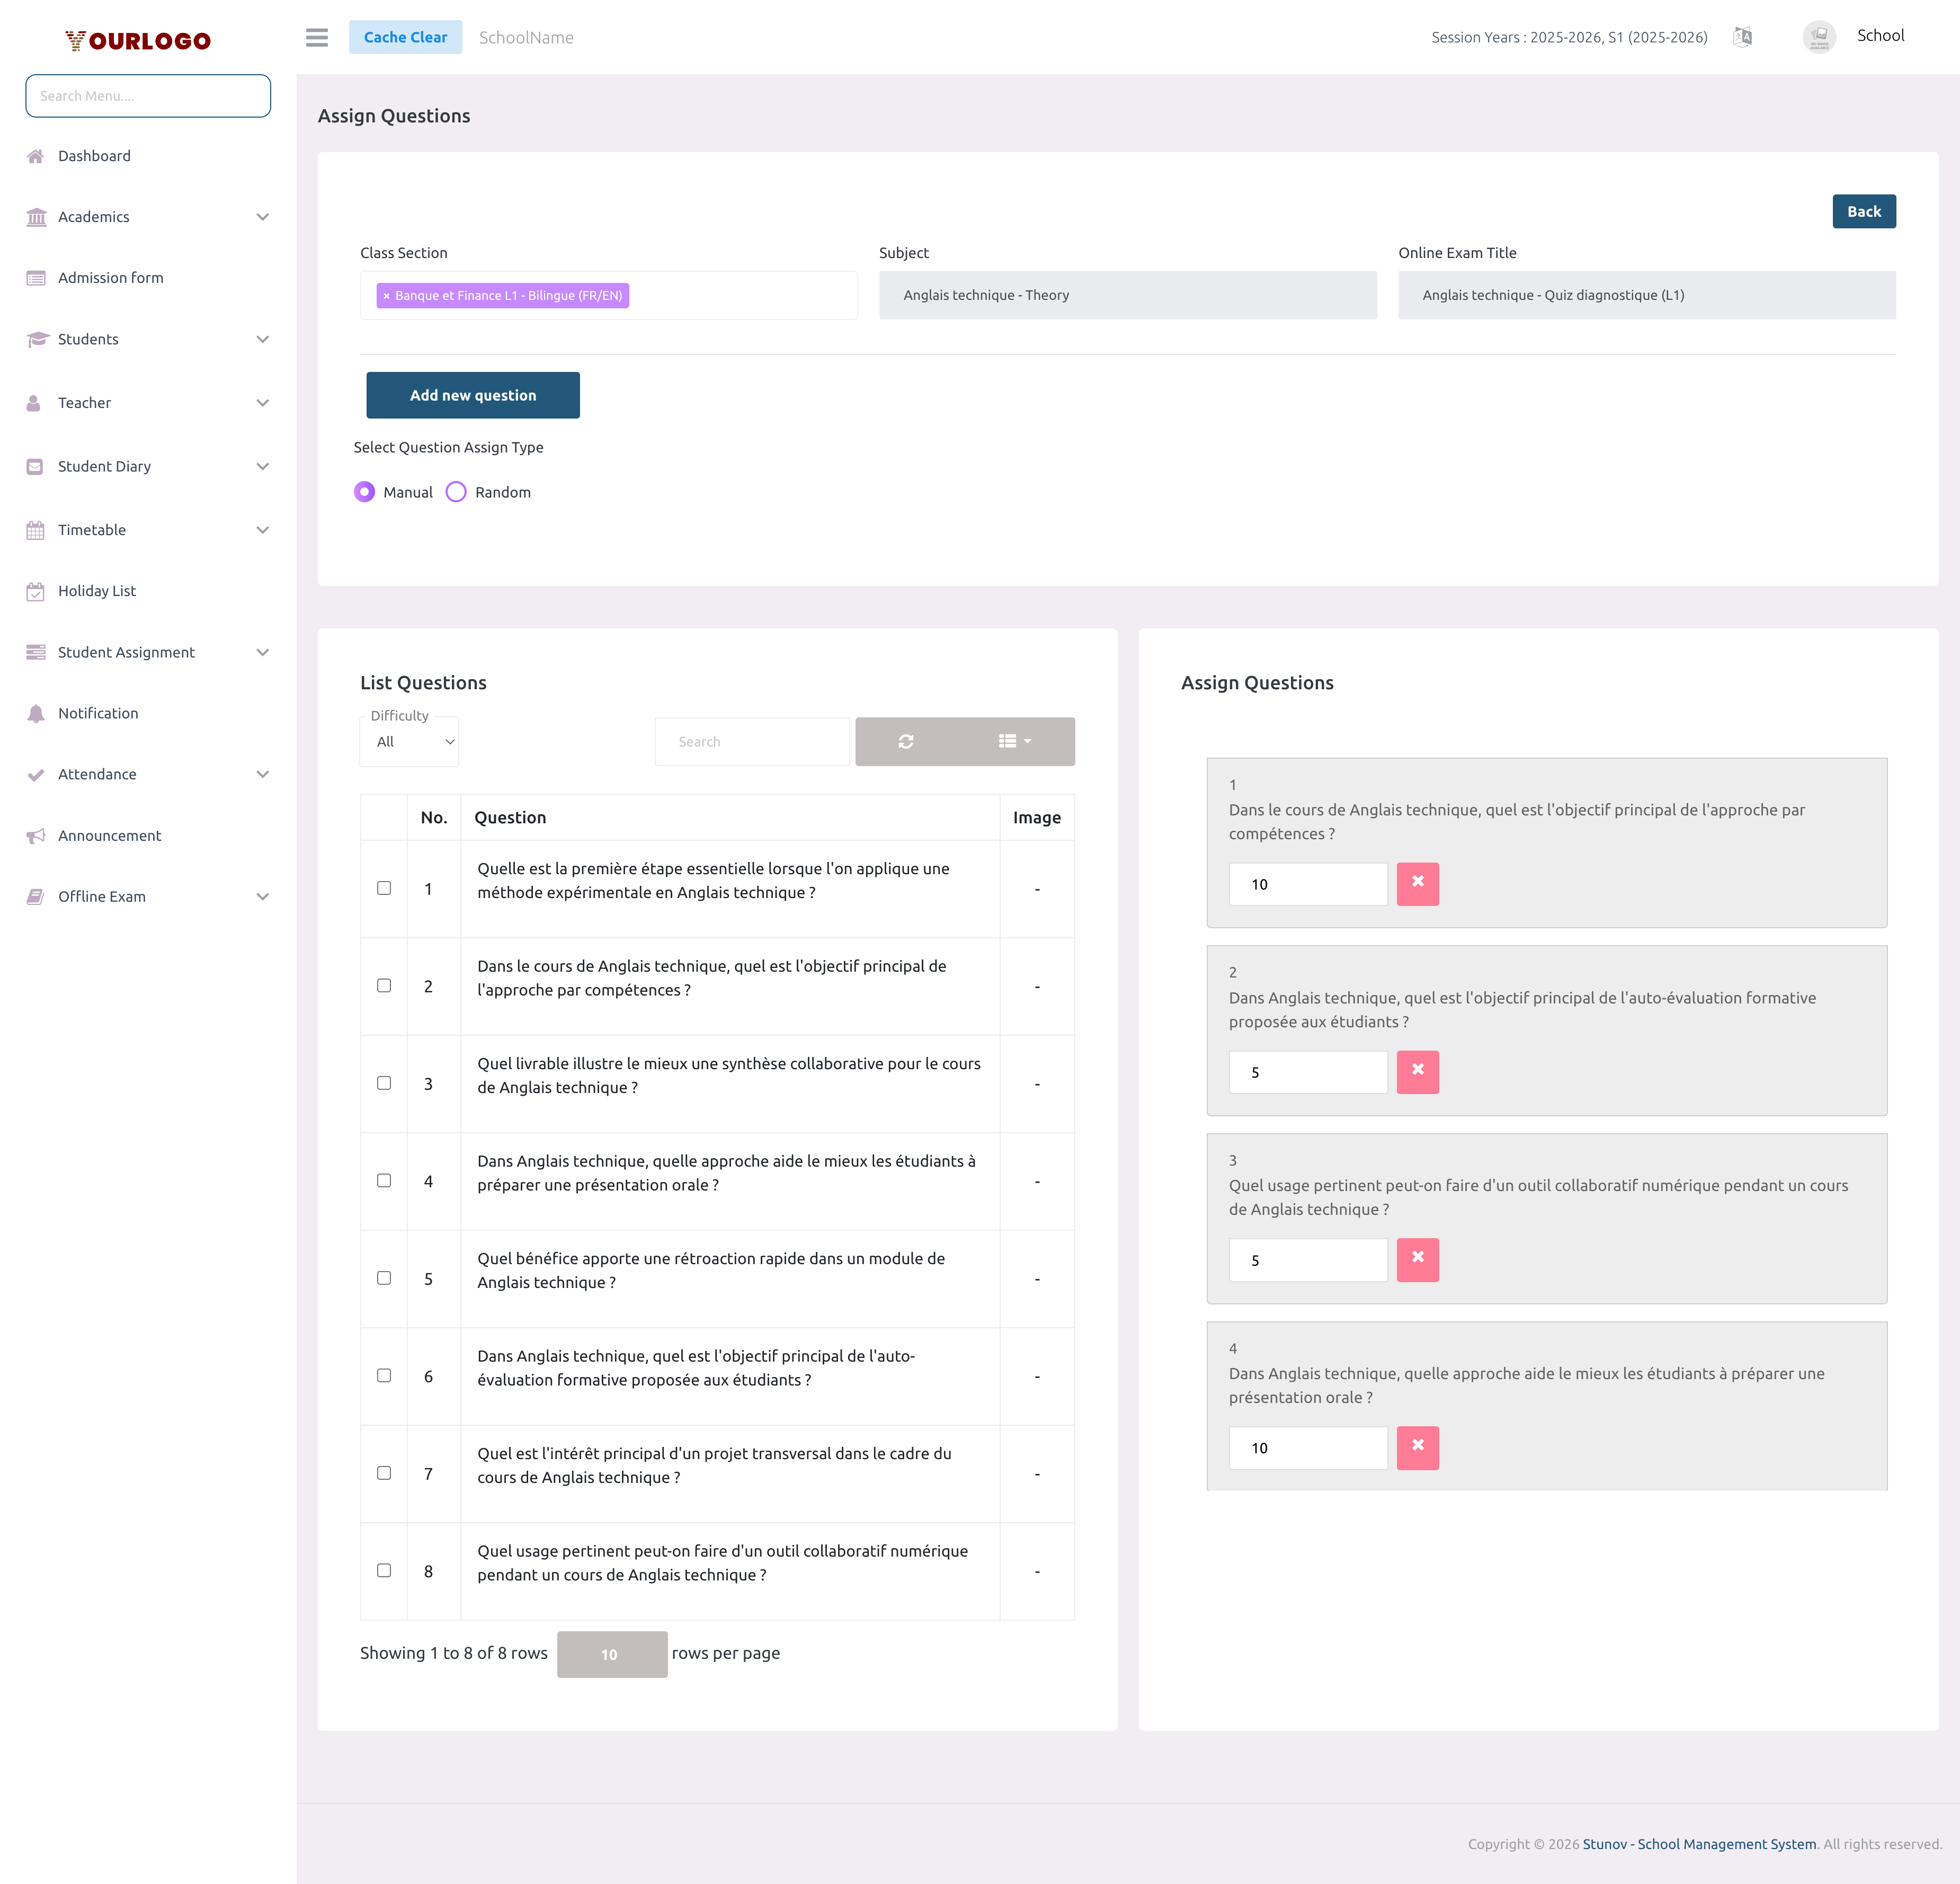
Manual Assignment
Random Assignment
For random assignment, the total marks must be evenly divisible by the total questions. For example, 100 marks with 10 questions = 10 marks each.
Inline Question Creation
You can also create a new question directly from the Add Questions page using the Add New Question toggle. This creates the question in the bank and lets you immediately assign it.
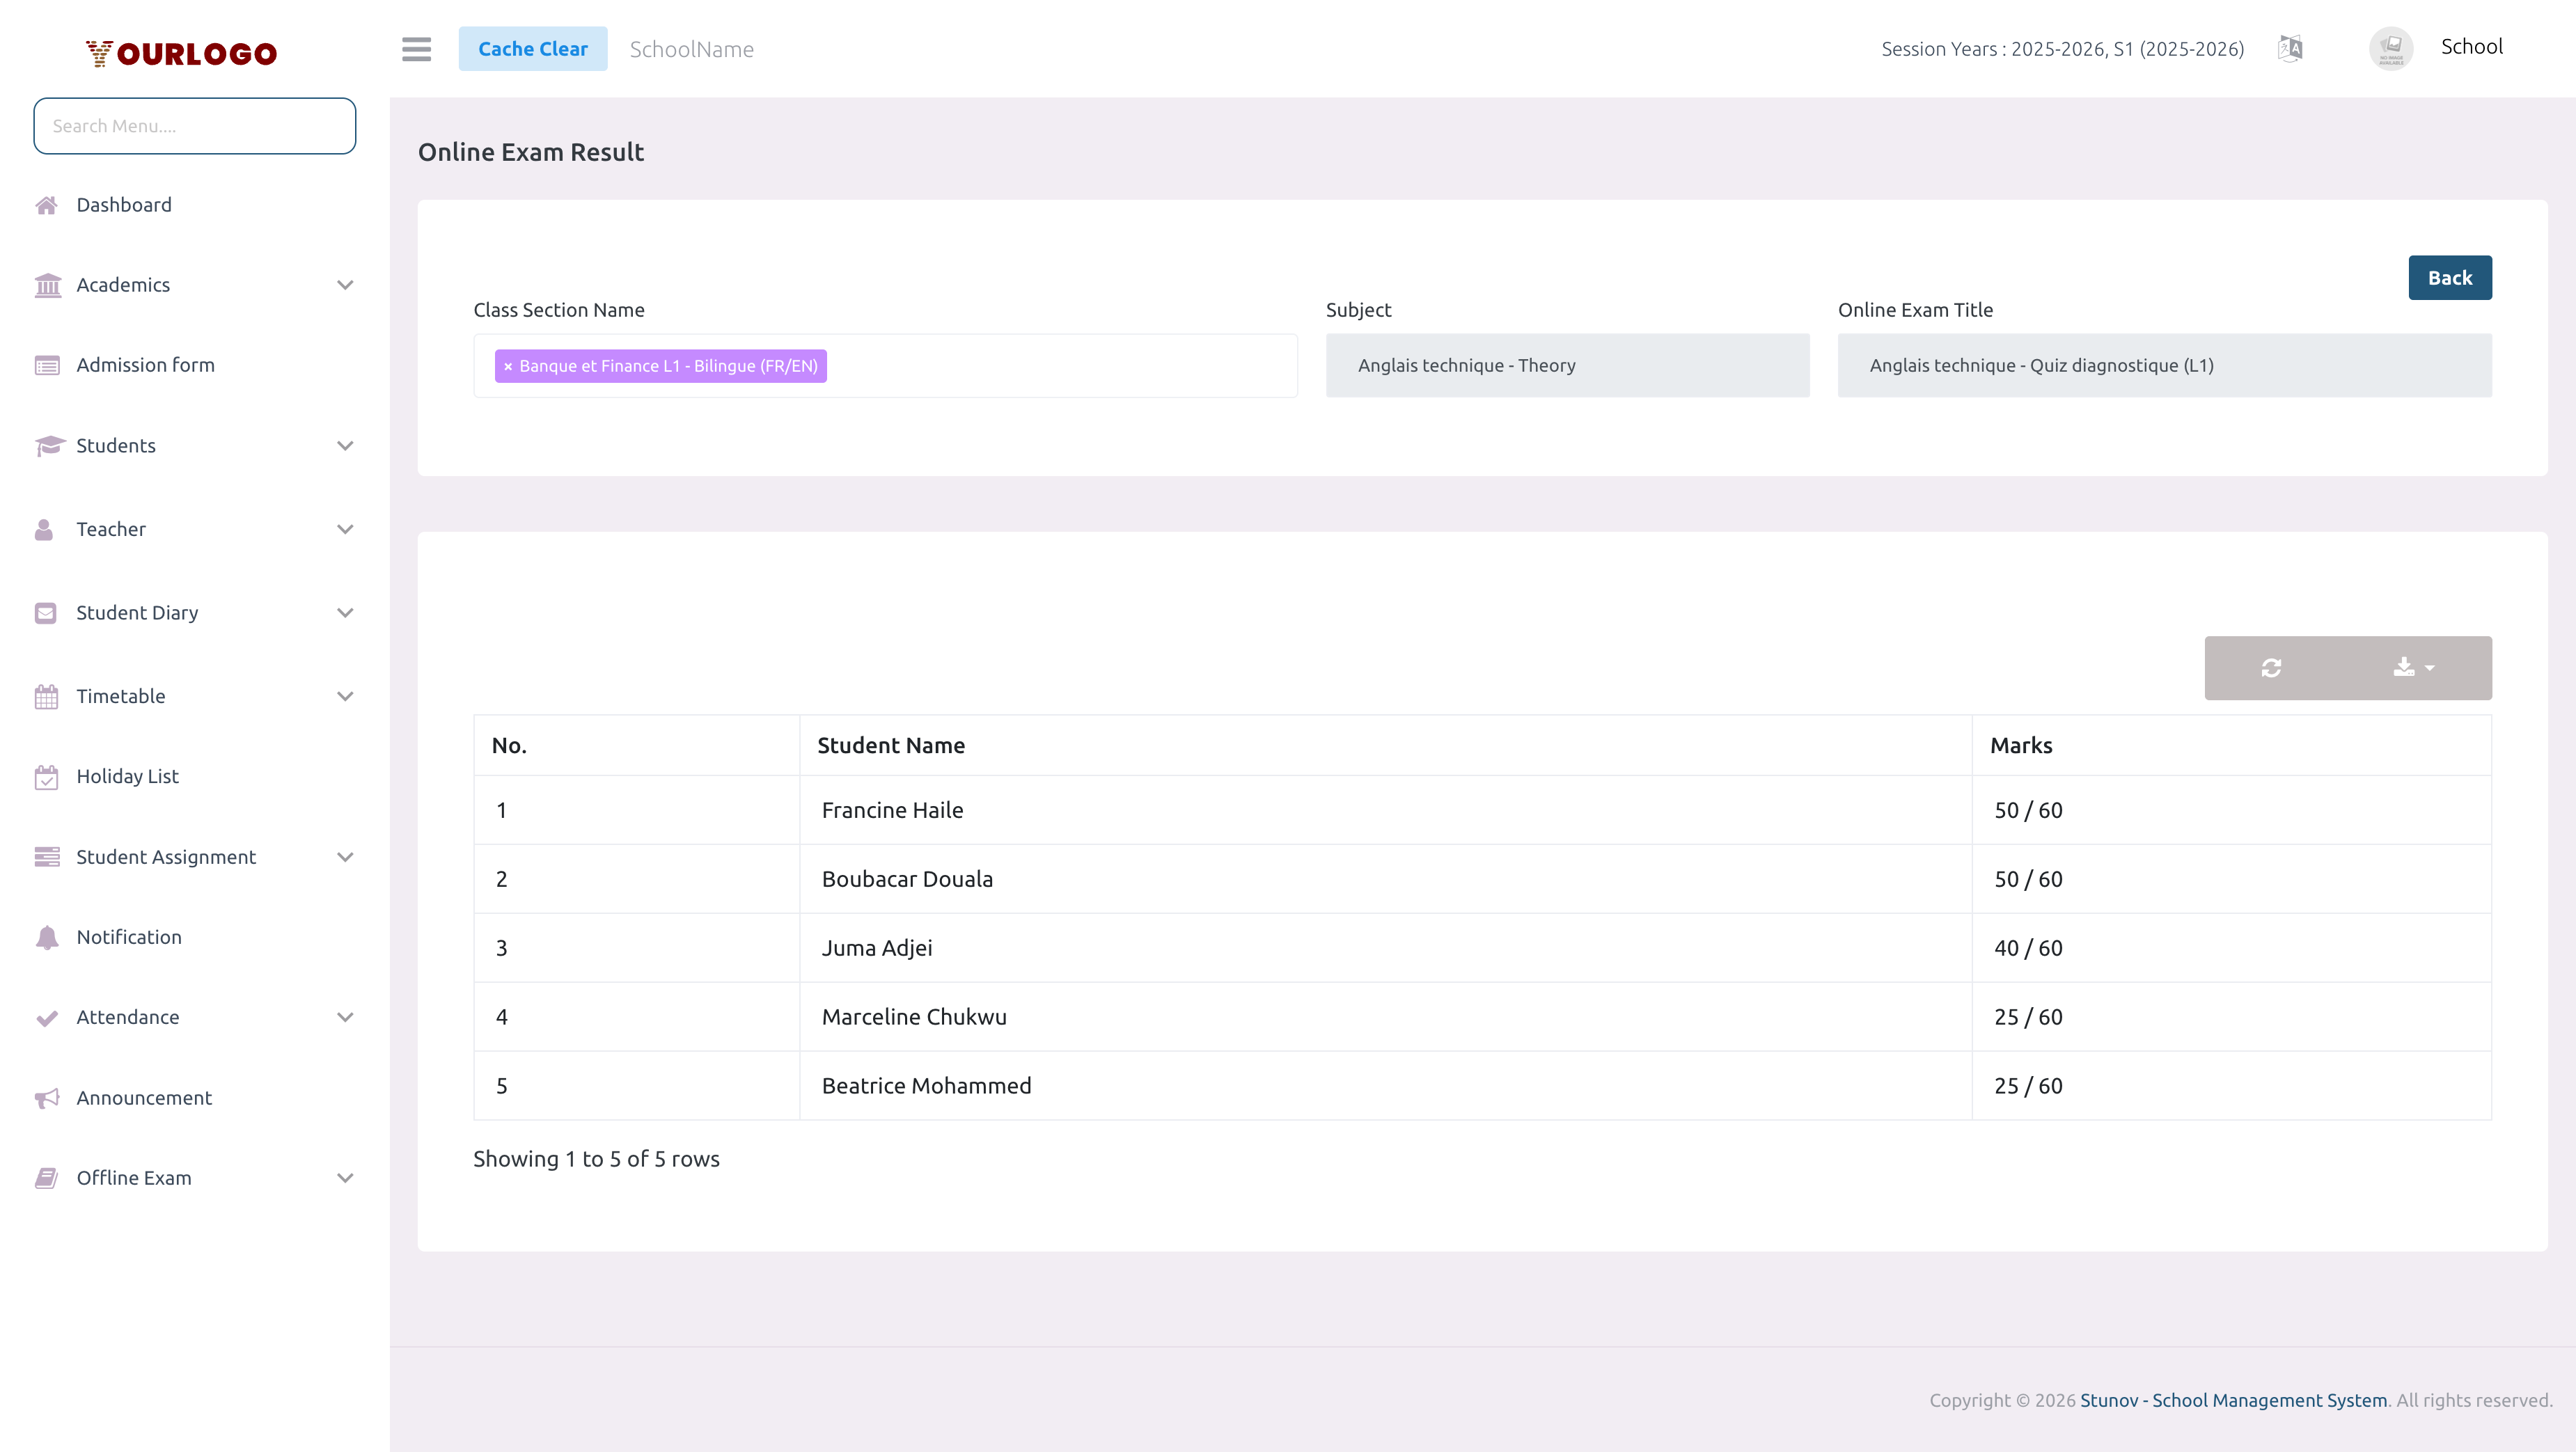
View Exam Results
Delete an Online Exam
Restore or Permanently Delete
- Switch to the Trashed tab in the exam list
- Click Restore to bring the exam back to the active list
- Click Permanent Delete to remove it forever
Deleting an exam also removes all question assignments and student result data associated with it.
Related Pages
- Manage Questions — Create and manage the question bank
- Add Bulk Questions — Import questions via CSV
- Offline Exam — Traditional paper-based exam management