
Manage Fee

Manage Fee is where you create the complete fee structure for one or more classes. Each fee configuration bundles together compulsory fees, optional fees, installment schedules, and late-payment (due) charges. This is the central page of the fees module.

Fee setup workflow
  1. Create Fee Types first (e.g., Tuition, Library, Sport)
  2. Create a fee here, assigning compulsory and optional fee types with amounts
  3. Students can then be charged and payments tracked on Student Fees
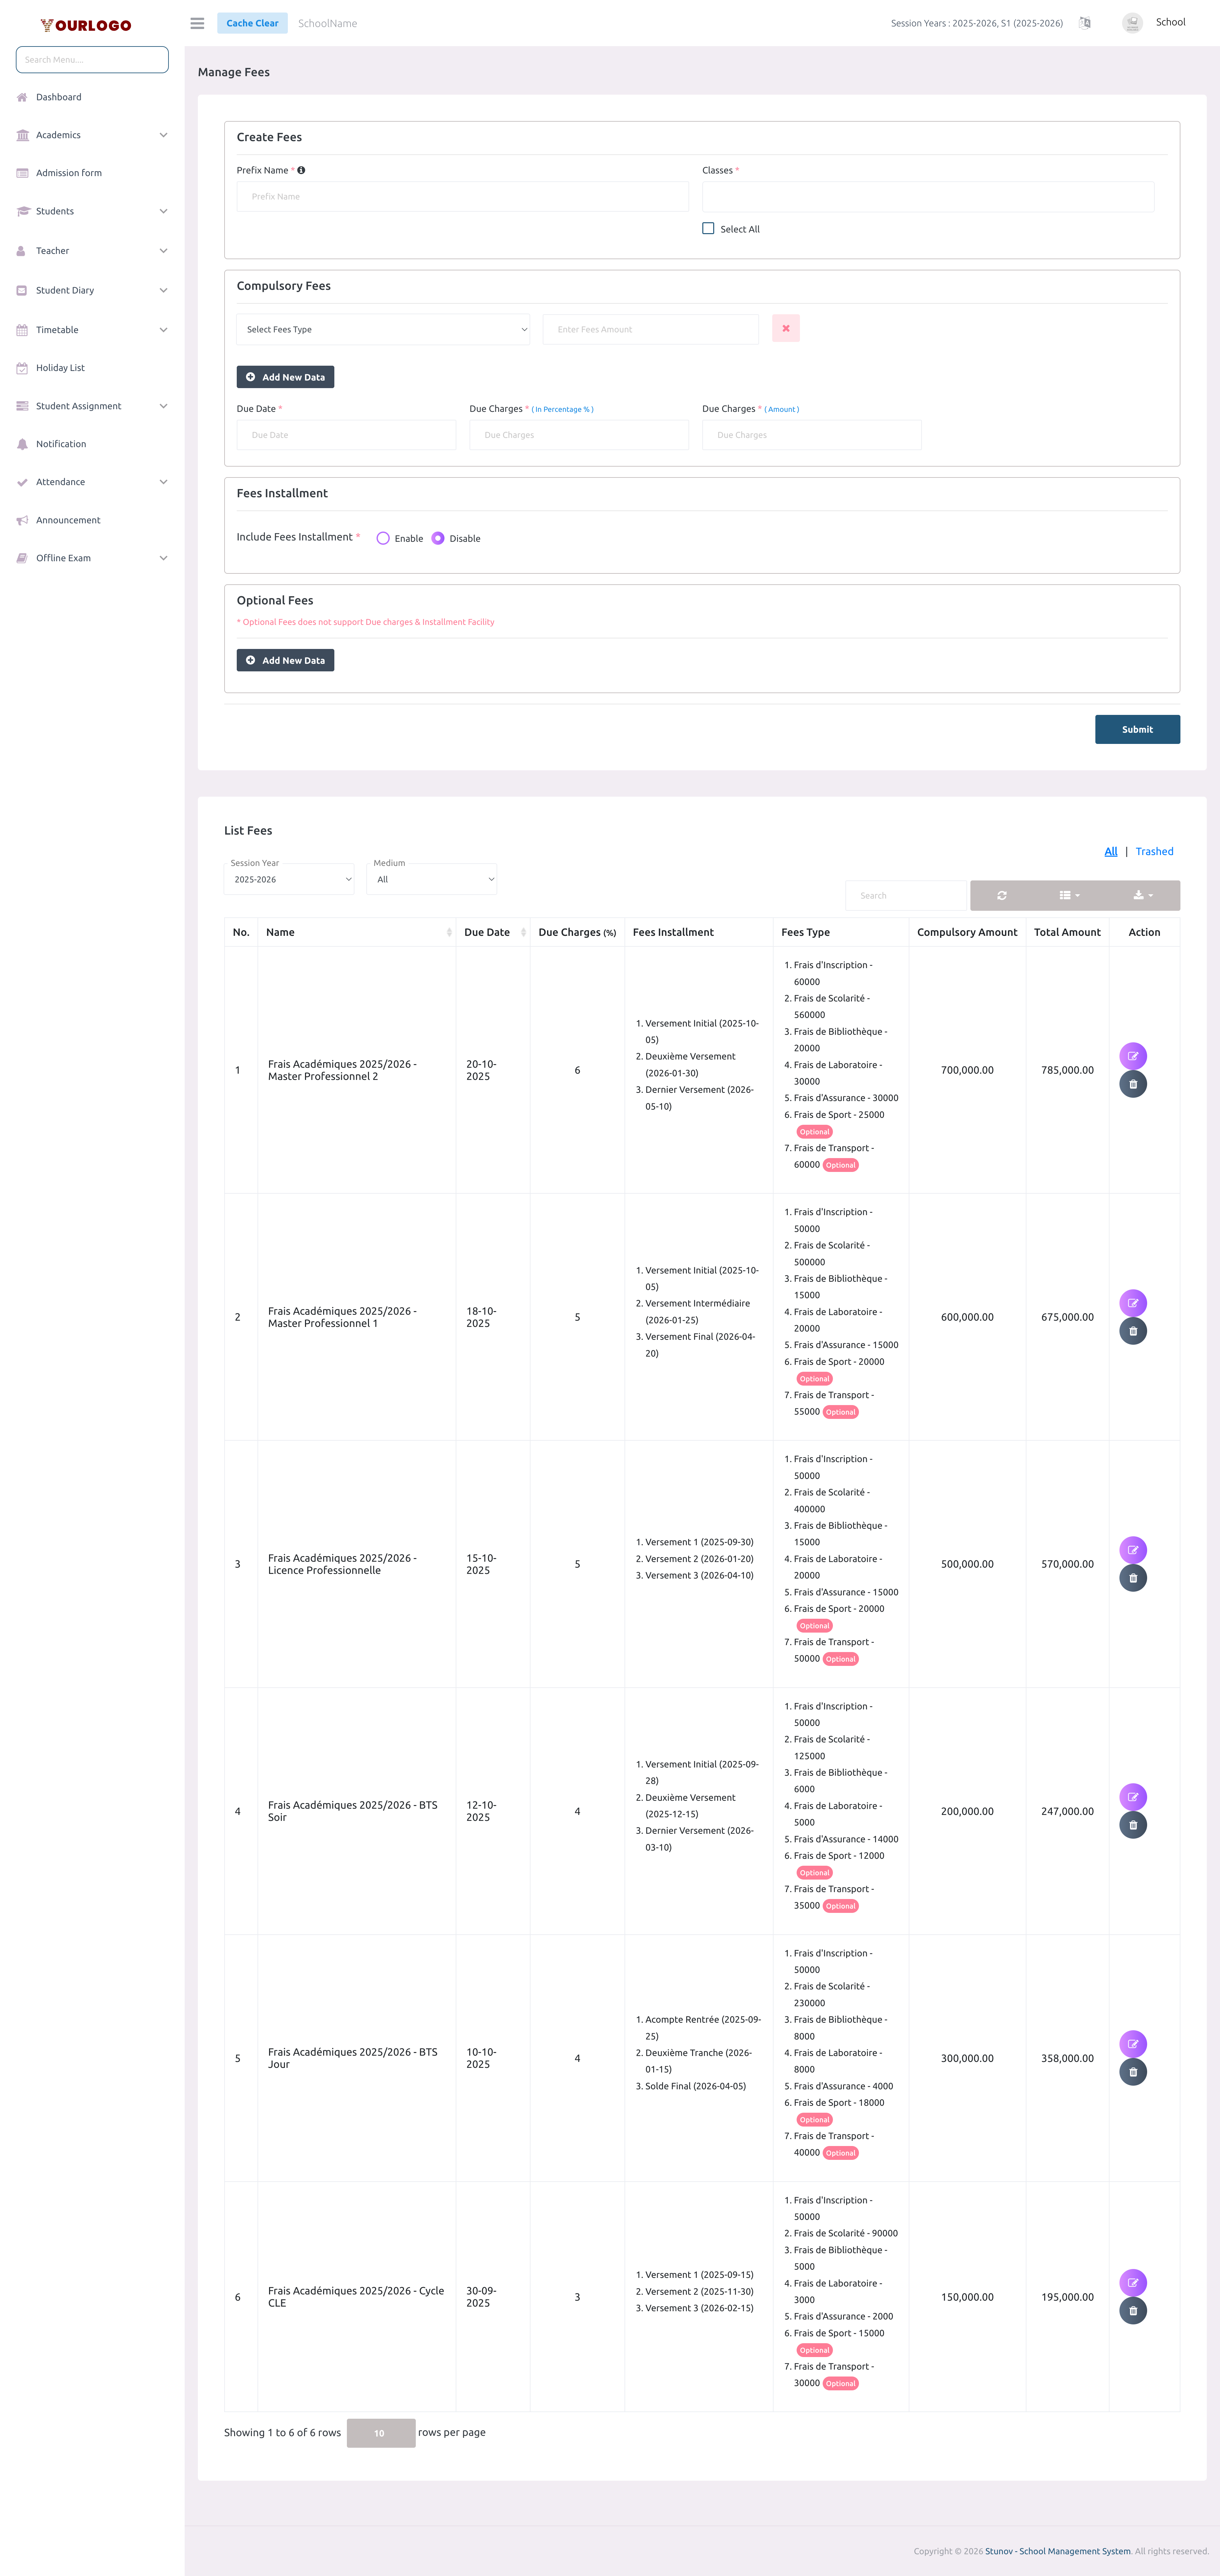
Manage Fee page showing the create form with compulsory fees, due charges, installments, and optional fees sections
Manage Fee — create form with compulsory fees, due date, installments, and optional fees sections

Create a Fee

1
Navigate to Fees → Manage Fee
From the sidebar, expand **Fees** and click **Manage Fee**. The fee management page opens.
2
Enter the Prefix Name
Type a prefix name for the fee (e.g., "Annual Fees"). This prefix is appended before the class name to form the full fee name (e.g., "Annual Fees - Class 1").
3
Select Classes
Choose one or more classes from the **Classes** dropdown. Use the **Select All** checkbox to assign this fee to every class. A separate fee record is created for each selected class.
4
Add Compulsory Fees
In the **Compulsory Fees** section, select a **Fees Type** from the dropdown and enter the **Amount** for each compulsory fee line. Click **+ Add** to add more rows. These fees are mandatory for all students in the selected classes.
5
Set Due Date and Charges
Set the **Due Date** (the payment deadline), and configure **Due Charges** — both a percentage and a fixed amount that will be applied as late fees after the due date.
6
Configure Installments (optional)
Enable the **Fees Installment** toggle to allow payment in installments. The total compulsory amount is automatically divided equally among installments. For each installment, set the **Name**, **Amount** (editable), **Due Date**, **Due Charges Type** (Fixed Amount or Percentage), and **Due Charges**. Click **+ Add** for more installments.
7
Add Optional Fees (optional)
In the **Optional Fees** section, select a **Fees Type** and enter the **Amount**. Optional fees are not mandatory — students can choose to pay them.
8
Submit
Click **Submit** to create the fee configuration. One fee record is created per selected class.
Optional fees limitation

Optional fees do not support due charges or installment facilities. They are standalone payments that students can opt into.
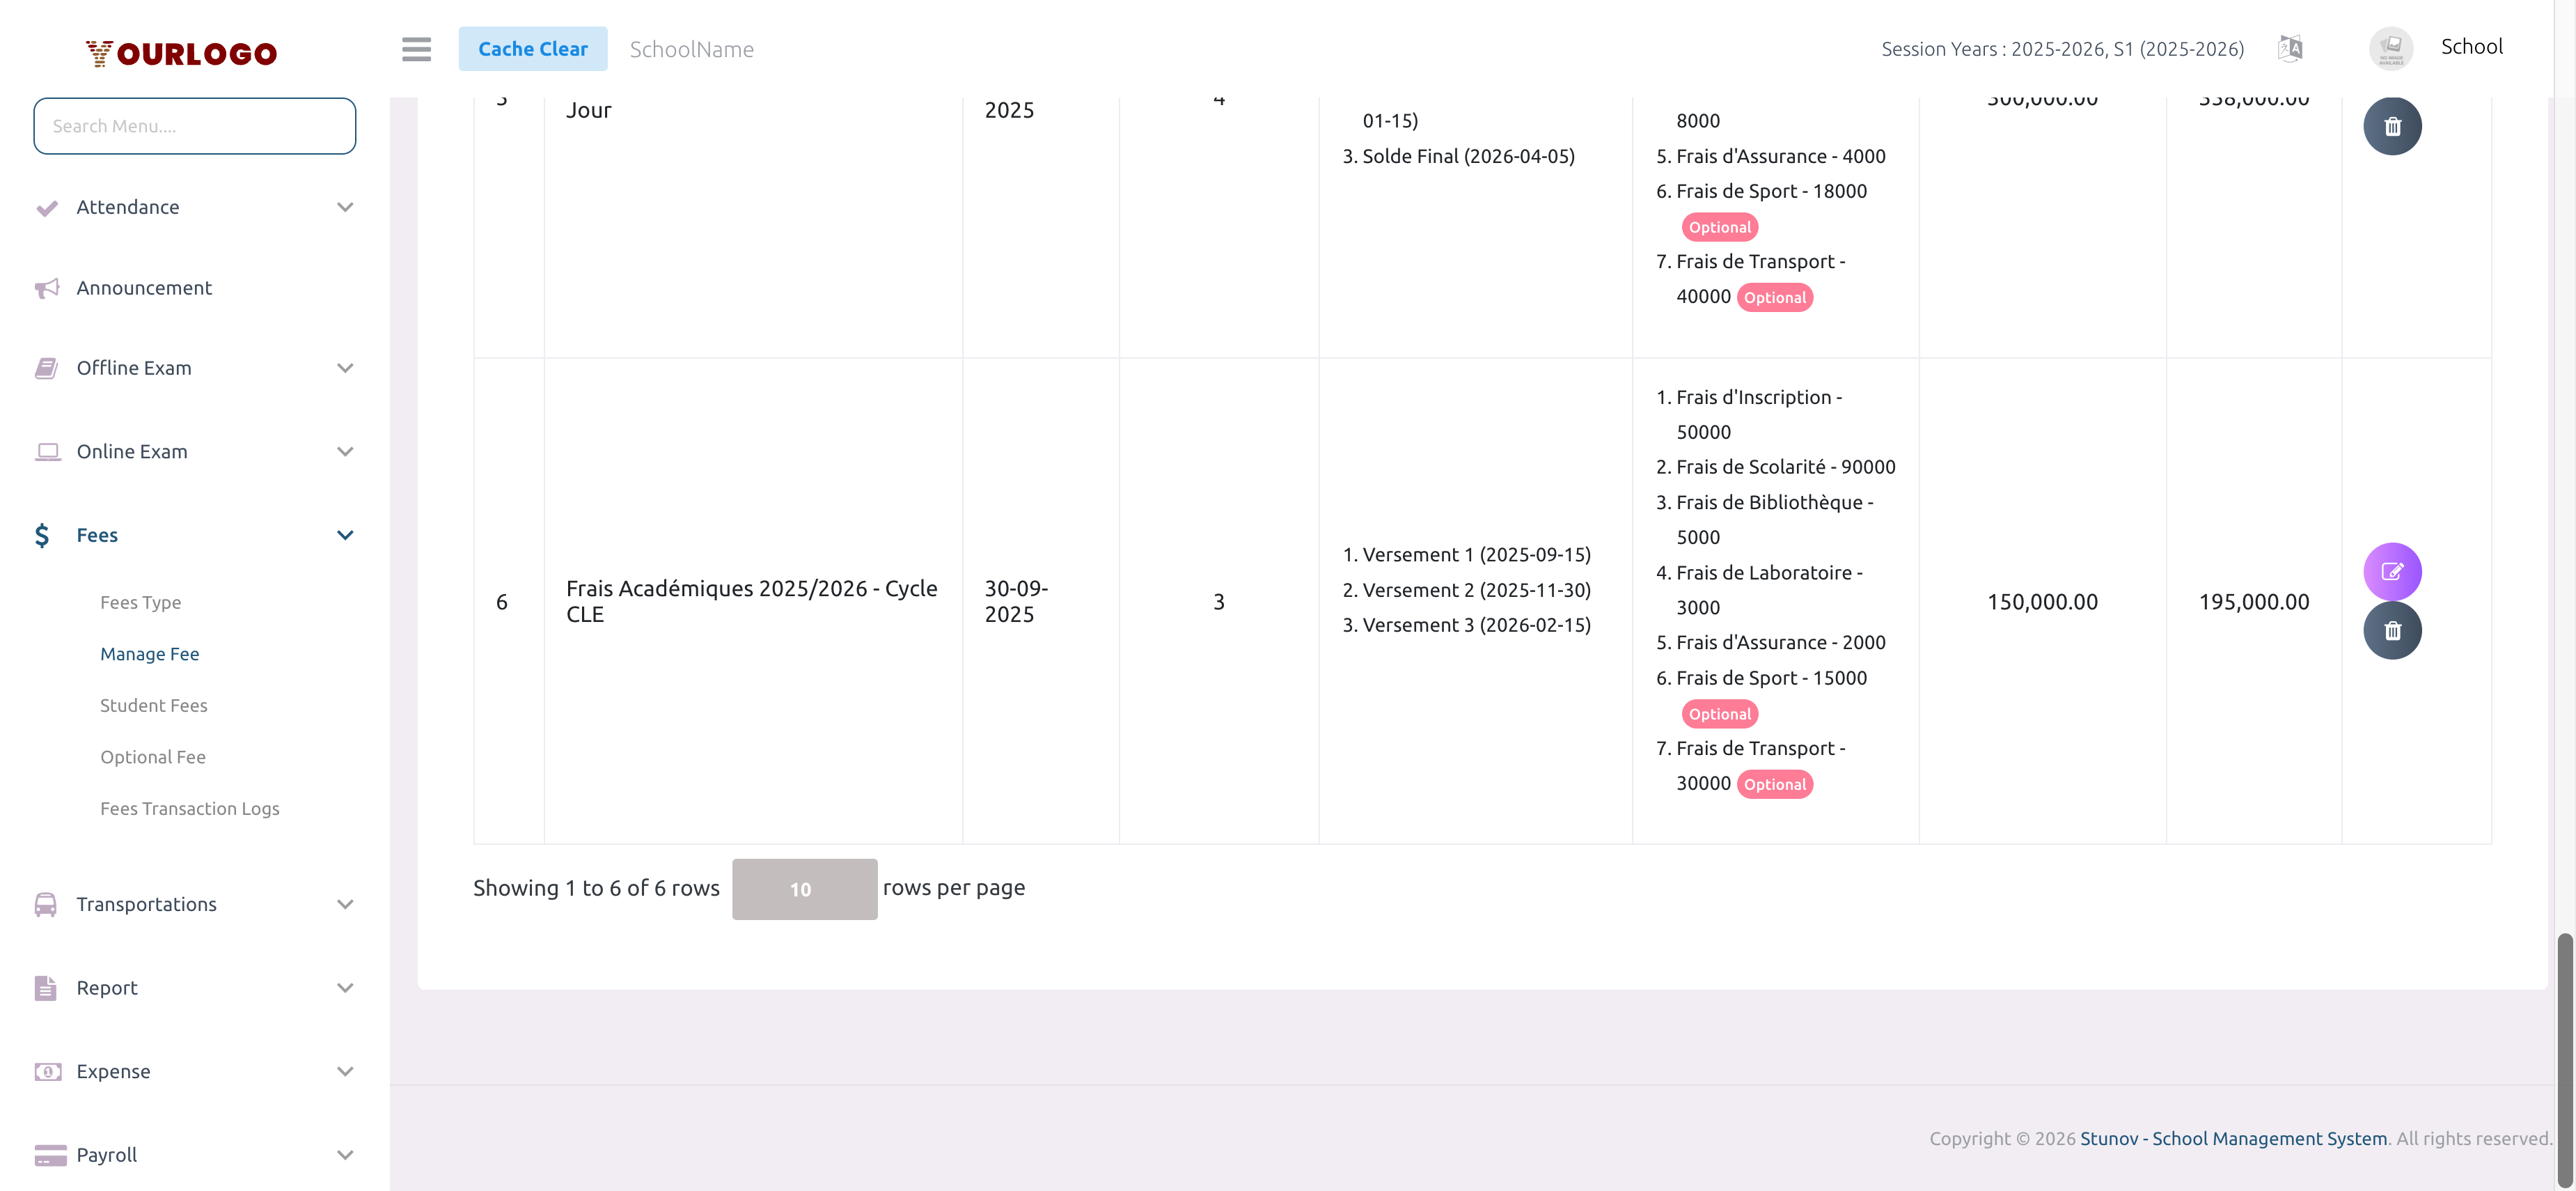

View Fees

The fee list displays all configured fees with their compulsory amount, total amount, installment details, and due dates. Use the Session Year and Medium dropdowns to filter, and the All / Trashed toggle to switch between active and deleted fee configurations.

Manage Fee list showing configured fees with amounts, installments, and due dates
List of configured fees — showing fee types, installments, compulsory and total amounts

Edit a Fee

Edit fee page showing the fee configuration form with pre-filled values
Edit Fee page — modify compulsory fees, installments, and due charges for an existing fee
1
Click the Edit button
In the Action column, click the **Edit** (pencil) icon. You are redirected to the edit page.
2
Modify the fee configuration
Update the prefix name, compulsory/optional fee amounts, installment schedule, or due charges. Note: the class cannot be changed after creation.
3
Save changes
Click **Submit** to save the updated fee configuration.
Class is locked on edit

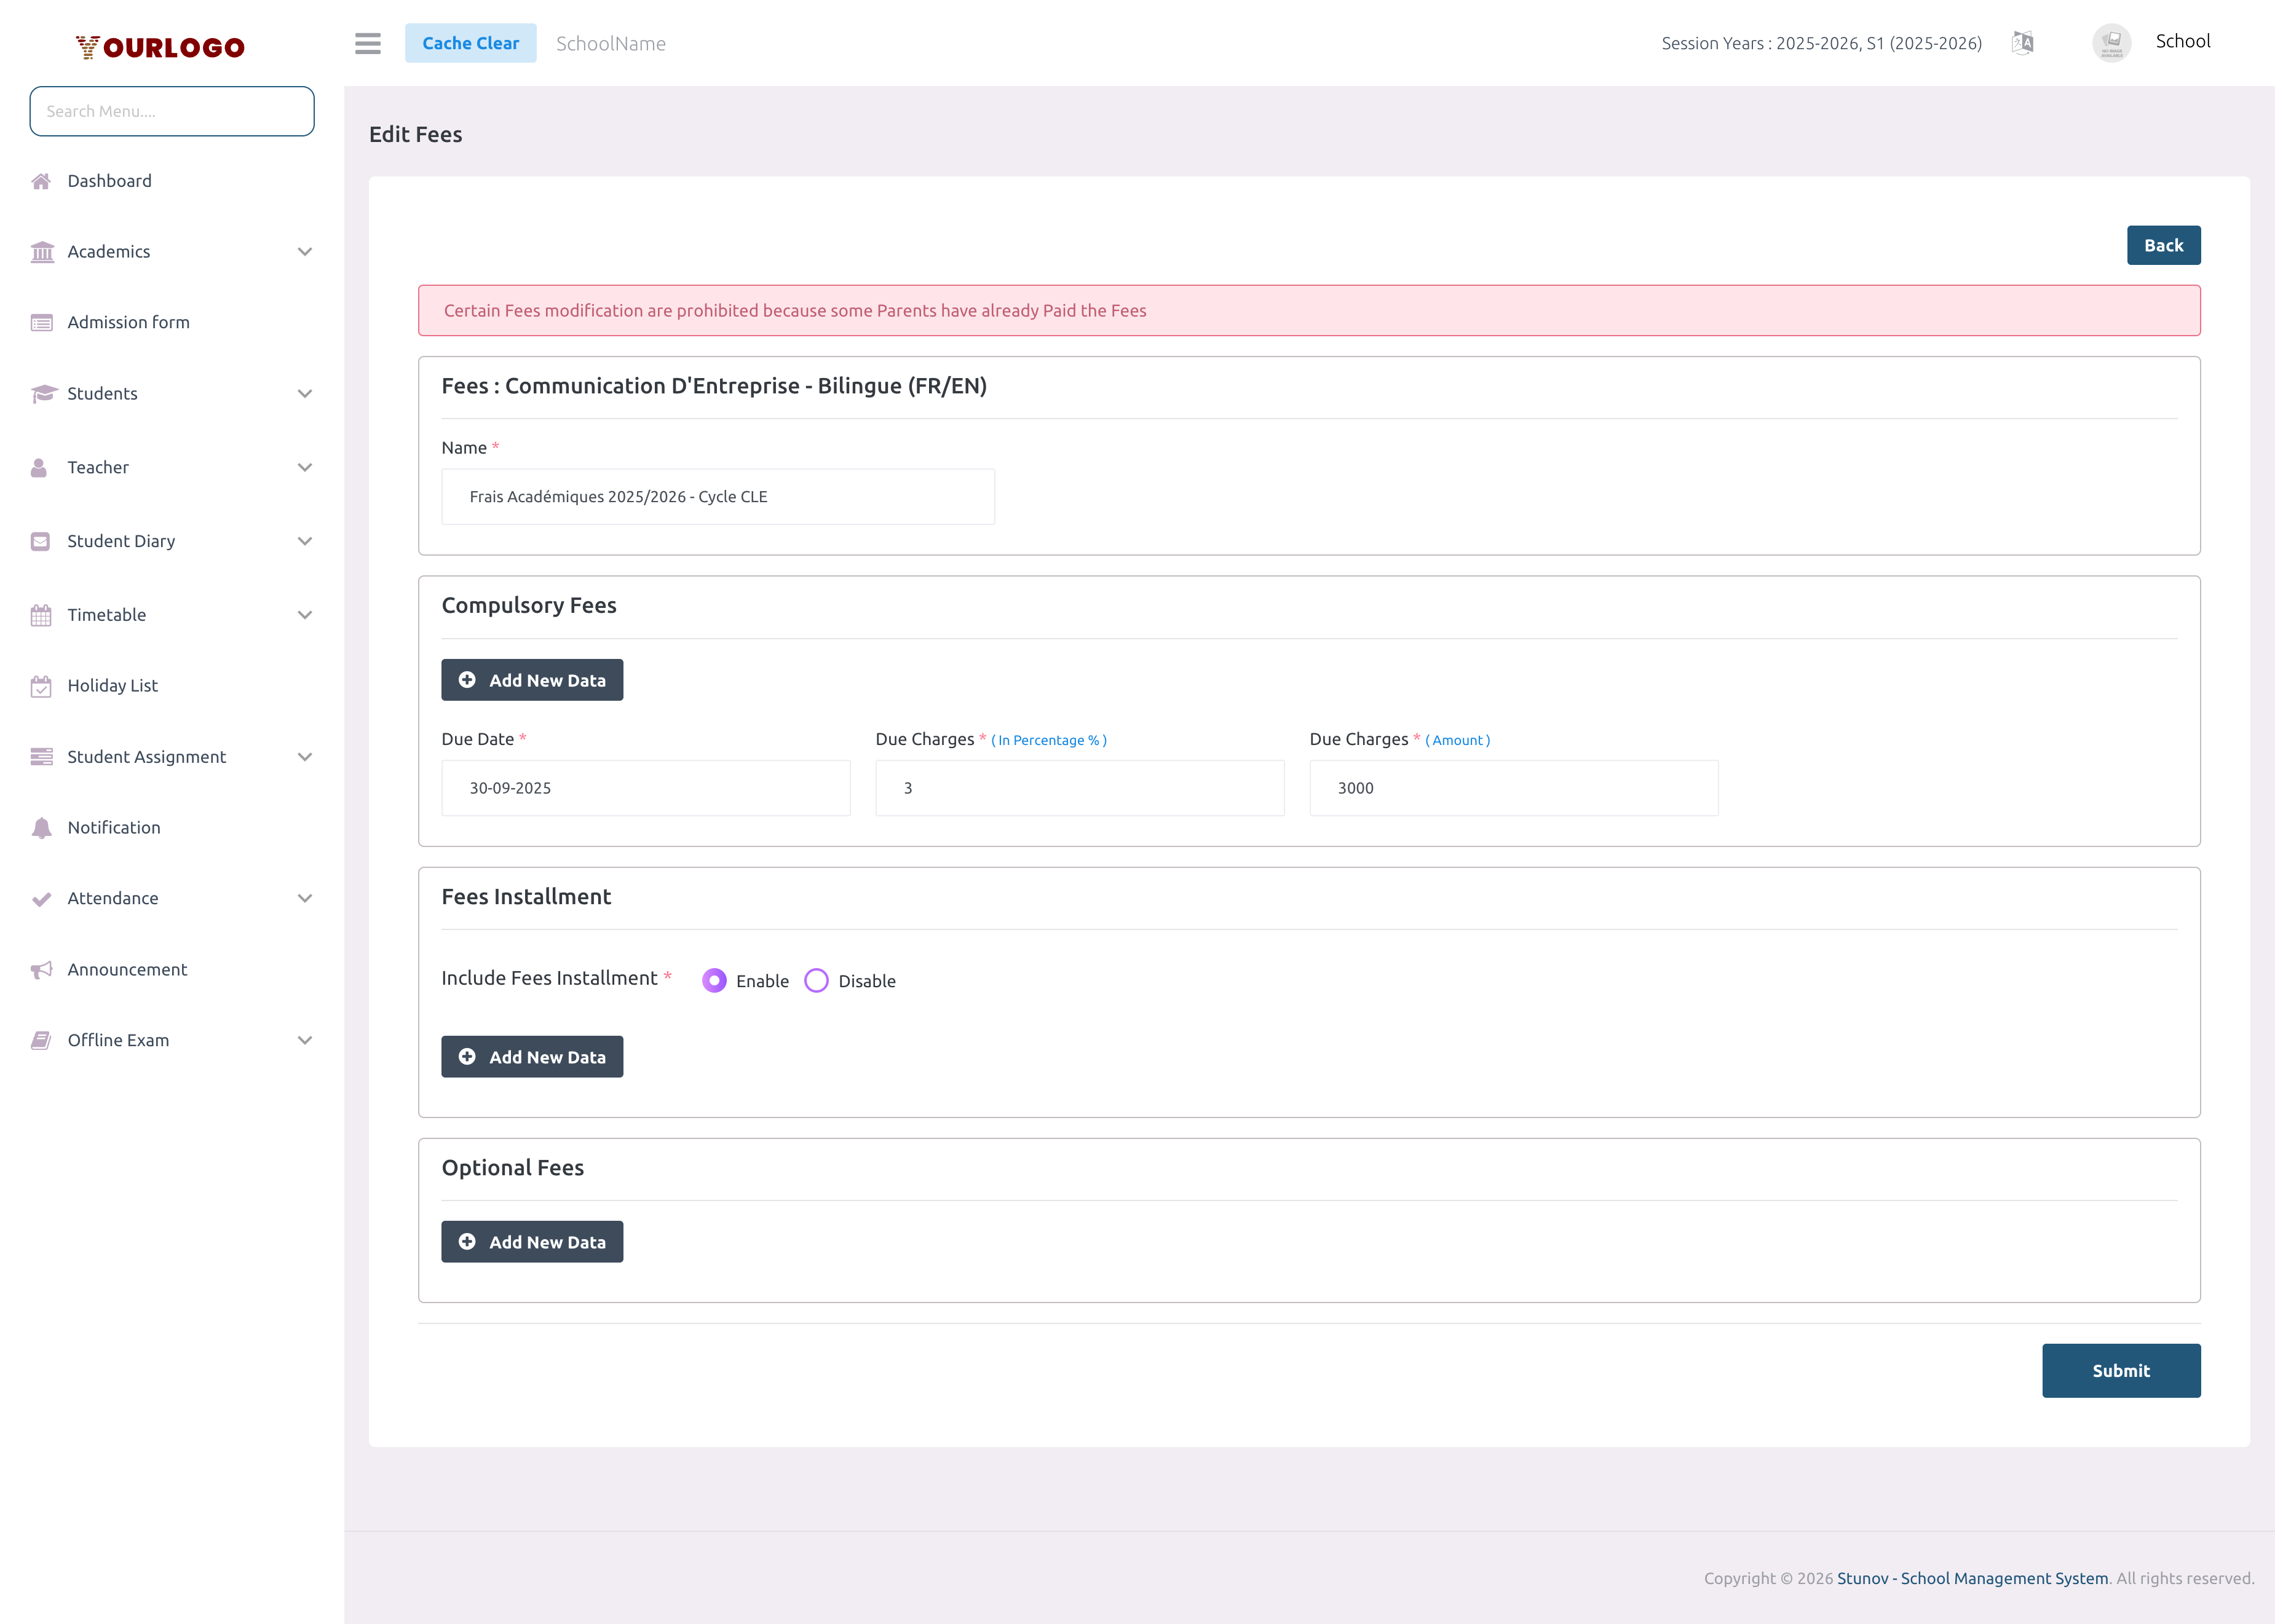
The assigned class cannot be changed after a fee is created. To assign the same fee structure to a different class, create a new fee configuration.


Delete a Fee

1
Click the Delete button
In the Action column, click the **Delete** (trash) icon next to the fee.
2
Confirm deletion
A confirmation dialog appears. Click **Confirm** to soft-delete the fee.

Restore a Deleted Fee

  1. Switch to the Trashed tab in the fee list
  2. Click Restore to recover the fee, or Force Delete to permanently remove it