Create Lesson
A Lesson groups teaching content under a specific subject for one or more class sections. As a teacher, you create lessons to structure your curriculum, then add Topics within each lesson for detailed content delivery. Students see your lessons and topics in the mobile app.
Subject → Lesson → Topic — Your School Admin creates Subjects and Class Sections (under Academics). You then create Lessons here for your assigned subjects, and finally add Topics to each lesson.
The Lesson Management feature must be enabled in your school's subscription for the "Subject Lesson" menu to appear. Contact your School Admin or Super Admin if you don't see it in the sidebar.
Overview
The Lesson page combines a create form at the top and a list table below it. You can create, view, edit, and delete lessons all from this single page.
Create a Lesson
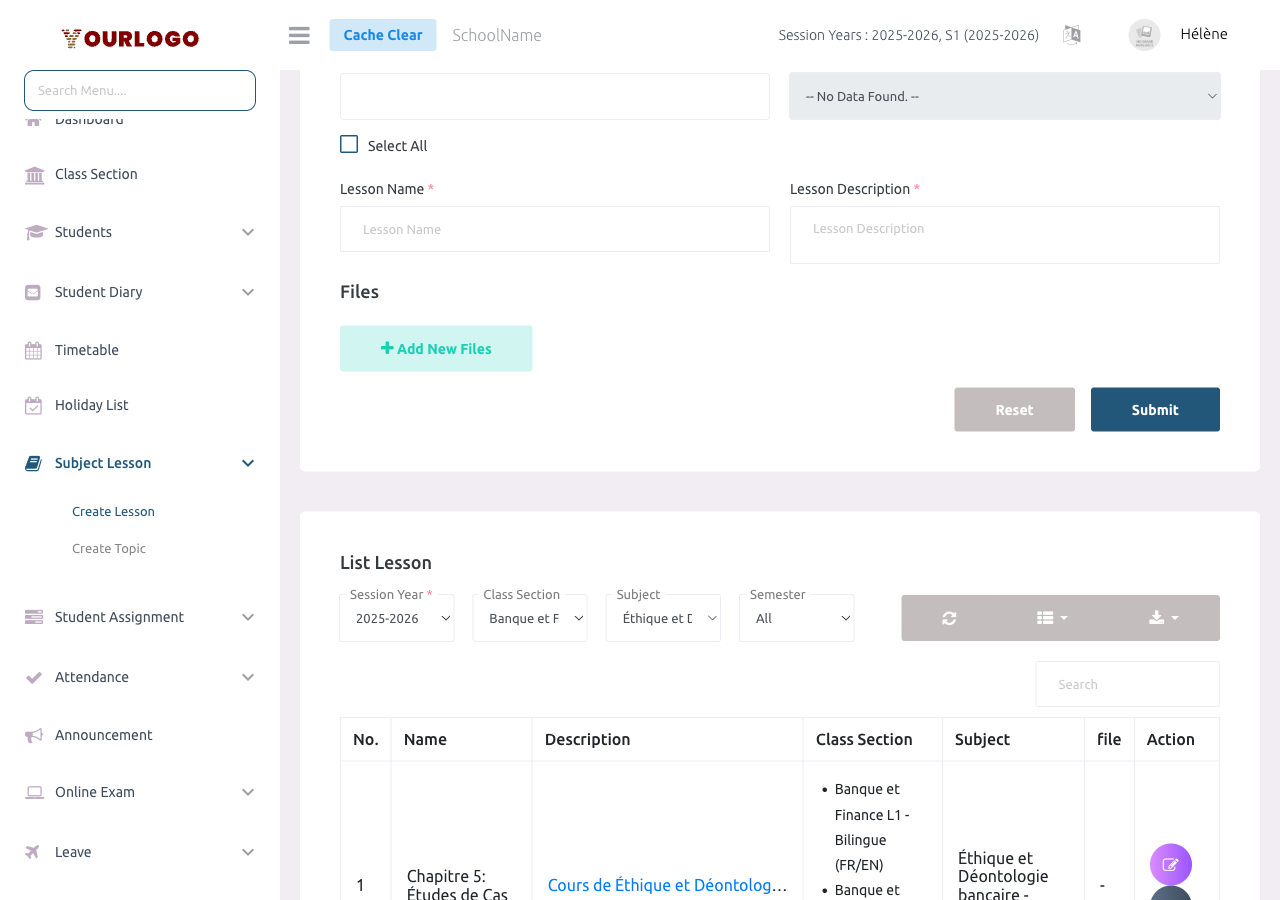
Form Fields
| Field | Type | Required | Description |
|---|---|---|---|
| Class Section | Multi-select dropdown | Required | One or more class sections the lesson is assigned to. Includes a "Select All" checkbox. Only shows class sections assigned to you. |
| Subject | Dropdown | Required | The subject this lesson belongs to. Disabled until a class section is selected. Only shows your assigned subjects for the selected sections. |
| Lesson Name | Text | Required | The name of the lesson (max 512 characters). Visible to students in the mobile app. |
| Lesson Description | Textarea | Required | A description of the lesson content (max 1024 characters). |
File Attachment Fields
Each file attachment row supports one of four types:
| Field | Type | Required | Description |
|---|---|---|---|
| Type | Dropdown | Required | The type of attachment: **File Upload** (documents, PDFs, images), **YouTube Link**, **Video Upload**, or **Other Link**. |
| File Name | Text | Required | A descriptive name for the attachment (shown to students). |
| Thumbnail | Image upload | Optional | A thumbnail image for YouTube links, video uploads, and other links. Required for YouTube Link, Video Upload, and Other Link types. |
| File | File upload | Optional | The actual file to upload. Required for File Upload and Video Upload types. Supported formats depend on system settings. |
| Link | URL | Optional | The URL for YouTube links or other links. Required for YouTube Link and Other Link types. |
File uploads are subject to system-configured maximum size limits. If your upload fails, check with your School Admin about the allowed file size and formats in System Settings → General Settings.
View Lessons
The lesson list table appears below the create form. To avoid long loading times, select a Class Section and Subject in the filter bar first.
Select a Class Section and Subject right away so the list loads only the relevant lessons instead of everything.
Filter Options
| Filter | Description |
|---|---|
| Session Year | Filter lessons by academic session year (required) |
| Class Section | Filter by class section (recommended — select to reduce load time) |
| Subject | Filter by subject (recommended — works with class section filter) |
| Semester | Filter by semester (only appears if semesters are enabled for your school) |
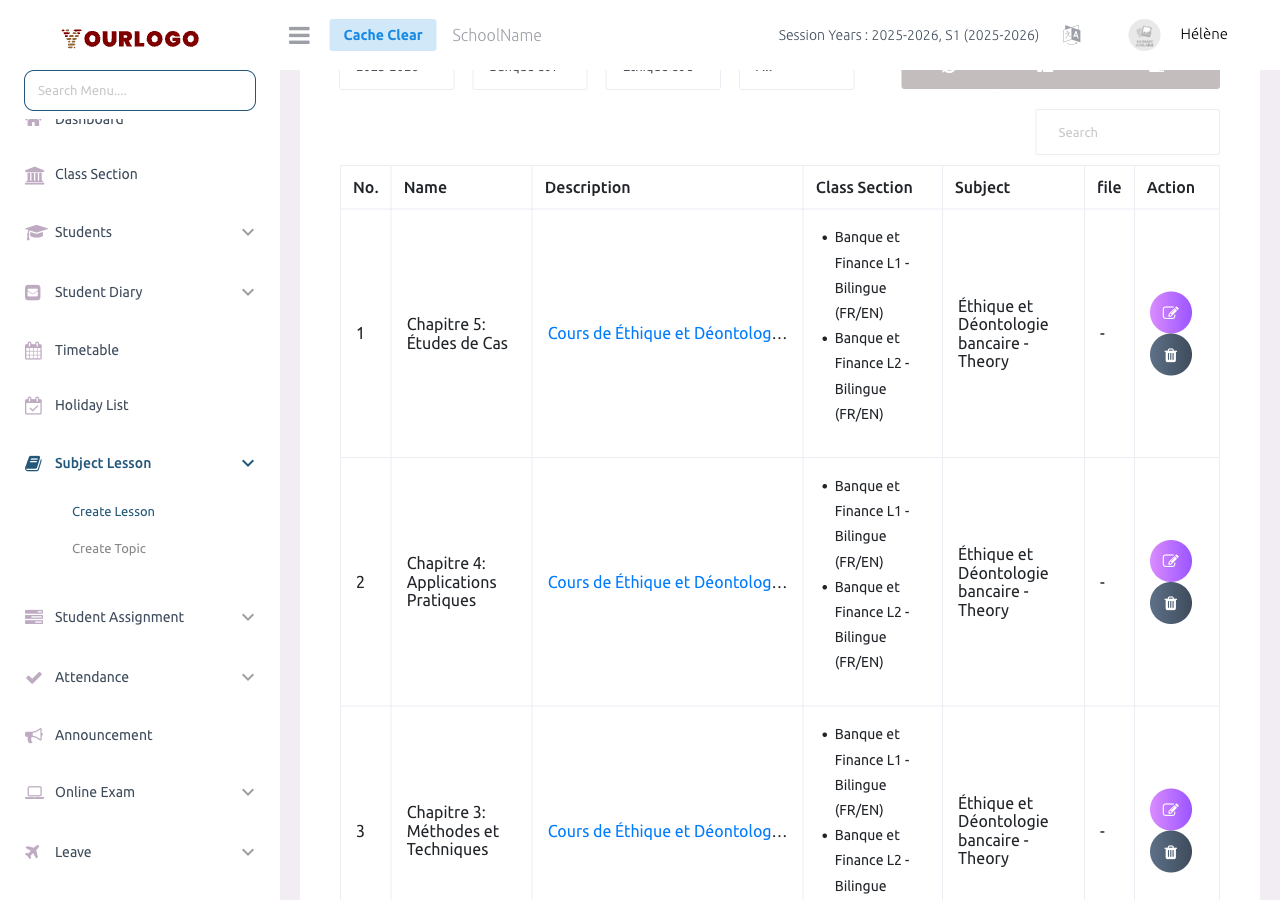
Table Columns
| Column | Description |
|---|---|
| No. | Row number |
| Name | Lesson name |
| Description | Lesson description (click to expand) |
| Class Section | Assigned class section(s) with medium |
| Subject | Subject name with type (Theory/Practical) |
| File | Attached files (click to view/download), or "-" if none |
| Action | Edit (pencil icon) and Delete (trash icon) buttons |
Additional toolbar features:
- Search bar — find lessons by name or description
- Refresh button — reload the table data
- Columns button — show/hide table columns
- Export button — download the list as a file
Edit a Lesson
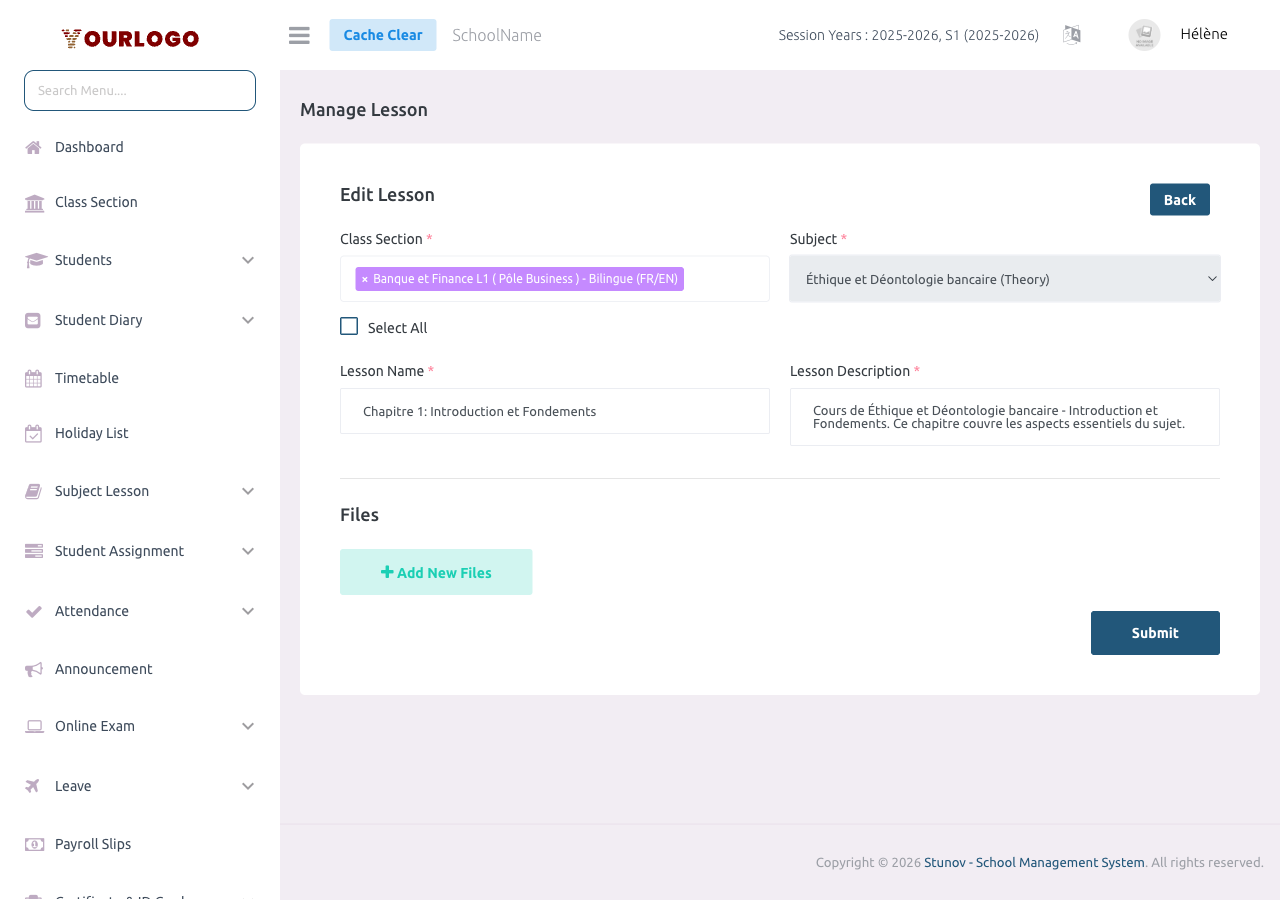
After a lesson is created, its Class Section and Subject assignments cannot be changed. If you need to reassign a lesson, delete it and create a new one with the correct assignments.
Delete a Lesson
When you delete a lesson, all topics within that lesson are also deleted. Make sure you no longer need the topics before deleting the parent lesson.
Restore a Deleted Lesson
Deleted lessons are soft-deleted and can be recovered:
- In the lesson list, switch to the Trash view
- Click Restore next to the deleted lesson
- The lesson and its topics return to the active list
To permanently remove a lesson, use Force Delete from the Trash view.
Staff App (Teacher View)
You can also manage lessons from the Stunov+ Staff App on your mobile device. The app provides the same functionality: create lessons, attach files, and manage content per subject.
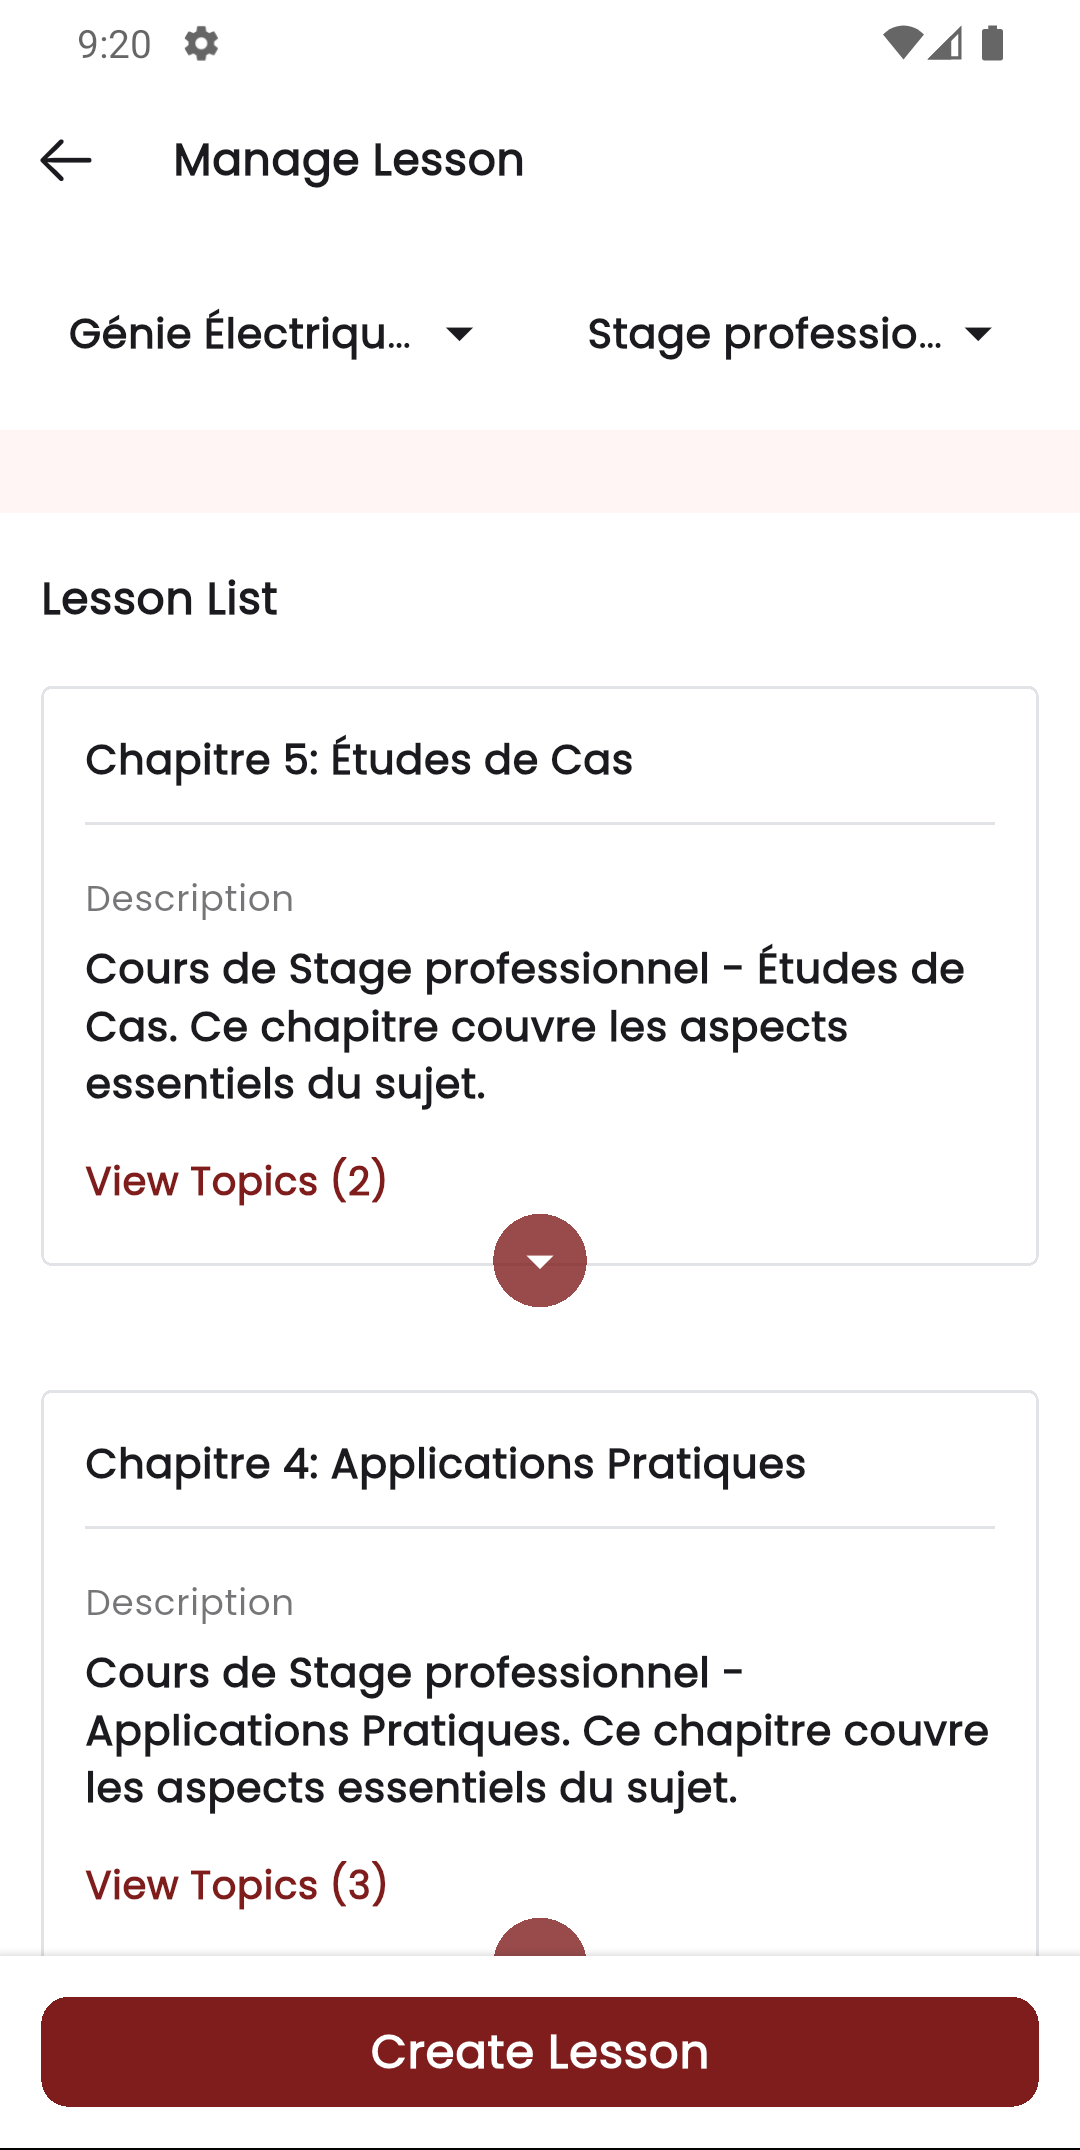
Mobile Workflow
- Open the Staff app and navigate to Manage Lesson
- Select the class section and subject
- Tap + Add Lesson to create a new lesson
- Fill in the lesson name, description, and optionally attach files
- Tap Submit to save

Permissions Required
| Action | Permission | Role |
|---|---|---|
| View lessons | lesson-list | Teacher |
| Create lesson | lesson-create | Teacher |
| Edit lesson | lesson-edit | Teacher |
| Delete lesson | lesson-delete | Teacher |
Lesson management is a teacher-only feature. School Admins configure the school structure (subjects, class sections, teacher assignments) but do not create or manage individual lessons.
Related Pages
- Create Topic — Add topics within lessons for detailed content
- Subject — Manage subjects that lessons belong to
- Class Section Teachers — Assign teachers to class sections
- Student Assignment — Create assignments linked to subjects