Fees & Payments
The Fees area shows what a child owes, breaks each fee down line by line, and lets you pay online through your school's payment gateways. Compulsory and optional fees are handled separately, larger fees can be paid in installments, and every successful payment produces a receipt you can save or share.
The numbered screens below walk through this page — each section references them by number.
For parents, fees apply to the child you opened from My Children. A student sees their own fees.
The fee list
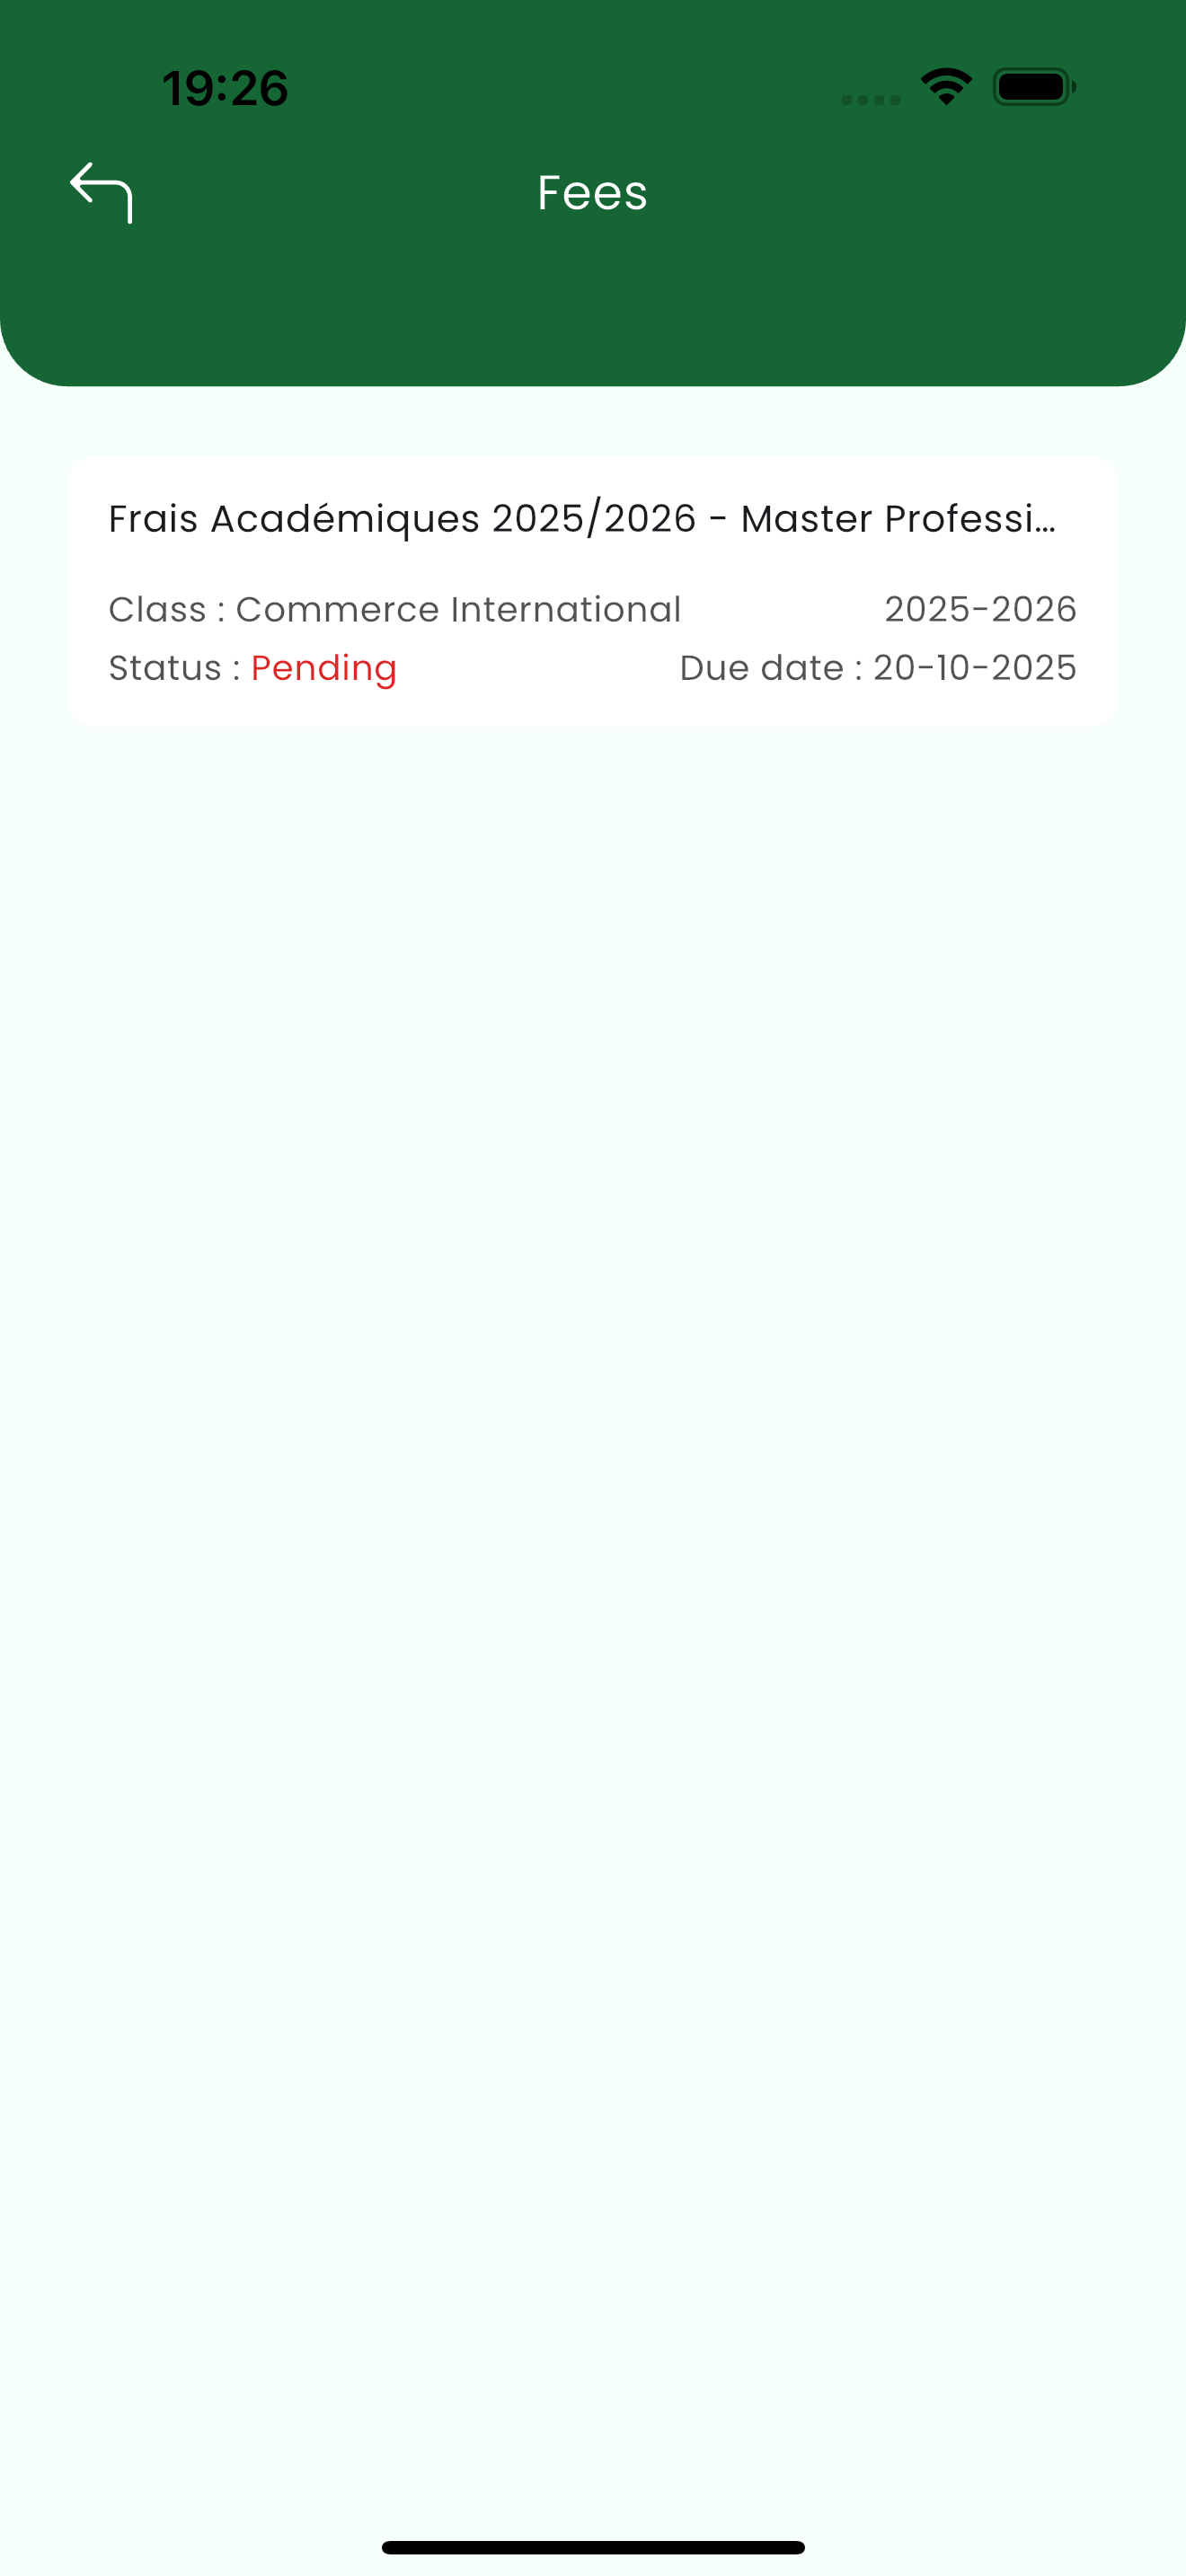
The Fees screen lists each fee assigned to the child — its title, class, session year, status (e.g. Pending or Paid) and due date. Tap a fee to open its full breakdown. (see 1)
Fee details
A fee opens into two tabs: Compulsory and Optional.
Compulsory fees
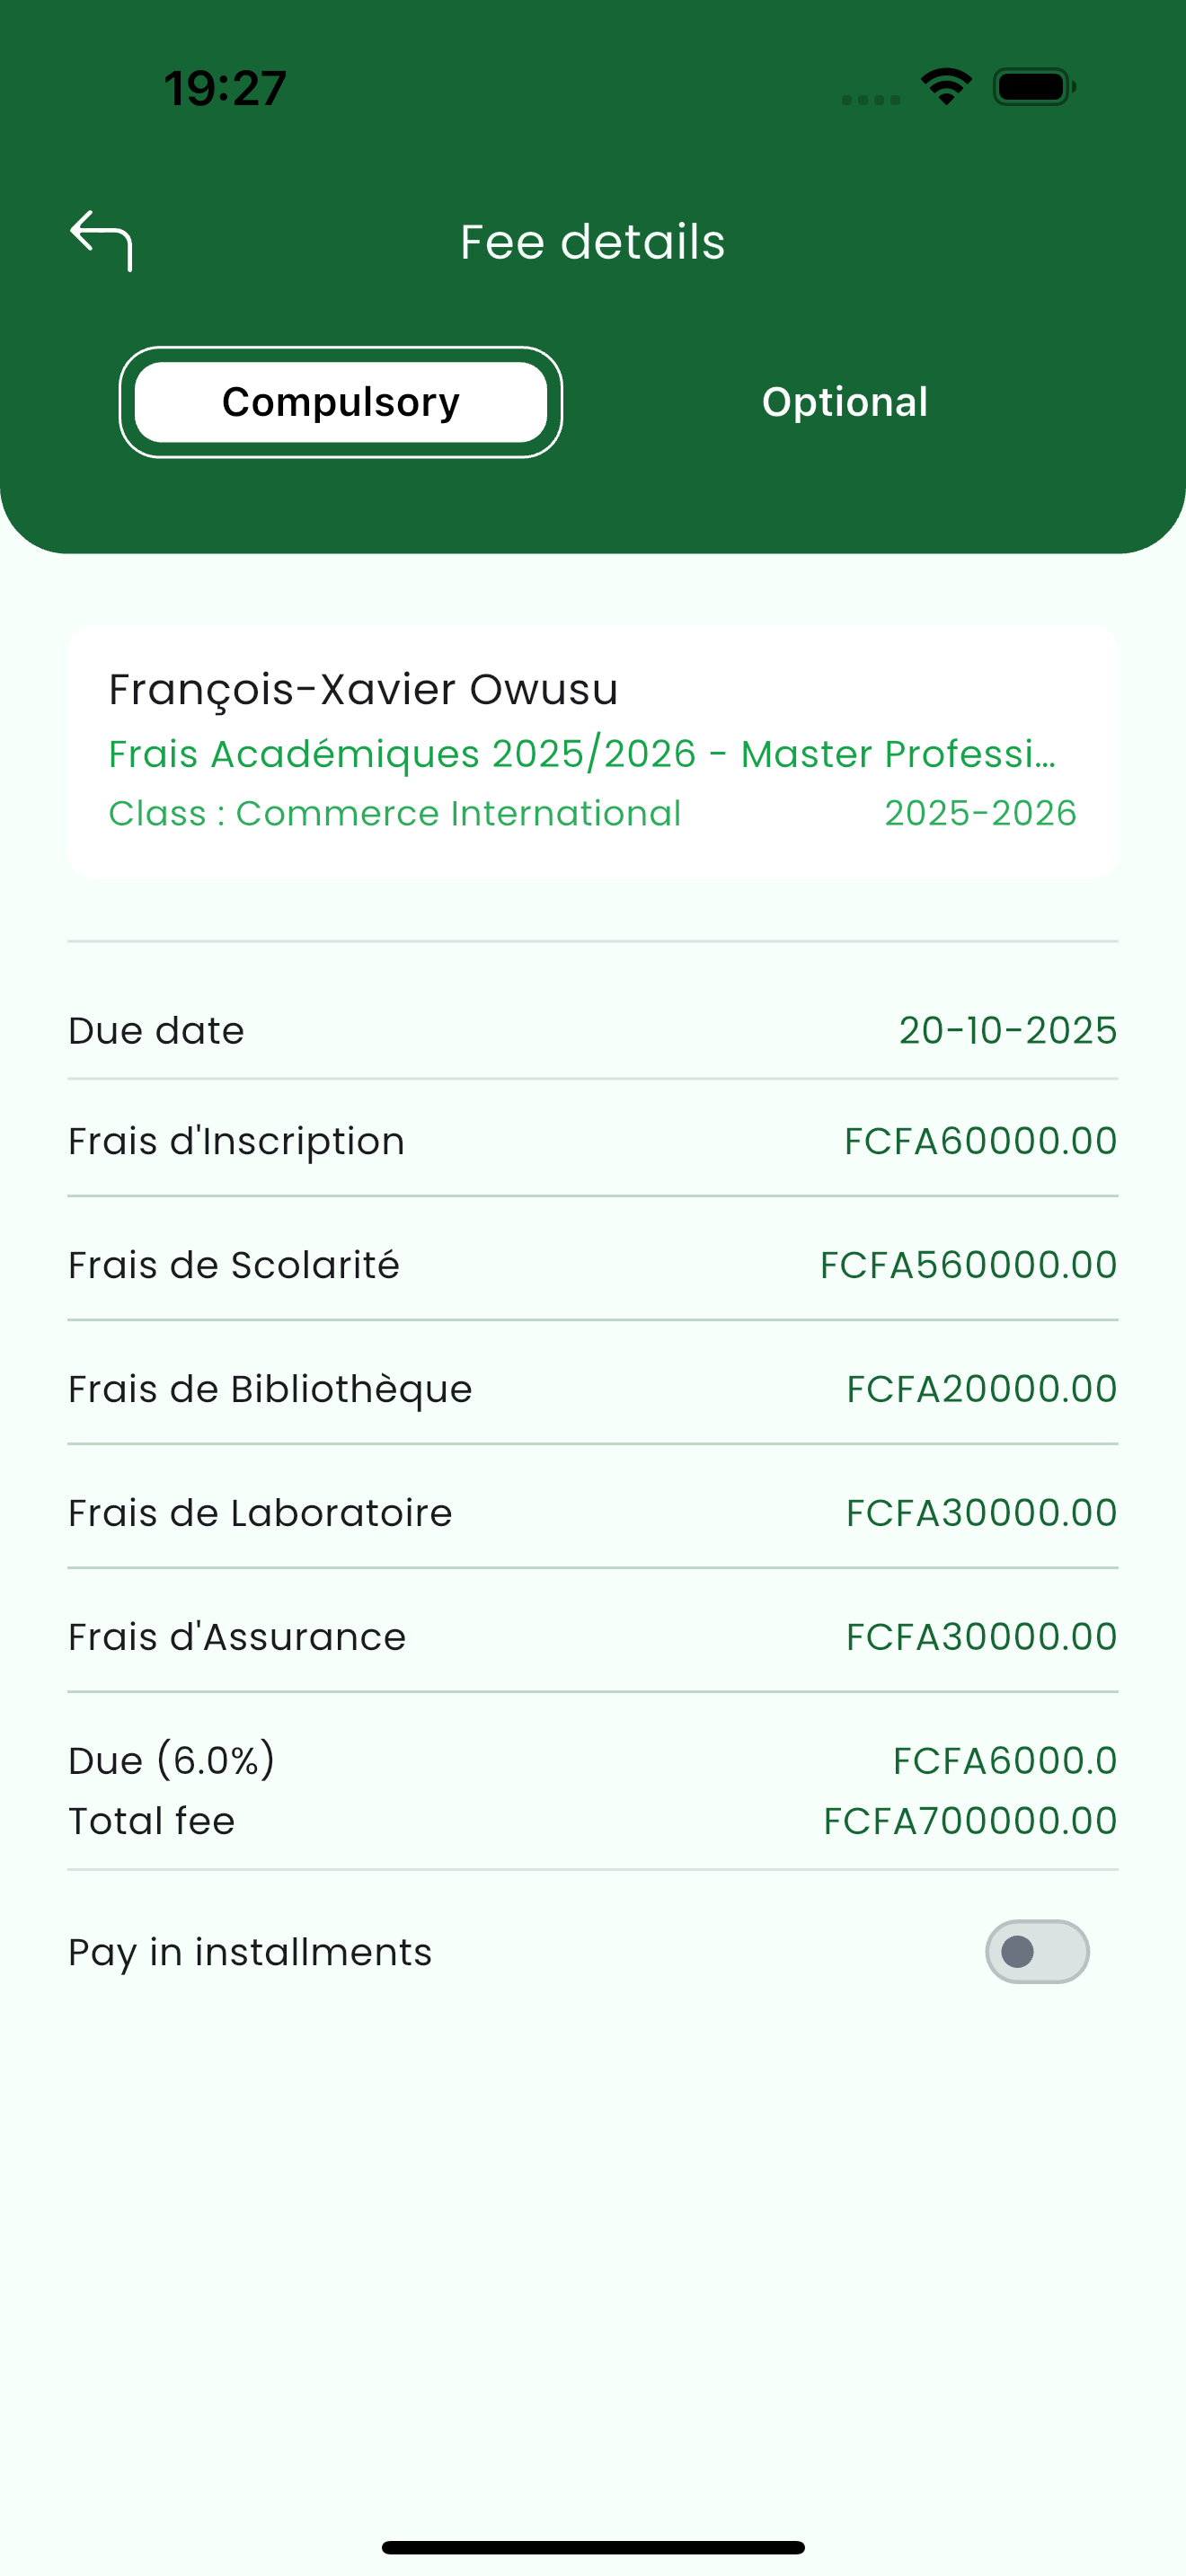
The Compulsory tab itemizes every required charge (registration, tuition, library, lab, insurance and so on), shows any applicable due charge, and totals it all. A Pay in installments toggle lets you split the total into scheduled payments. (see 2)
Paying in installments
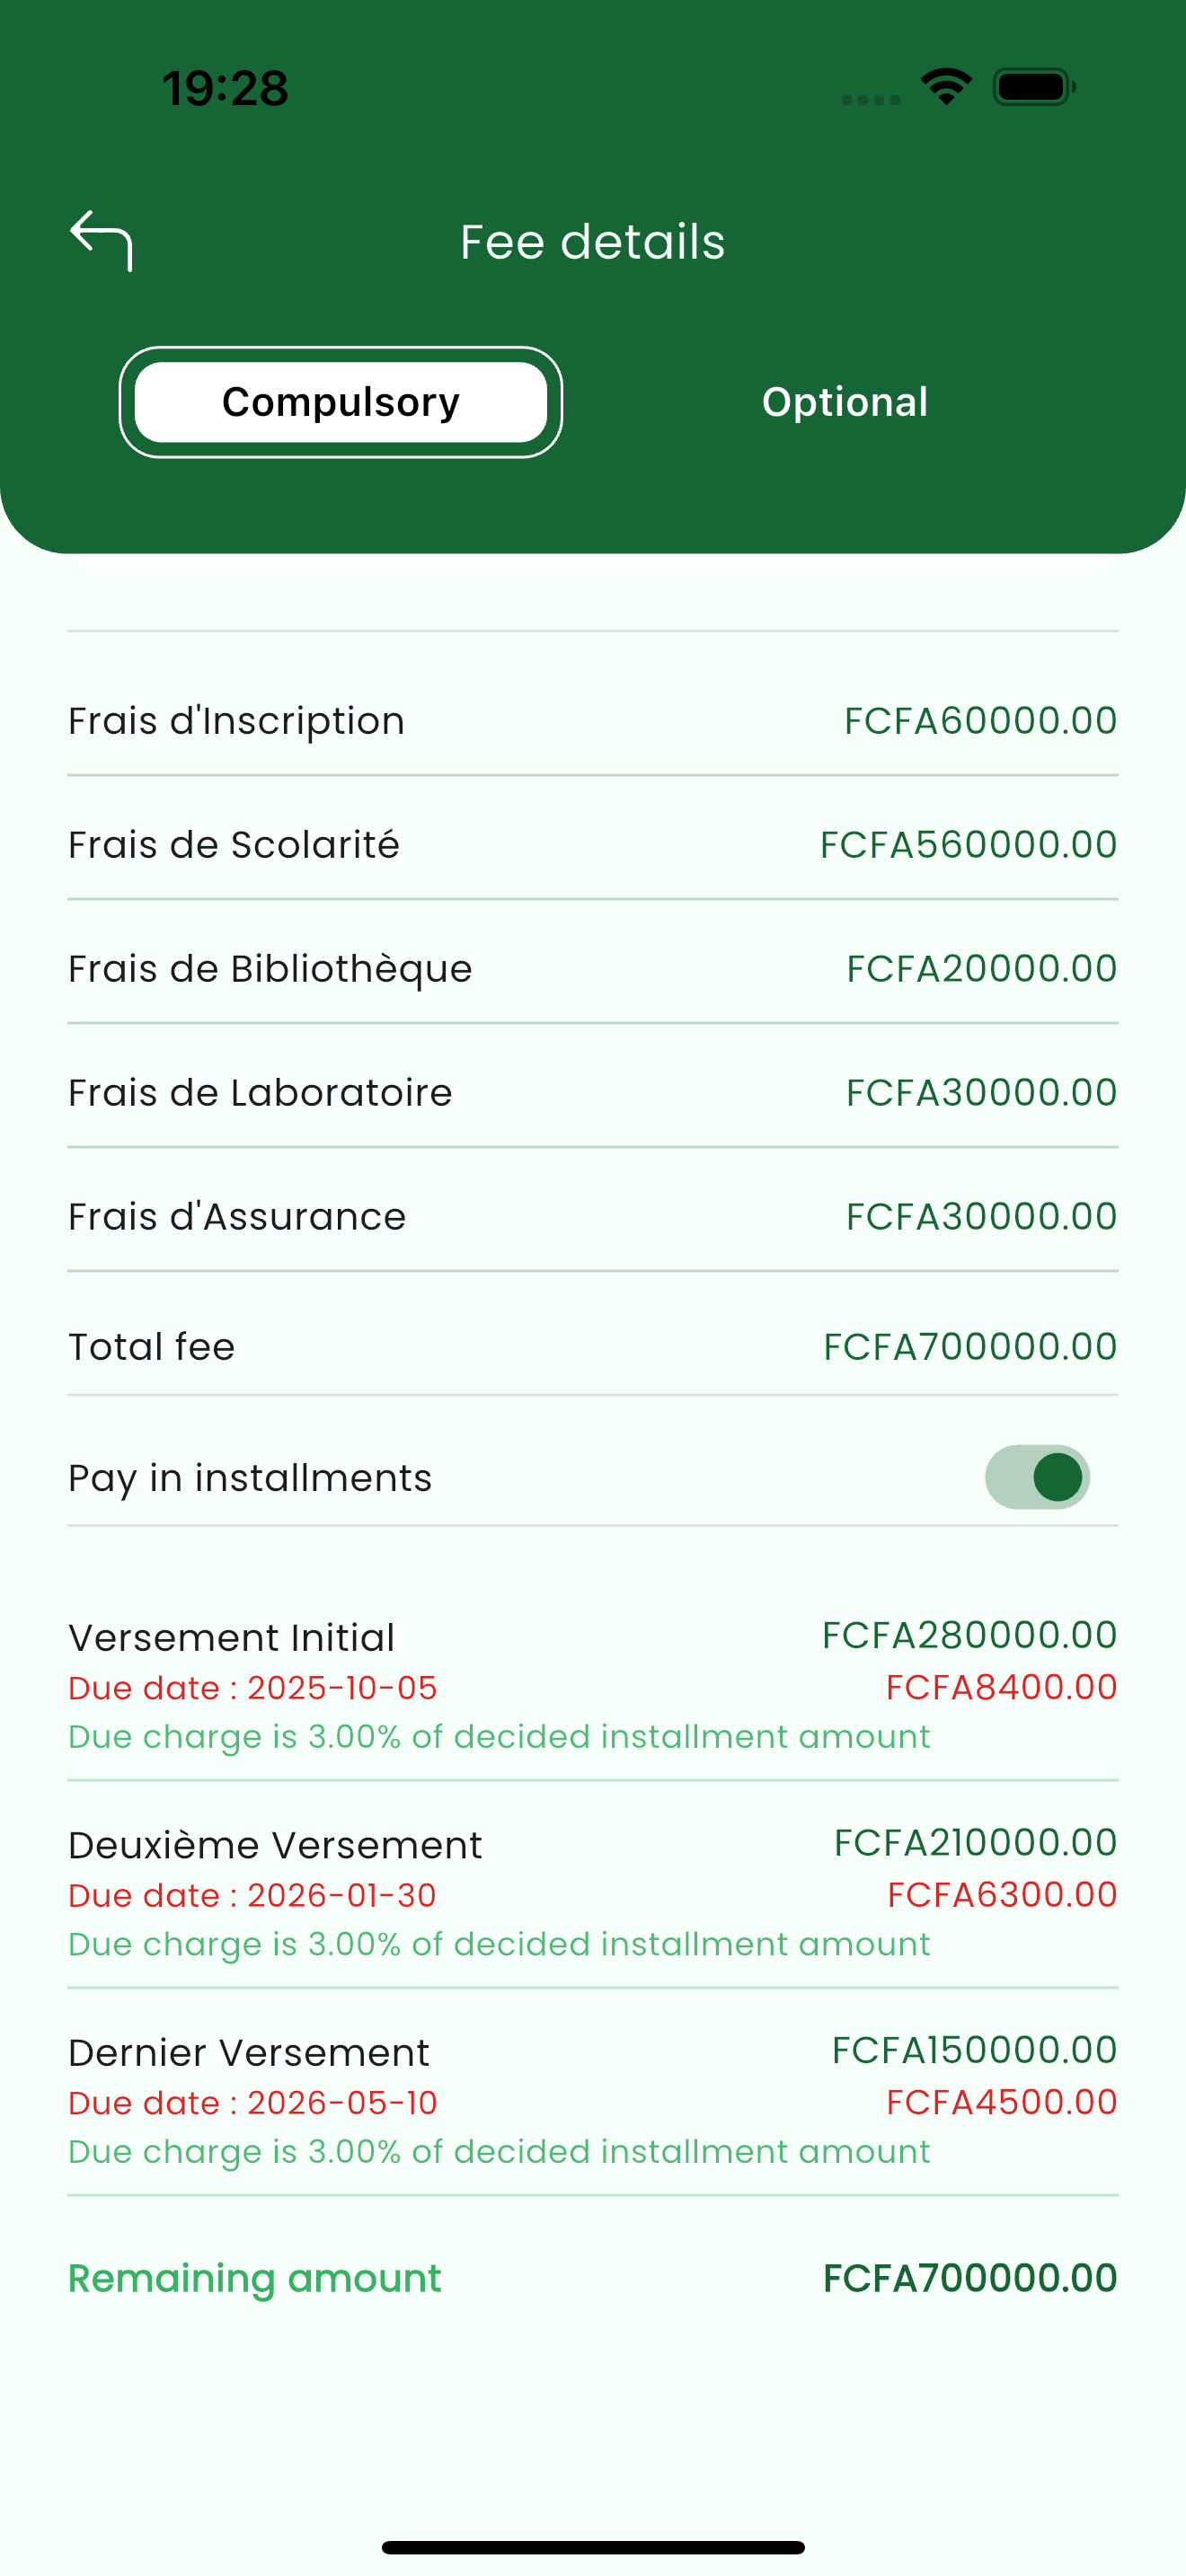
Turn on Pay in installments to reveal the schedule: each installment's amount, its due date, the late charge that applies after that date, and the remaining amount still owed. (see 3)
Each installment shows a late charge (a percentage of the installment) that is added if you pay after its due date. Pay on time to avoid it.
Optional fees
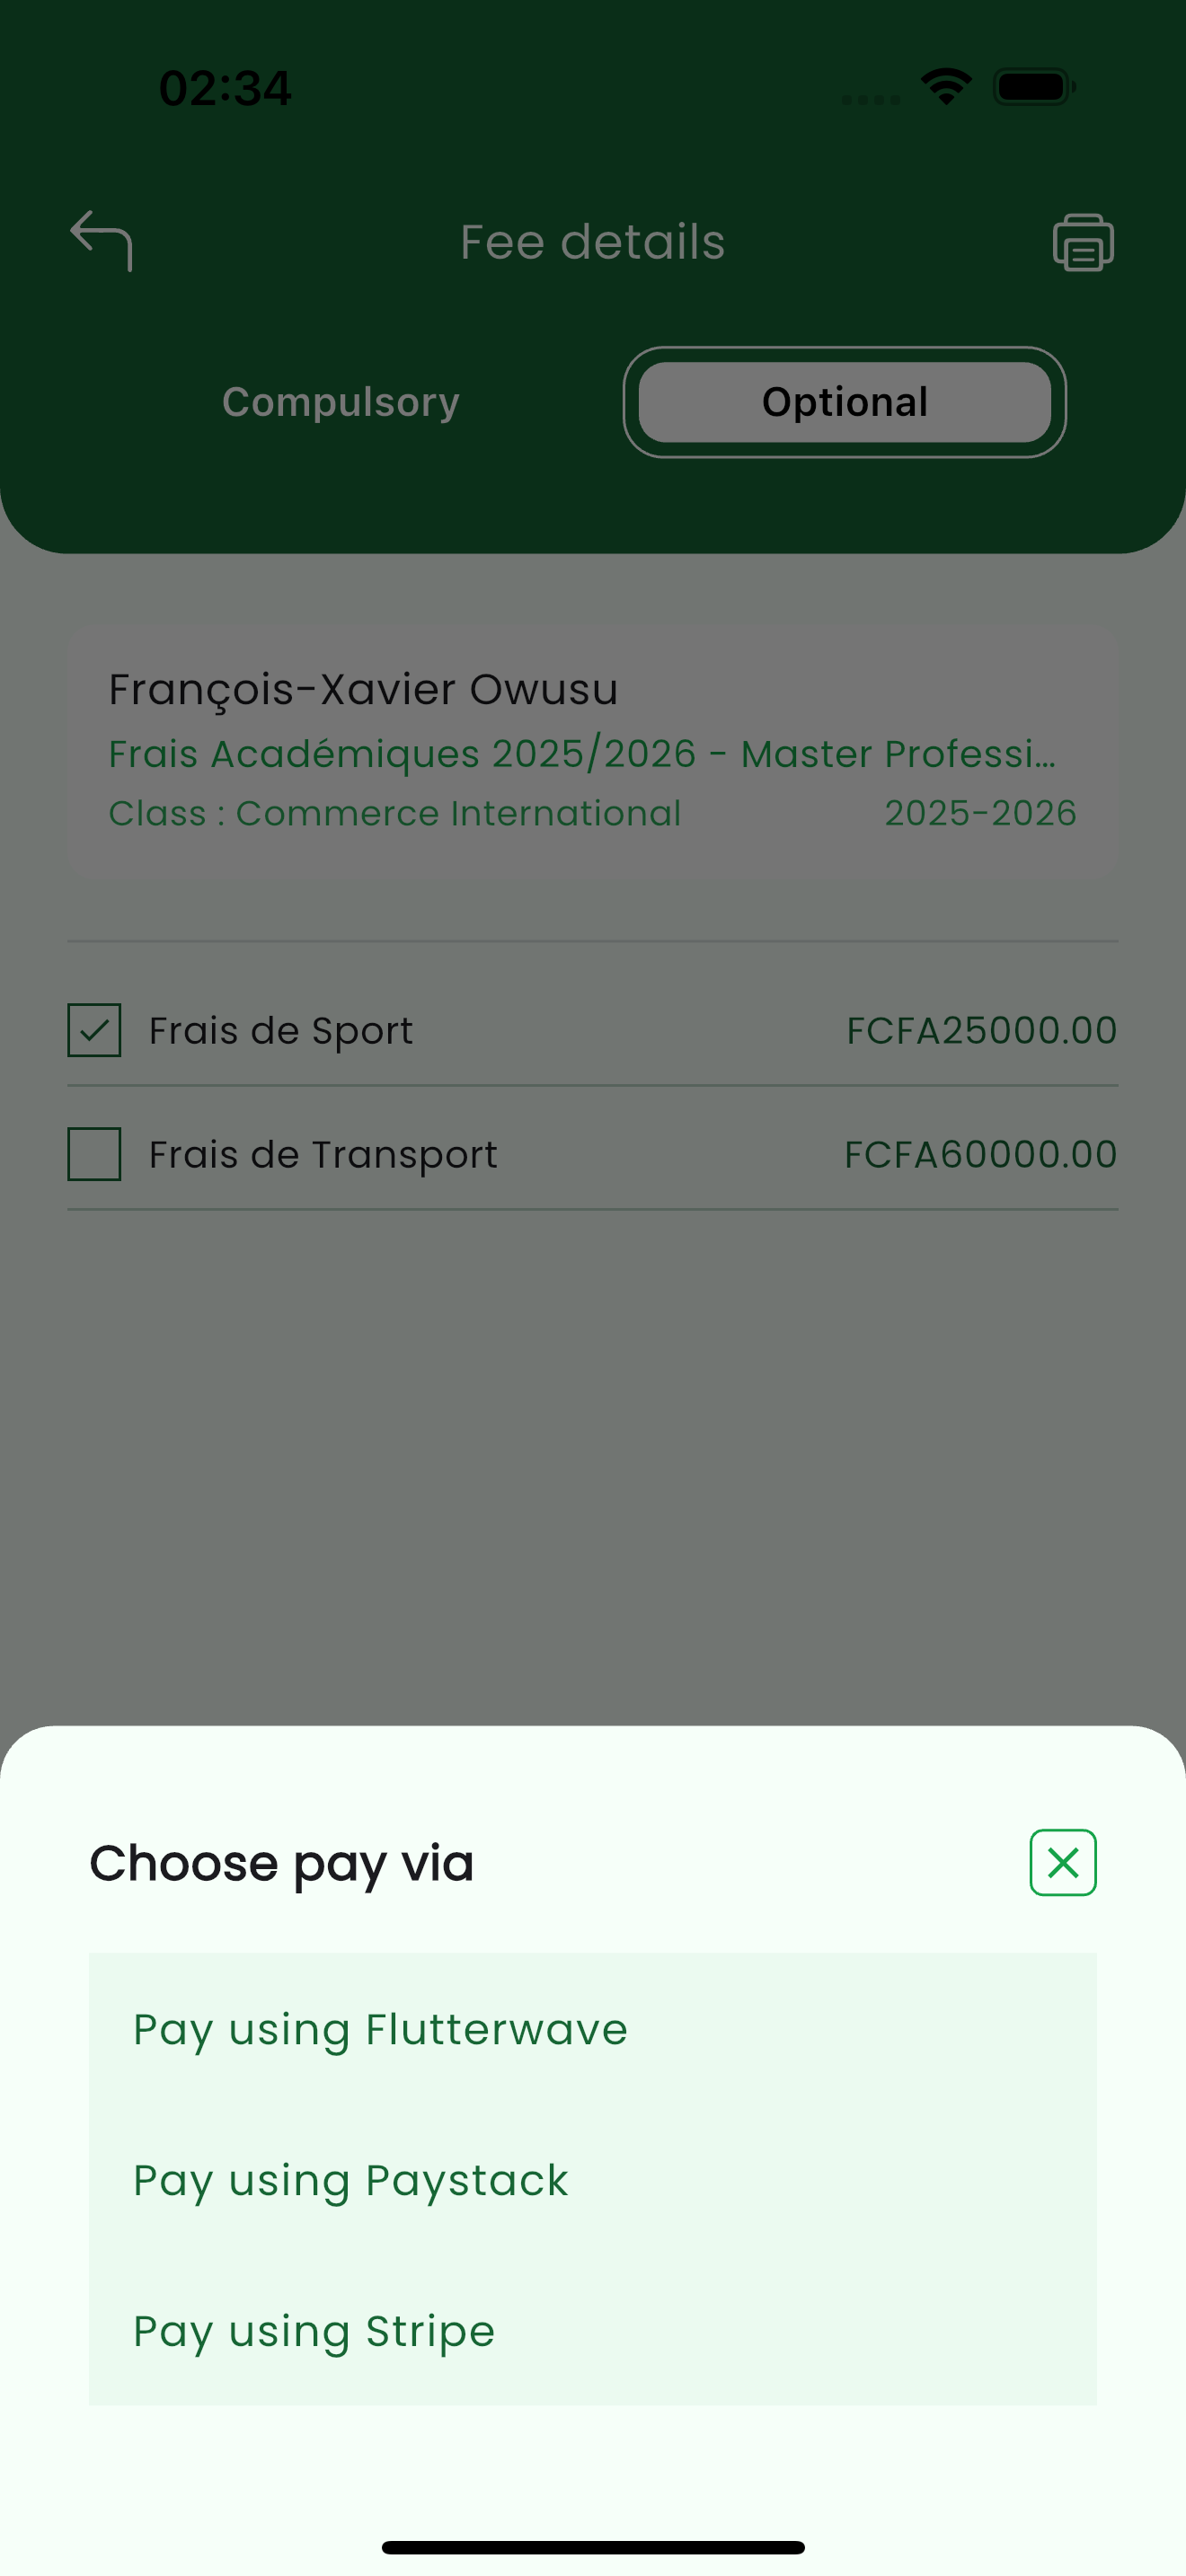
The Optional tab lists extra fees (e.g. sports, transport) with a checkbox beside each. Tick the ones you want to pay, then start the payment — only the selected items are charged. (see 4)
Paying online
When you start a payment, the app shows a Choose pay via sheet listing the gateways your school has enabled. Pick one to complete the payment in its secure flow.
Stunov supports Stripe, Razorpay, Flutterwave, Paystack, MTN MoMo and Orange Money. Only the gateways your school has configured appear on the Choose pay via sheet, so your list may differ from the example above.
Receipts
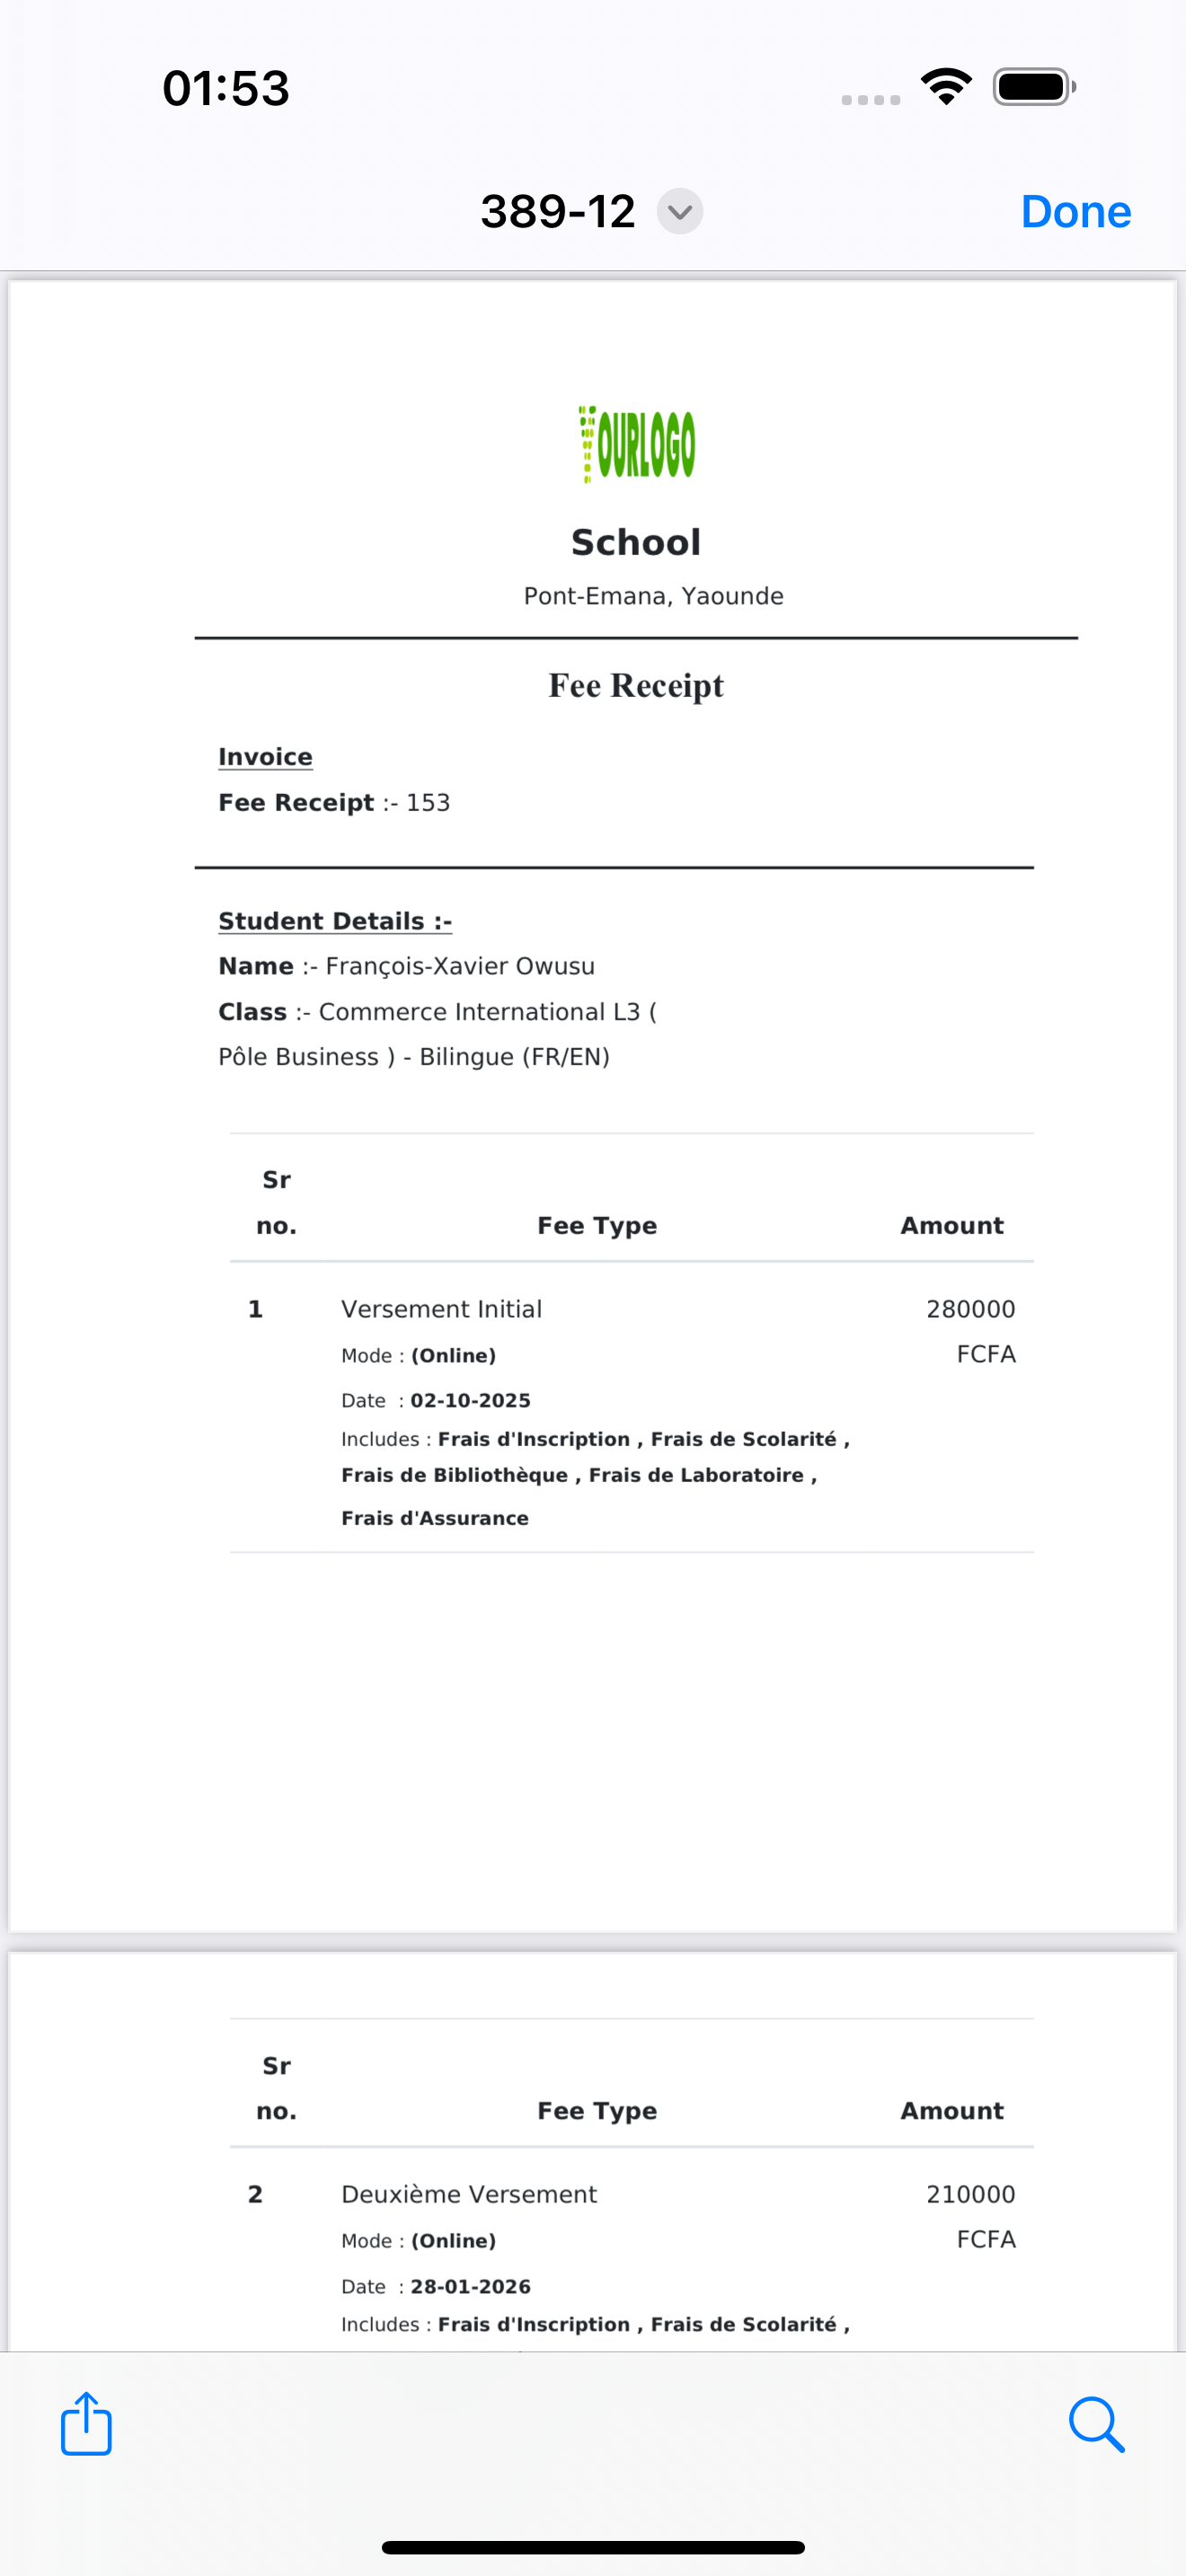
A successful payment produces a Fee Receipt showing the school details, the receipt number, the student, and each payment made (amount, mode, date and the charges it covered). Use the share and download actions to save it or send it on. (see 5)
Transactions
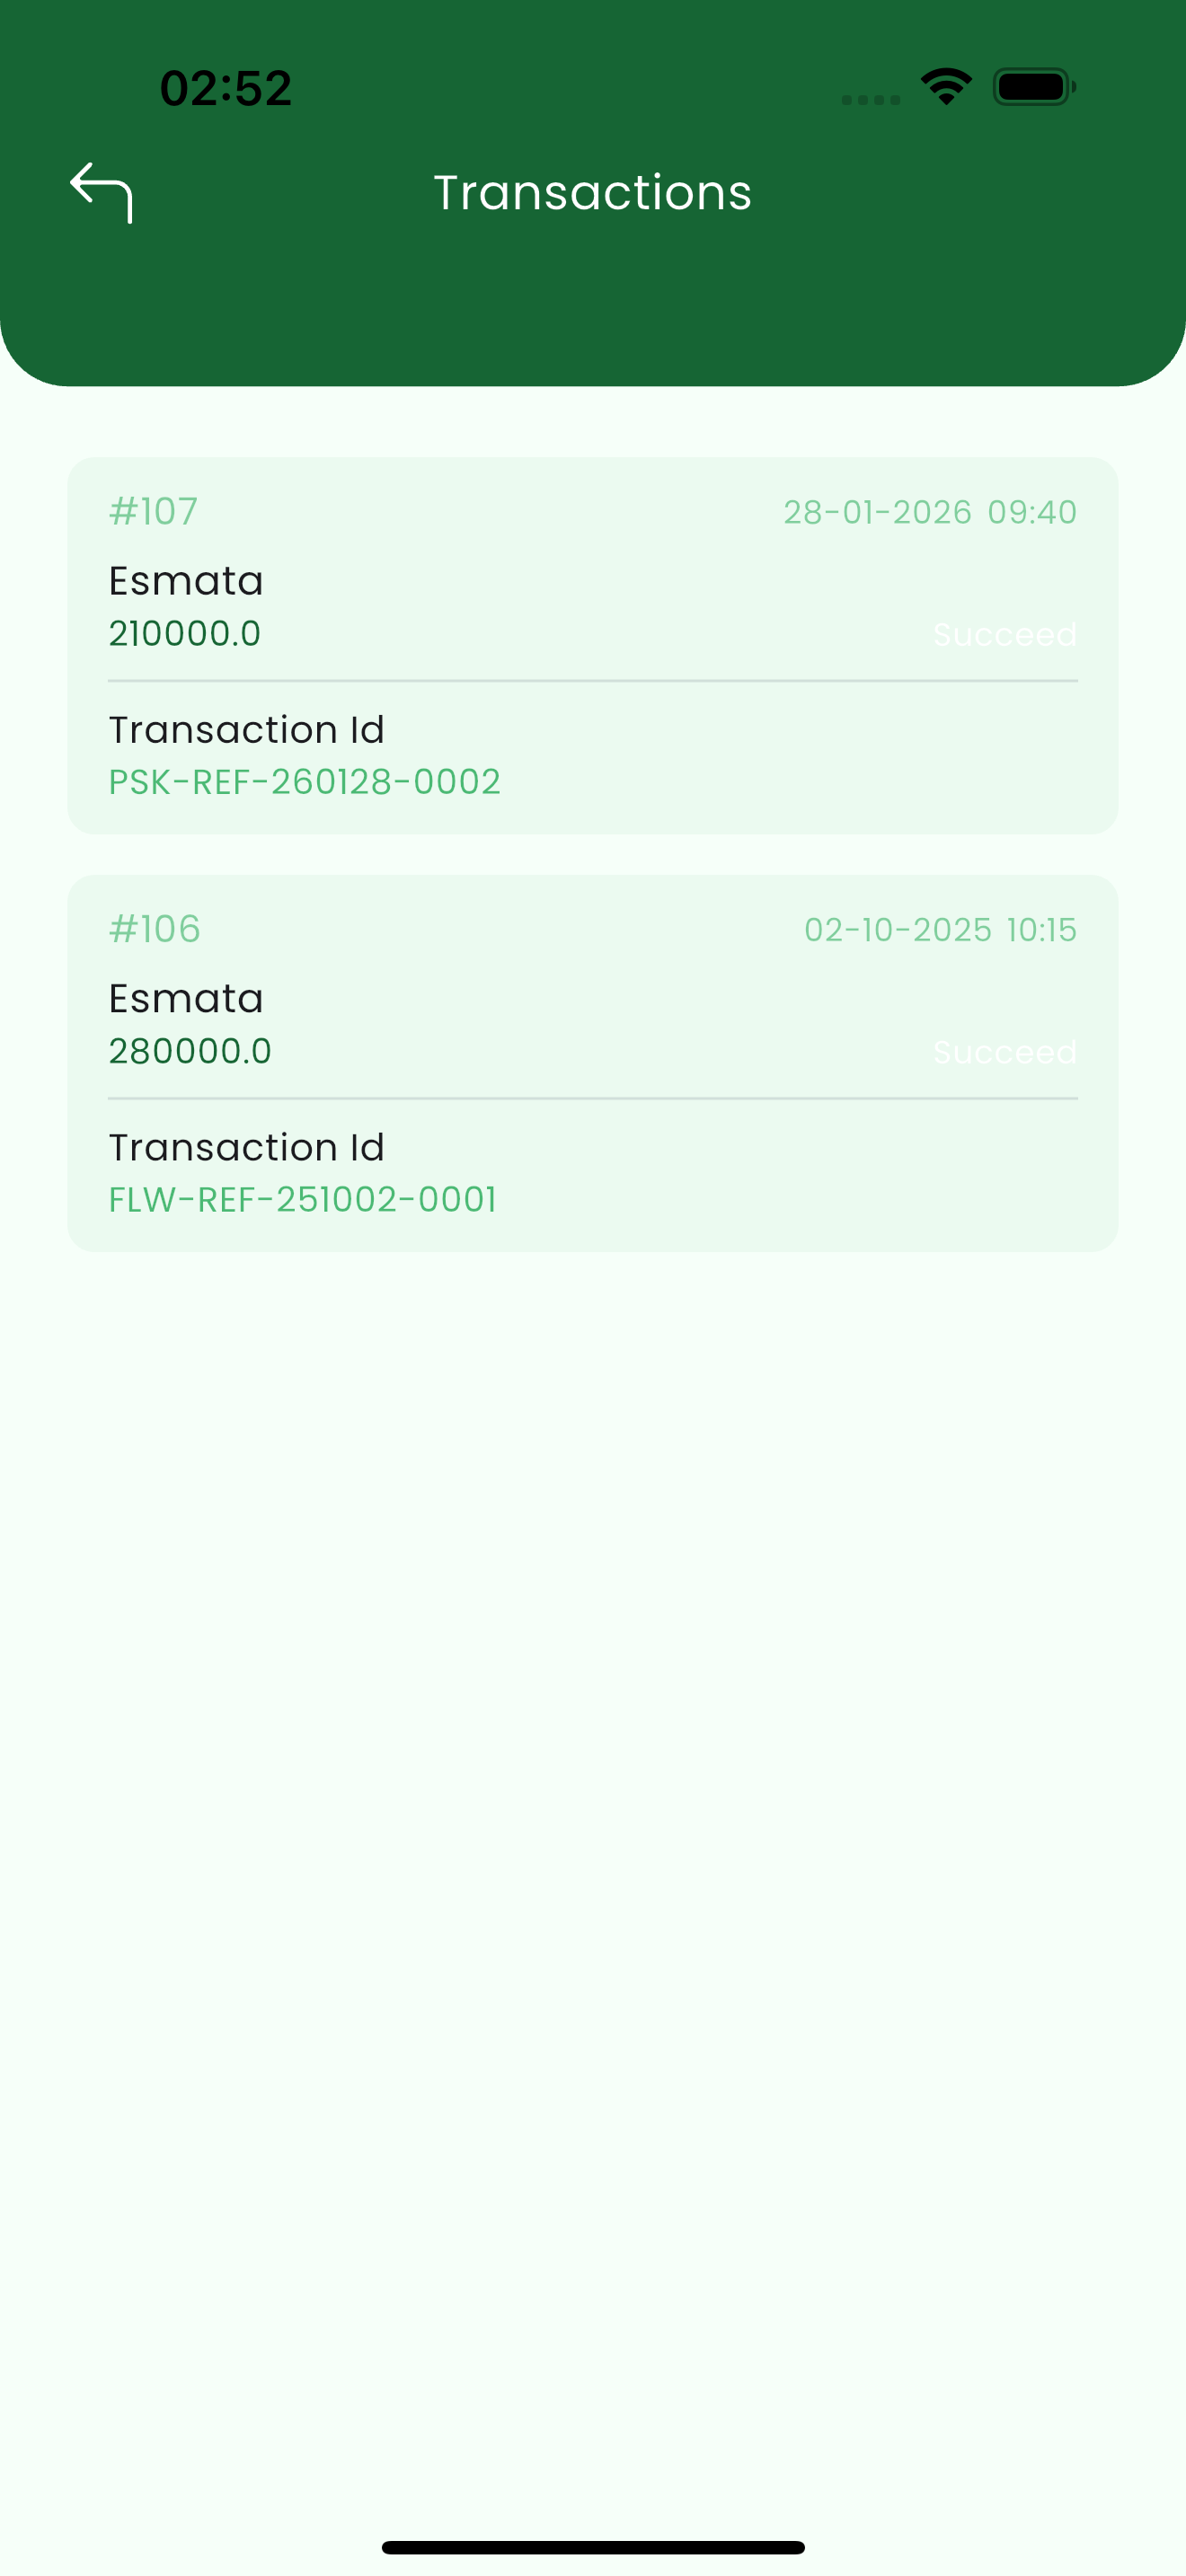
The Transactions screen is the running history of every payment on the account: the amount, the date and time, the status (e.g. Succeed), and the gateway Transaction Id for reference. (see 6)
If a payment ever needs to be traced with the gateway or the school office, the Transaction Id shown here is the reference to quote.
Related pages
- Getting Started — sign in and open a child
- Transportation & Live Tracking — transport fees and live bus tracking
- Academics — subjects, assignments, exams and results