Add Bulk Data
Add Bulk Data lets you import multiple students at once using a CSV file. This is ideal for the start of a new academic year, school migrations, or any scenario where you need to enrol dozens or hundreds of students efficiently.
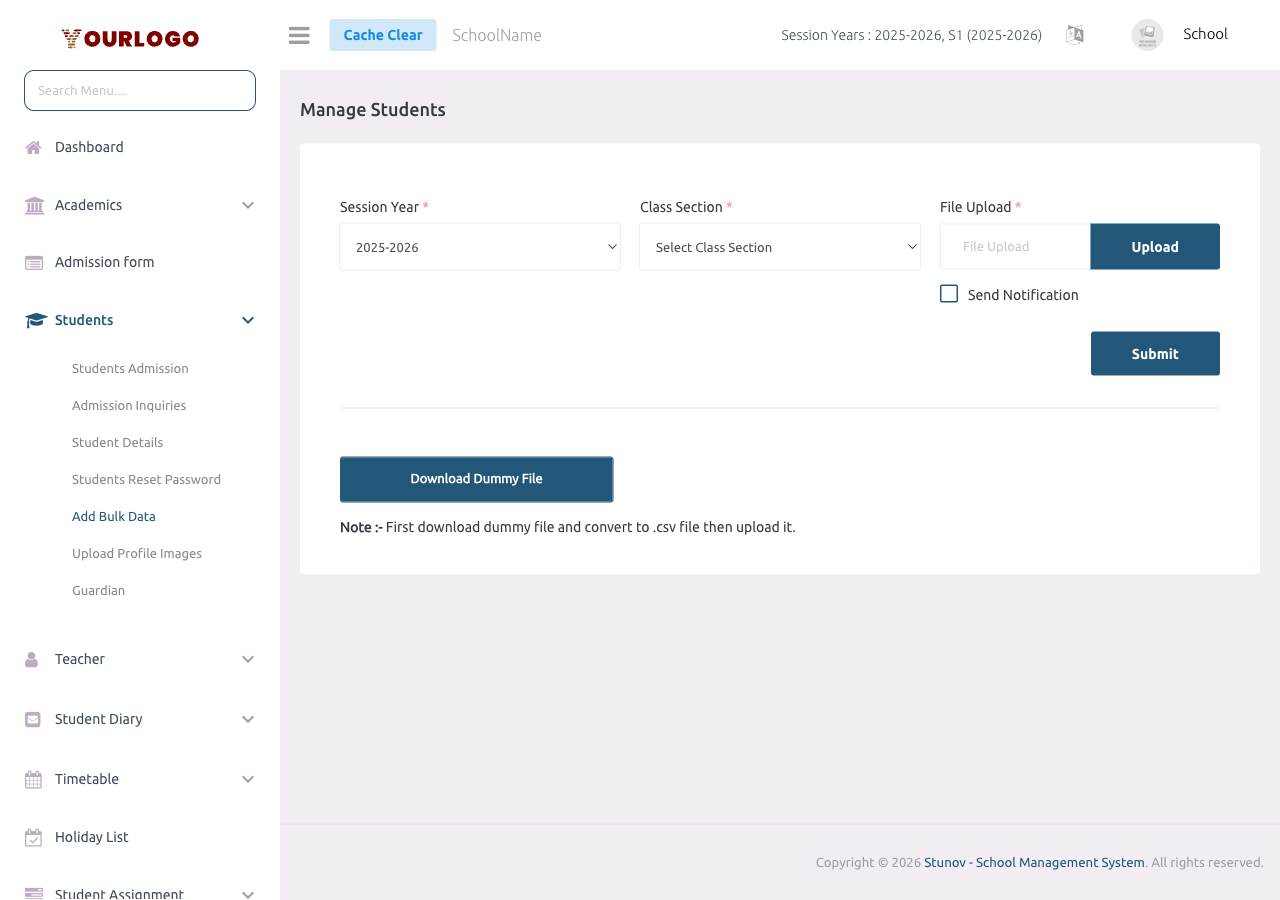
Upload Students via CSV
Each CSV upload assigns all students to the same class section. If you need to enrol students into different class sections, perform separate uploads for each.
CSV Columns
| Field | Type | Required | Description |
|---|---|---|---|
| first_name | text | Required | Student first name |
| last_name | text | Required | Student last name |
| mobile | text | Optional | Student phone number |
| gender | text | Required | Must be "male" or "female" (lowercase) |
| dob | date | Required | Date of birth. Accepted formats: DD-MM-YYYY or MM/DD/YYYY |
| admission_date | date | Required | Admission date in the same format as DOB |
| current_address | text | Required | Current residential address |
| permanent_address | text | Required | Permanent home address |
| guardian_email | email | Required | Guardian email address. If an account with this email exists, the student is linked to the existing guardian |
| guardian_first_name | text | Required | Guardian first name |
| guardian_last_name | text | Required | Guardian last name |
| guardian_mobile | text | Required | Guardian phone number |
Custom Field Columns (optional)
Any columns after guardian_mobile are treated as custom form field data. The column header must match the custom field name (with spaces replaced by underscores).
Example: If you have a custom field called "Blood Group", add a column named blood_group after the guardian_mobile column.
Sample CSV Structure
| first_name | last_name | mobile | gender | dob | admission_date | current_address | permanent_address | guardian_email | guardian_first_name | guardian_last_name | guardian_mobile | blood_group |
|---|---|---|---|---|---|---|---|---|---|---|---|---|
| John | Doe | +237600000001 | male | 15-03-2010 | 01-09-2025 | 123 Main St | 123 Main St | [email protected] | Jane | Doe | +237600000002 | O+ |
| Alice | Smith | female | 22-07-2011 | 01-09-2025 | 456 Oak Ave | 456 Oak Ave | [email protected] | Bob | Smith | +237600000003 | A- |
How It Works Behind the Scenes
For each row in the CSV, the system:
- Creates a new user account (using
first_name + admission_noas the email/login) - Sets the default password to the admission number
- Creates or links the guardian account (by email lookup)
- Creates the student record linked to the selected class section and session year
- Stores any custom field data
The admission number is auto-generated from the student's first name and a unique identifier. It serves as the student login credential.
Common Errors and Solutions
| Error | Cause | Solution |
|---|---|---|
| "The first_name field is required" | Empty first name cell | Fill in all required fields |
| "The guardian_email has already been taken" | Guardian email conflicts with a non-guardian user | Use a different email or check the existing account |
| "The dob is not a valid date" | Date format not recognized | Use DD-MM-YYYY or MM/DD/YYYY consistently |
| "The gender must be male or female" | Capitalized or misspelled gender | Use lowercase: male or female |
| Row skipped silently | Completely empty row in CSV | Remove blank rows from the spreadsheet |
Tips for a Smooth Import
- Always use the sample file as your starting template
- Keep the column headers exactly as provided — do not rename or reorder standard columns
- Save as CSV (Comma delimited) — not Excel (.xlsx)
- Remove any formatting, merged cells, or formulas from the spreadsheet before saving
- Test with a small batch (5-10 students) before importing the full list
- Keep a backup of your CSV file for reference
Related Pages
- Student Admission — Add students one at a time
- Upload Profile Images — Add student photos after bulk import
- Student Details — View and verify imported students
- Custom Fields — Configure the custom field columns for your CSV