
Admission Inquiries

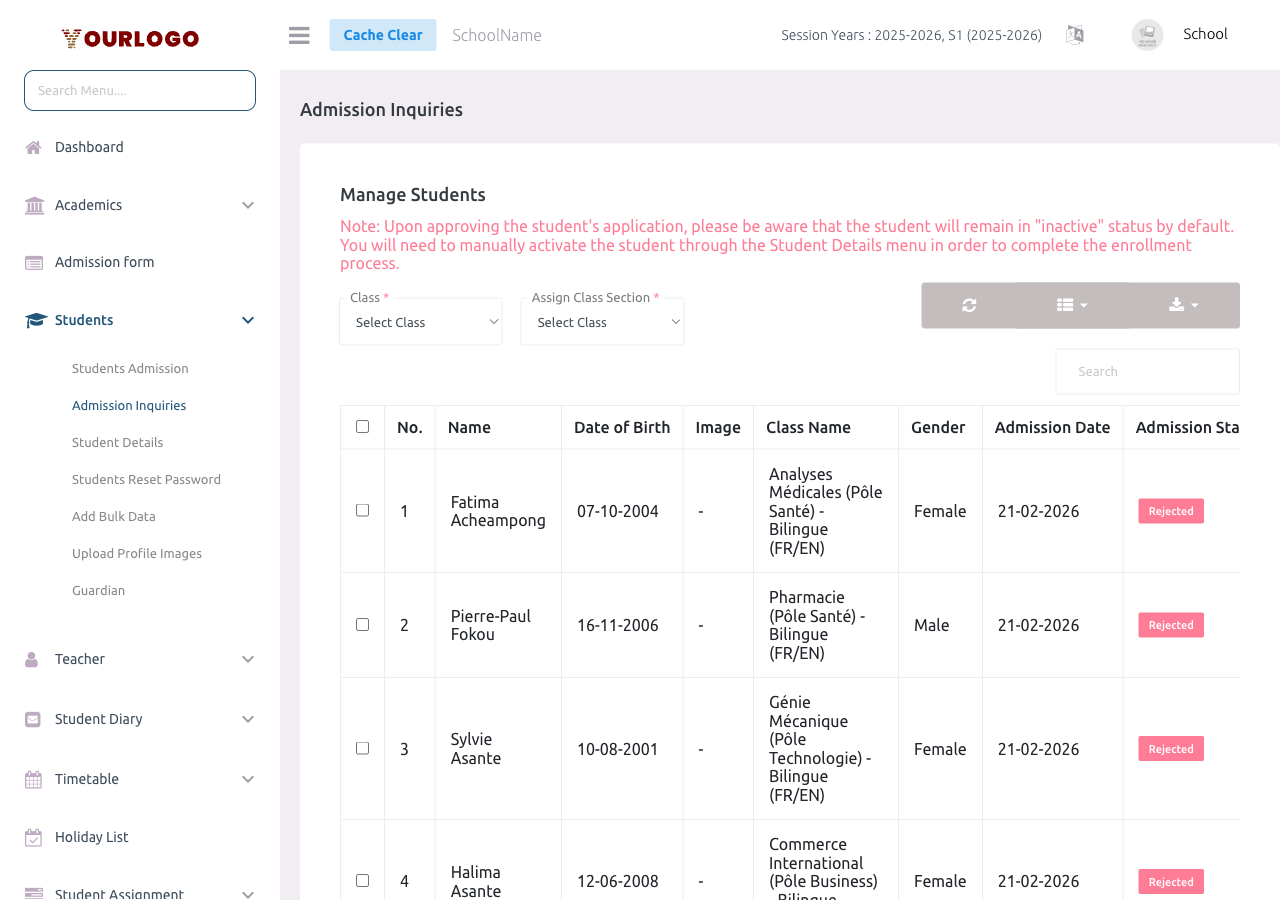
Admission Inquiries lists all student applications submitted through your school's public online admission form. Parents fill in student and guardian details on the website, and the application appears here for your review. You can then approve or reject each application individually or in bulk.

How online admission works

When a parent submits the online admission form on your school website, the system creates a pending student record with application_type = online and application_status = pending. The student account remains inactive until an admin approves it from this page.

Admission inquiries page showing pending applications table with approve and reject buttons
Admission Inquiries — all online applications with status indicators and action buttons

Approve an Application

Single Approval

1
Navigate to Students → Admission Inquiries
From the sidebar, expand **Students** and click **Admission Inquiries**. The list of all online applications loads.
2
Locate the application
Find the student in the table. Use the **search box** to filter by student name, guardian name, or email.
3
Click Approve
In the **Action** column, click the **Approve** (checkmark) button. A confirmation dialog appears.
4
Select the Class Section
In the dialog, select the **Class Section** to assign the student to (e.g., Section A, Section B). Online applications only specify the class — you must assign the section.
5
Confirm
Click **Confirm**. The student account is activated, an admission number is auto-generated, and the student appears in [Student Details](/docs/students/student-details).

Bulk Approval

1
Select multiple applications
Use the **checkboxes** on the left of each row to select the applications you want to approve. You can also use "Select All".
2
Click Approve Selected
Click the **Approve Selected** button at the top of the table.
3
Select section and confirm
Choose the class section for all selected students and click **Confirm**. All selected applications are approved at once.
Class section required

Unlike the offline admission form where you select a class section directly, online applications only specify a class. When approving, you must assign the specific section (e.g., Section A, Section B).


Reject an Application

Single Rejection

1
Click Reject
In the **Action** column, click the **Reject** (cross) button next to the application.
2
Confirm the rejection
Click **Confirm** in the dialog. The student record stays in the system but remains **inactive** and is not visible in active student lists.

Bulk Rejection

1
Select applications
Use the checkboxes to select the applications you want to reject.
2
Click Reject Selected and confirm
Click **Reject Selected** at the top, then **Confirm**.

Application Status Flow

StatusMeaning
PendingApplication submitted, awaiting admin review
ApprovedApplication accepted — student account activated, appears in all modules
RejectedApplication declined — student remains inactive
Application status flow: Pending, Approved, Rejected
Application lifecycle — from parent submission to admin decision

Online Admission Form Setup

For parents to submit applications, your school must have:

1
Enable the School Website
Go to [Web Settings → Content](/docs/web-settings/content) and make sure the school website is enabled and configured.
2
Ensure the Online Admission form is active
The registration form is part of the school's public website. Parents can access it from the school website homepage.
3
Configure reCAPTCHA (optional)
If configured in [Third-Party APIs](/docs/system-settings/third-party-apis), the form includes spam protection via reCAPTCHA.

The online form collects:

  • Student: First name, Last name, Mobile, Gender, Image, Date of Birth
  • Academic: Class (not section — section is assigned on approval)
  • Guardian: Email, First name, Last name, Mobile, Gender, Image
  • Custom Fields (if configured)