Sliders
Sliders are the hero banners that cycle on your school homepage. Each slide can include an image, title, subtitle, description, and a call-to-action button. You can choose between fullscreen and split layout modes, position the text, and select decorative line motifs.
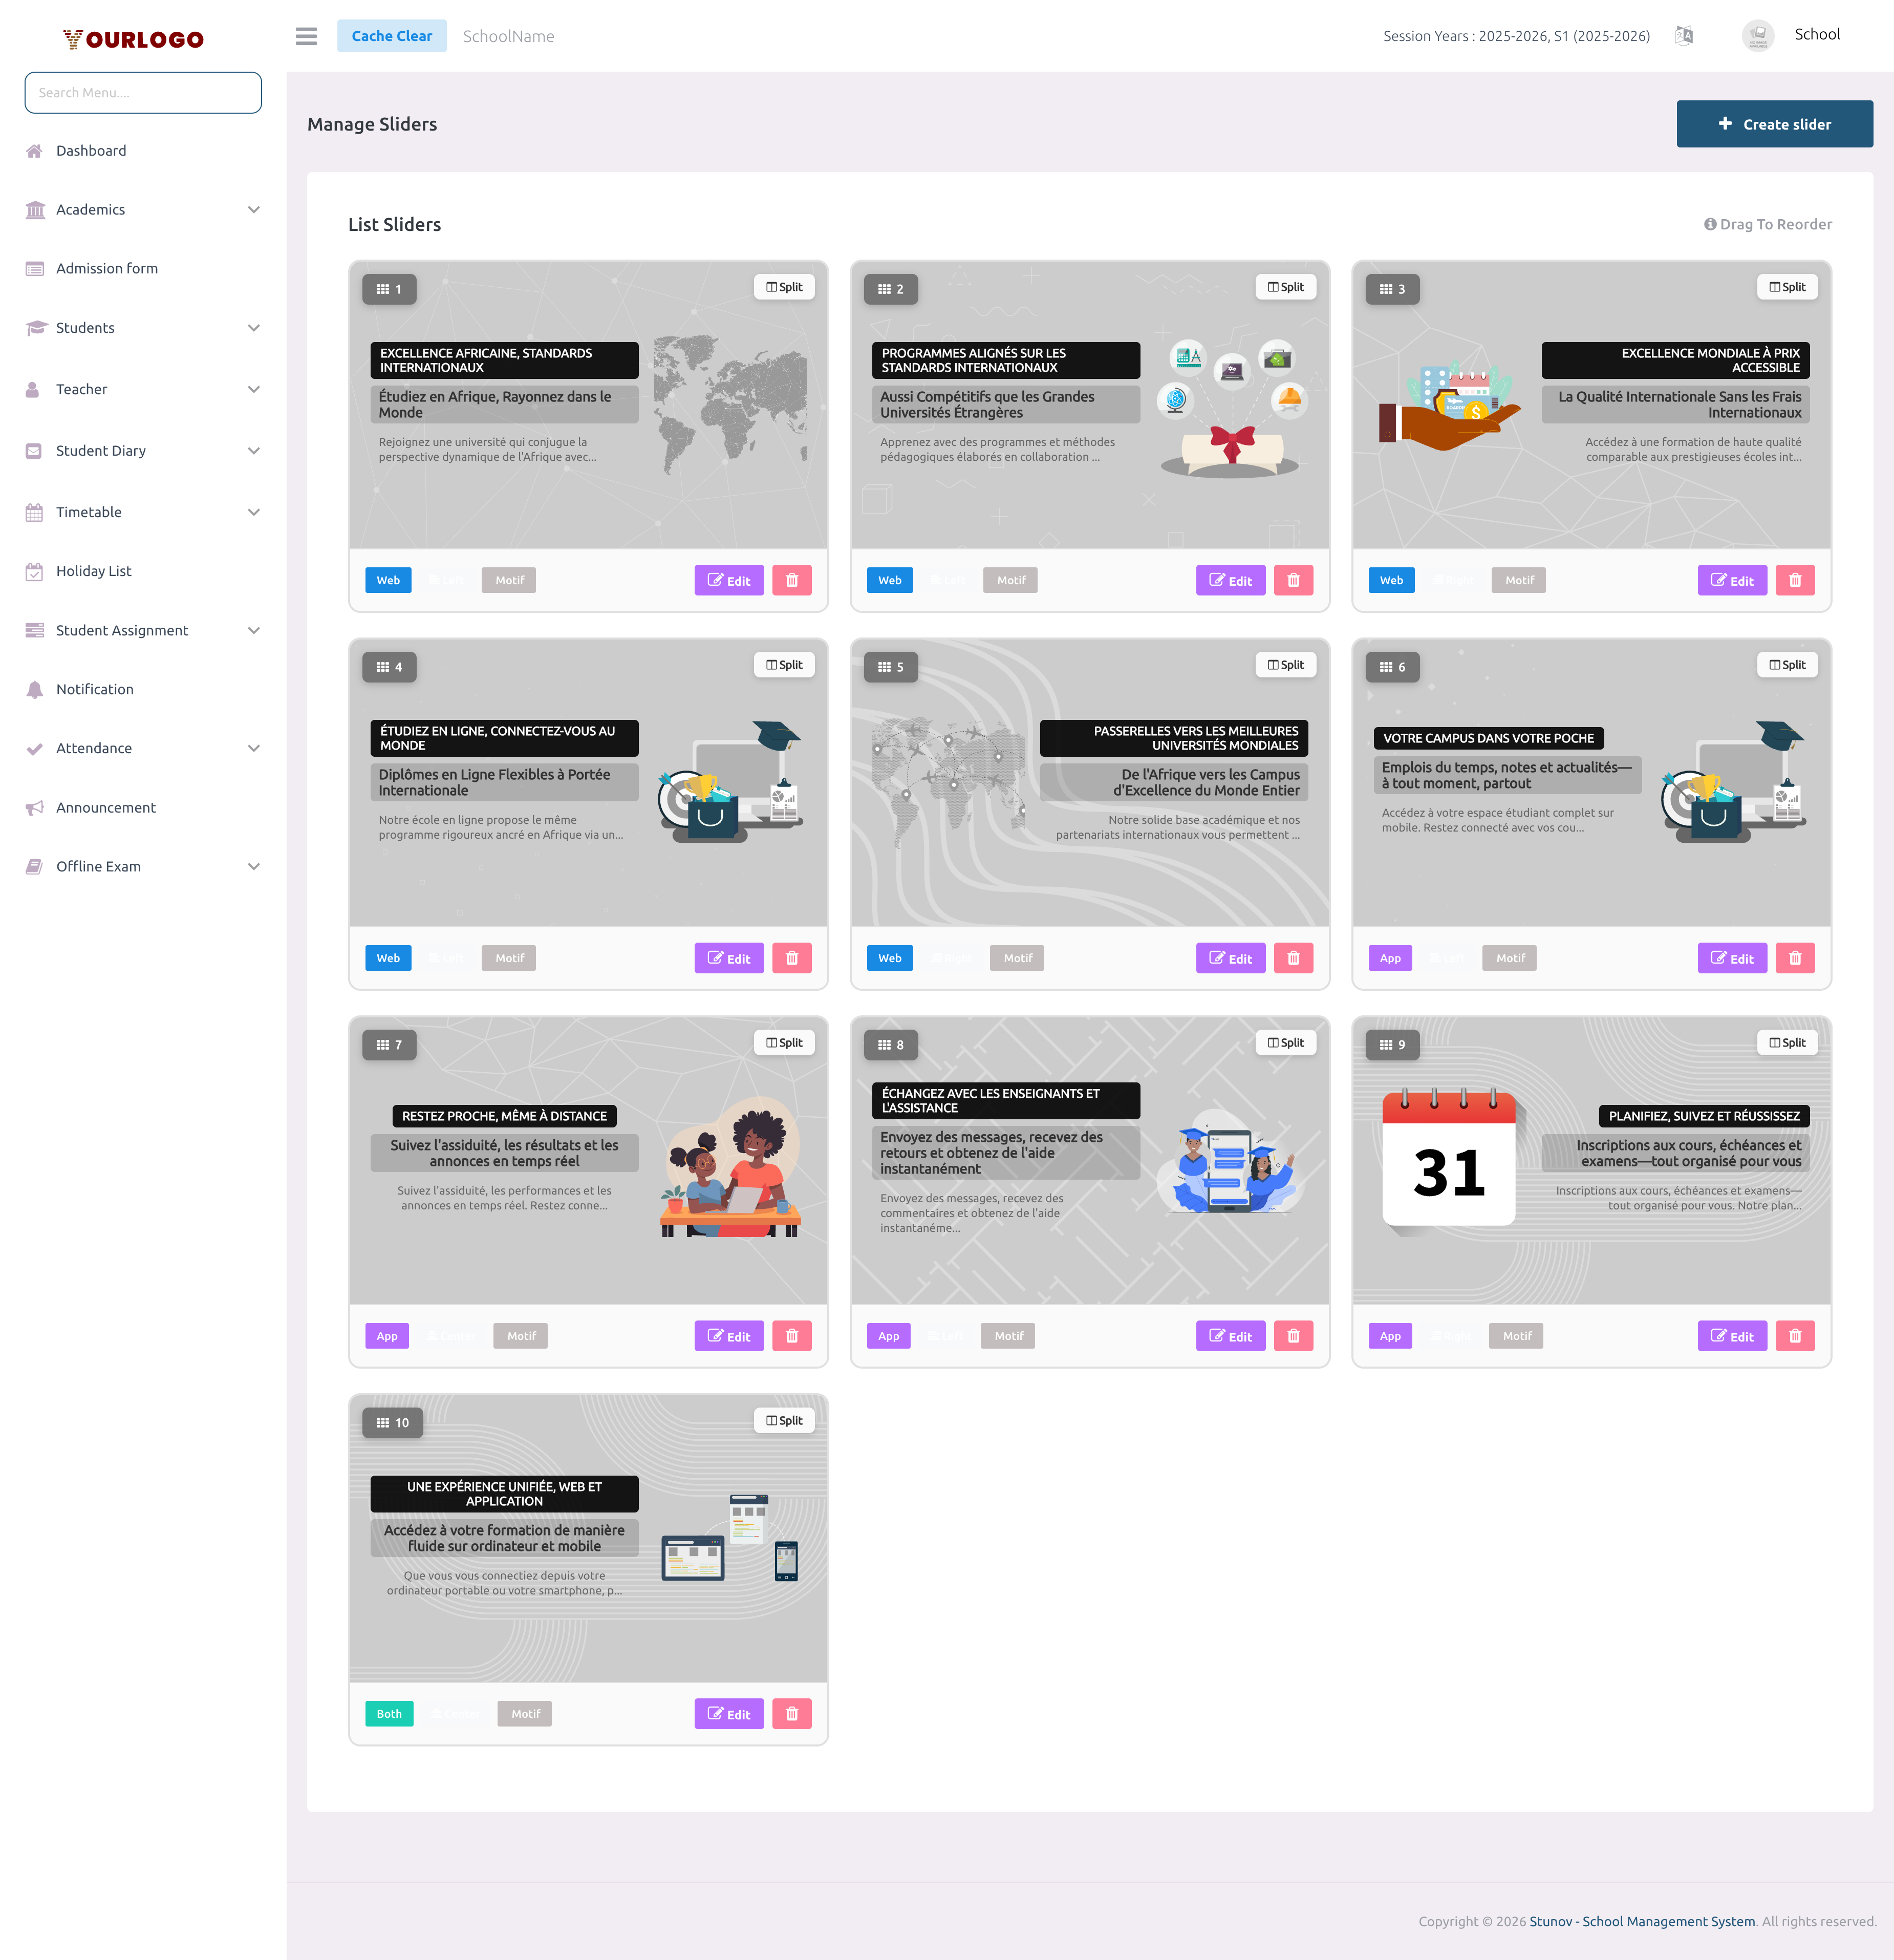
Slider list — drag cards to reorder, edit or delete individual slides
Create a Slider
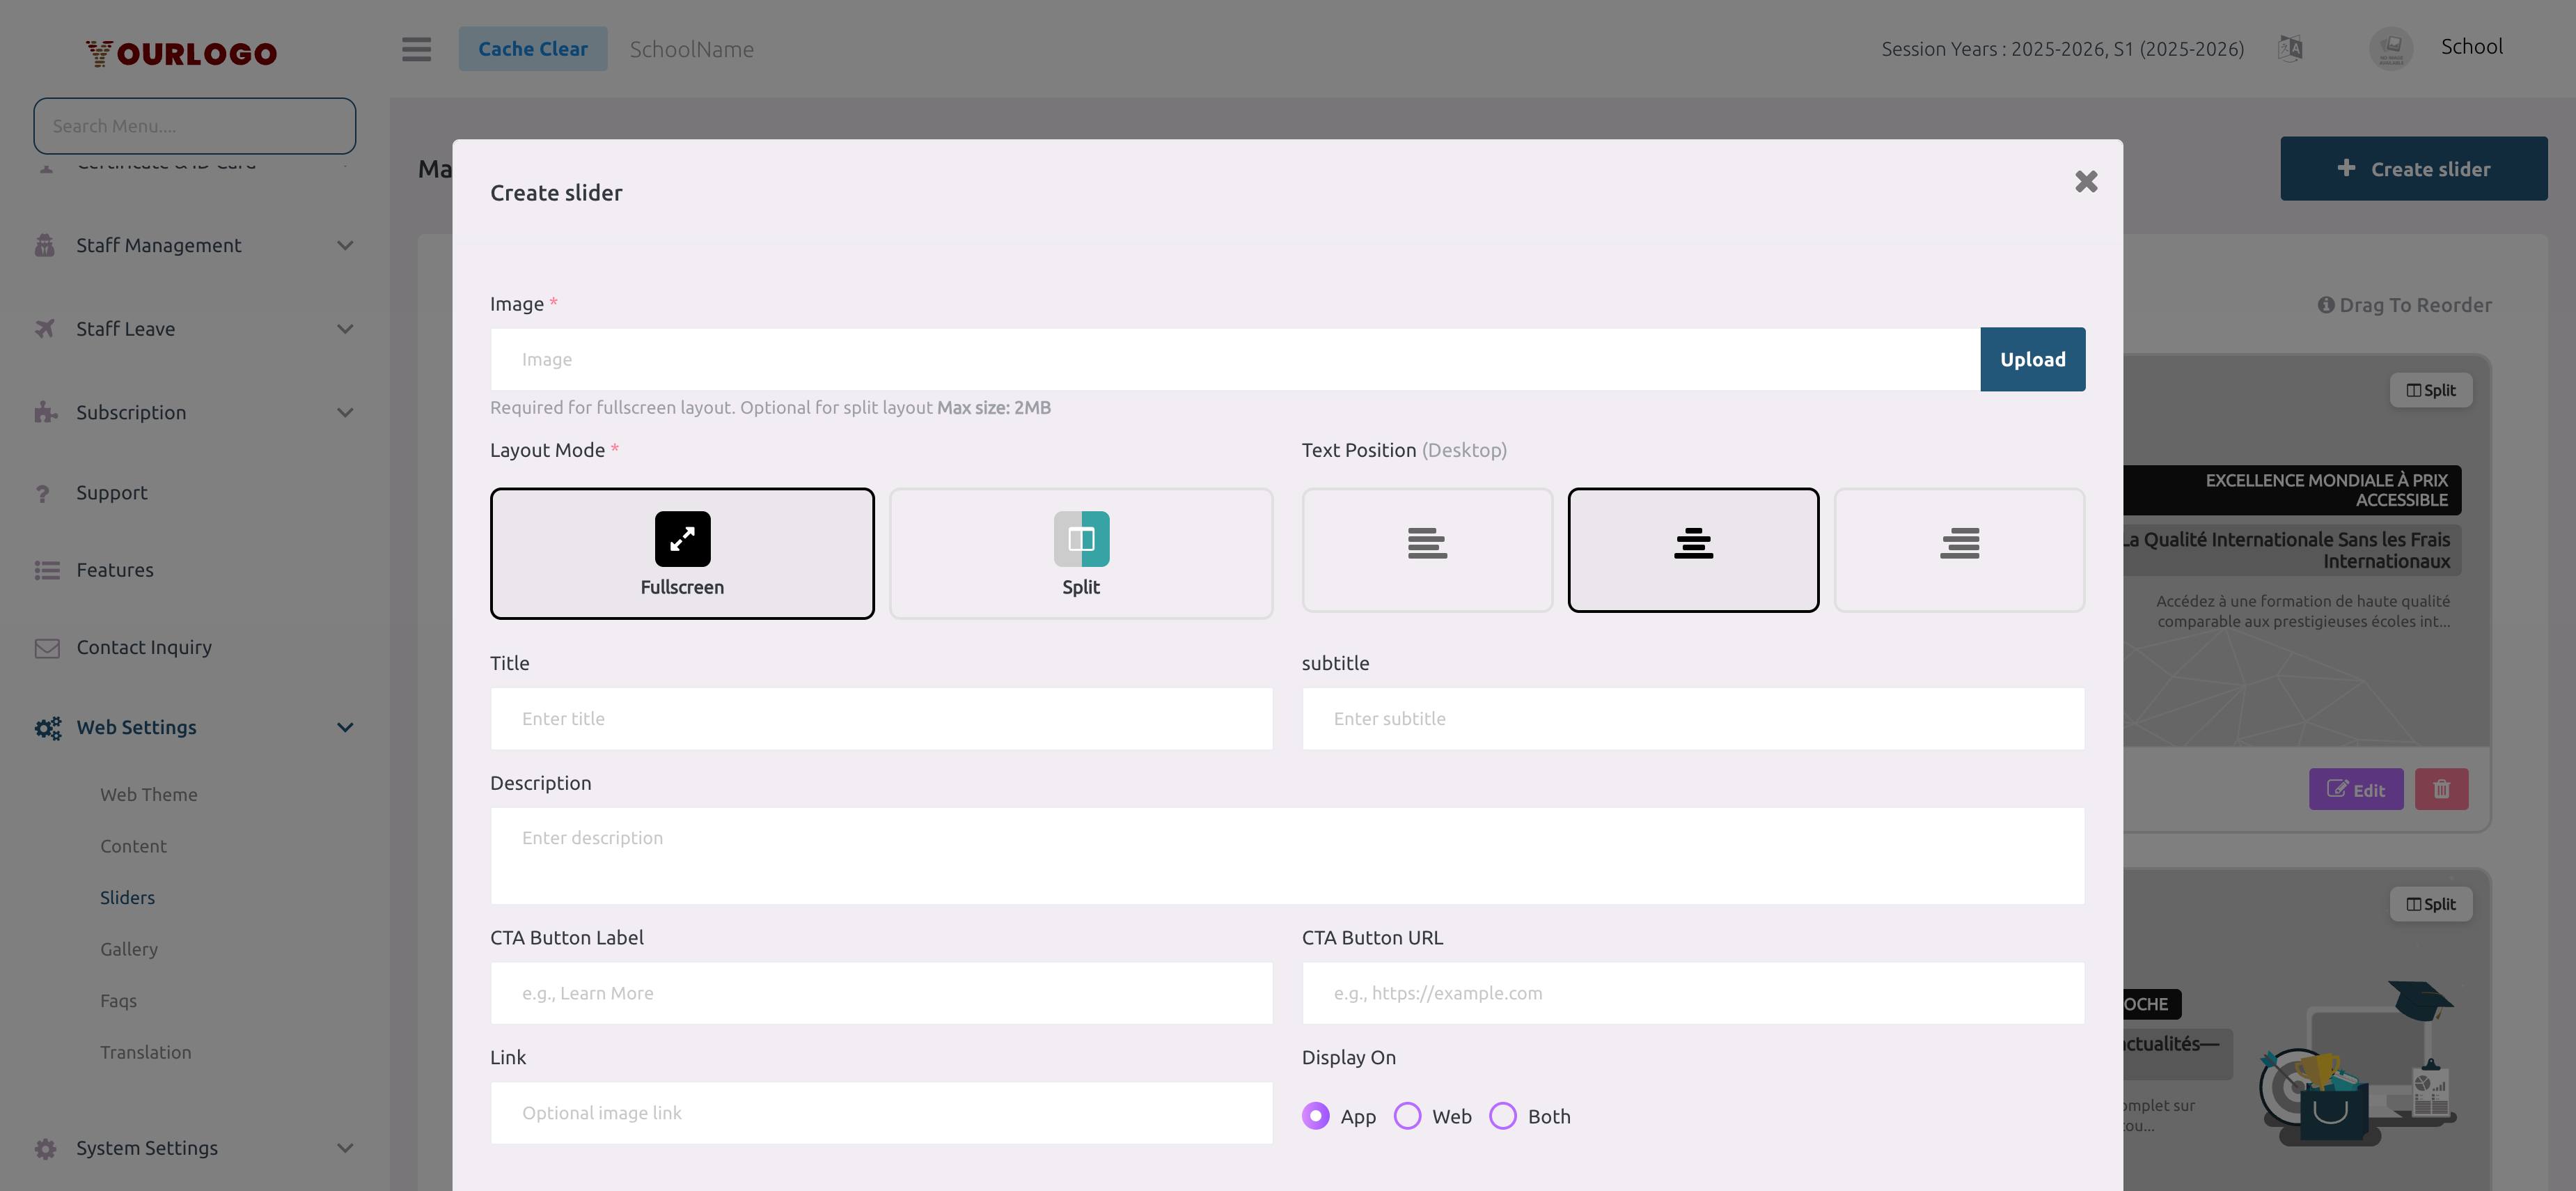
Create slider modal — configure image, layout, text position, motif, and call-to-action
1
Navigate to Web Settings → Sliders
From the sidebar, expand **Web Settings** and click **Sliders**.
2
Click "+ Create Slider"
Click the **Create slider** button at the top-right. A creation modal opens.
3
Upload an image
Click the image upload area and select an image file (max 2 MB, formats: JPEG, PNG, JPG, SVG).
4
Choose a Layout Mode
Select **Fullscreen** (image fills the entire slide) or **Split** (image on one side, text on the other).
5
Set Text Position
Choose **Left**, **Center**, or **Right** to control where the text overlay appears on the slide.
6
Select a Line Motif (Split mode only)
When Split layout is selected, a grid of **19 decorative motif patterns** appears. Choose one to add a visual separator between the image and text areas.
7
Enter Title, Subtitle, and Description
Fill in the **Title** (large heading), **Subtitle** (smaller heading below), and **Description** (supporting paragraph).
8
Configure the Call-to-Action (optional)
Enter a **CTA Label** (button text, e.g., "Apply Now") and **CTA URL** (link destination). Leave blank if you don't want a button on the slide.
9
Set the visibility target
Choose **App** (shows only on the mobile app slider), **Web** (school website only), or **Both**.
10
Submit
Click **Submit** to create the slide. It appears at the bottom of the slider list.
Reorder Sliders
The order of slides on the homepage matches the order on this management page. Reordering is done via drag-and-drop.
1
Hover over a slider card
Move your cursor over the card of the slide you want to move. The cursor changes to a drag handle.
2
Drag to the new position
Click and hold, then drag the card up or down to the desired position.
3
Release
Drop the card. The new order is saved automatically — no need to click Submit.
Edit a Slider
1
Click the Edit button
On the slider card you want to modify, click the **Edit** (pencil) button.
2
Update any field
The same modal opens with all fields pre-filled. Change the image, layout mode, text, CTA, or visibility target as needed.
3
Submit
Click **Submit** to save changes.
Delete a Slider
1
Click the Delete button
On the slider card, click the **Delete** (trash) button.
2
Confirm
A confirmation prompt appears. Click **Confirm** to permanently remove the slide.
warning
Deleting a slider removes it immediately from the live website. This action cannot be undone.
Slider Card Details
Each card in the list shows a quick summary of the slide:
| Info | Description |
|---|---|
| Preview image | Thumbnail of the uploaded image |
| Title | Slide heading text |
| Subtitle | Secondary heading |
| Description | Truncated description text |
| Layout badge | "Fullscreen" or "Split" |
| Target badge | "Web", "App", or "Both" |
| Position badge | "Left", "Center", or "Right" |
| Motif badge | Shows if a line motif is applied (Split mode only) |
Key Points
- Max 2 MB per image — use optimized SVG or compressed JPEG/PNG for fast page loads.
- Split layout motifs add a decorative SVG line pattern between image and text, available in 19 styles.
- App vs. Web — You can create separate slides for your mobile app and school website, or share slides across both.
- Drag-to-reorder saves automatically, no submit needed.